Renault Clio: Front side member, centre section: General description
IMPORTANT
Use a repair bench to ensure the positioning of the points and the geometry of the axle assemblies.
Note: The information contained in the following describes the general repair procedure for all vehicles having the same design for this part.
Before reading the following general information, make sure that there are no special notes associated with the vehicle. These special notes are specified if necessary in other parts of the sub-section dealing with the component.
Note: For a detailed description of a particular connection, see MR 400.
DESIGN OF THE STRUCTURAL COMPONENT
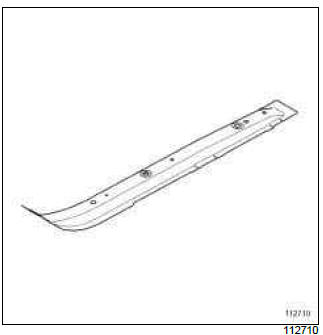
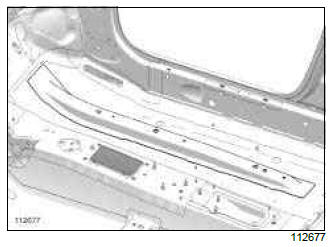
This is a basic part; its only function is that of front side member, centre section.
WARNING
If the mating faces of the parts to be welded are not accessible, make EGW plug welds to replace the original resistance welds (see MR 400).
Front side member, centre section: Description
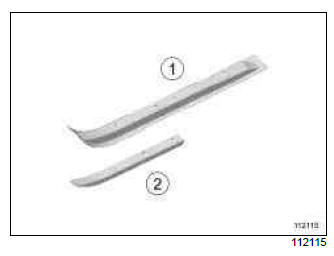
There is only one way of replacing this part:
- Complete replacement:
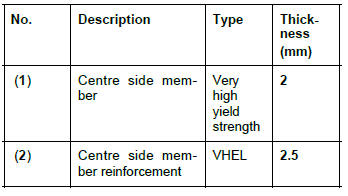
I - COMPOSITION OF THE SPARE PART
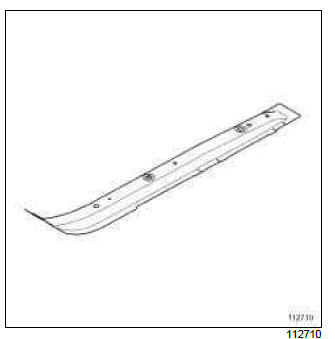
II - PART FITTED
WARNING
- To avoid damaging the vehicle's electrical and electronic components, be sure to disconnect the earths of any wiring near the weld zone.
- The welding machine earth must be placed as close as possible to the weld zone.
IMPORTANT
For welded connections in three thicknesses, the spot welds on the part replaced should be made in the same place as for the original joint to retain its mechanical properties.
READ NEXT:
 Front side member closure panel, front section:
General description
Front side member closure panel, front section:
General description
IMPORTANT
Use a repair bench to ensure the positioning of the
points and the geometry of the axle assemblies.
Note:
The information contained in the following
describes the general repair procedure fo
Radiator cross member mounting: General description
WARNING
The information contained in the following
describes the general repair procedure for all vehicles
having the same design for this part.
Before reading the following general information,
make
Engine stand: General description
IMPORTANT
Use a repair bench to ensure the positioning of the
points and the geometry of the axle assemblies.
Note:
The information contained in the following
describes the general repair procedure fo
SEE MORE:
K9K, and JH3 or JR5 - K9K, and 772, and TL4
REMOVAL
I - REMOVAL PREPARATION OPERATION
Position the vehicle on a two-post lift (see Vehicle:
Towing and lifting) (MR 392, 02A, Lifting equipment).
WARNING
During this operation, secure the vehicle to the
lift with a safety strap(s), to prevent it from
becoming unbalanced.
To fit the strap
Injector holder shim: Removal - Refitting
K4J or K4M
REMOVAL
I - REMOVAL PREPARATION OPERATION
Disconnect the battery (see Battery: Removal - Refitting)
(80A, Battery).
K4M, and 862
Remove:
the air resonator (1).
the air filter unit air inlet pipe (2),
the dipstick,
the dipstick guide bolts (3).
Move aside the dipstick
