Renault Clio: Sequential gearbox gear lever: Removal - Refitting
K9K, and JA5
REMOVAL
I - REMOVAL PREPARATION OPERATION
- Disconnect the battery (see Battery: Removal - Refitting) (MR 392, 80A, Battery).
II - OPERATION FOR REMOVAL OF PART CONCERNED
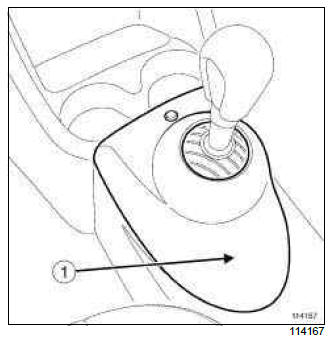
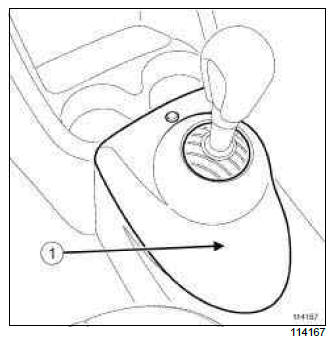
- Remove the gear lever cover (1) using a screwdriver.
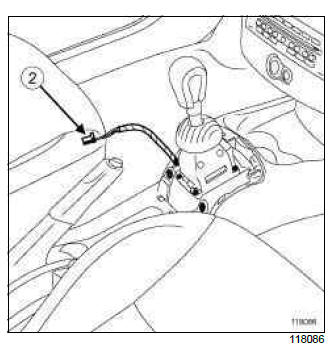
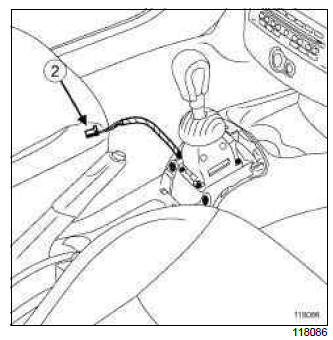
- Disconnect the gear lever lighting connector (2).

- Remove:
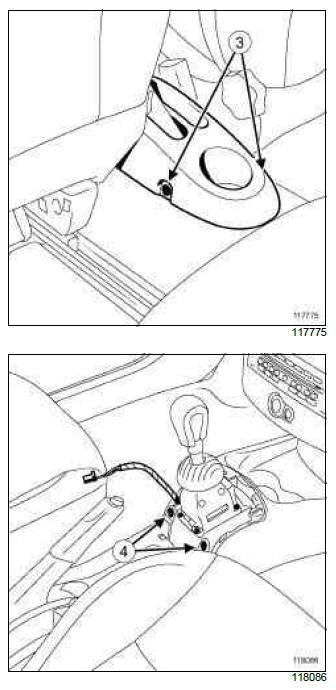
- the rear bolts (3) from the centre console,
- the front bolts (4) from the centre console.
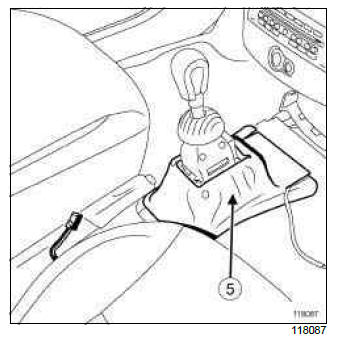
- Remove the soundproofing (5) from the gear lever.
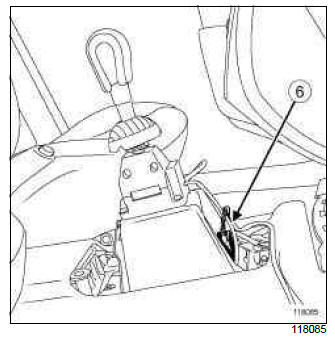
- Detach the connector (6) from the gear lever.
- Disconnect the gear lever connector.
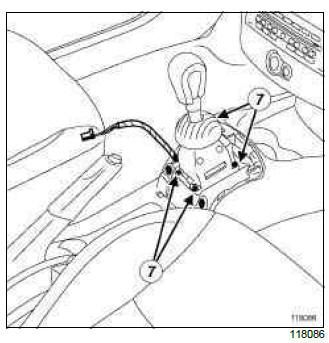
- Remove:
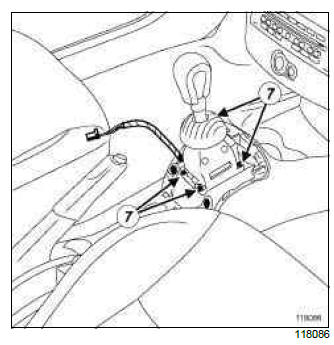
- the bolts (7) from the gear lever base plate,
- the gear lever.
REFITTING
I - REFITTING OPERATION FOR PART CONCERNED
- Refit:
- the gear lever,
- the gear lever base plate bolts,
- Connect the gear lever connector.
- Attach the gear lever connector.
- Refit:
- the gear lever soundproofing,
- the front bolts to the centre console,
- the rear bolts to the centre console.
- Connect the gear lever lighting connector.
- Refit the gear lever cover.
II - FINAL OPERATION.
- Connect the battery (see Battery: Removal - Refitting) (MR 392, 80A, Battery).
- Carry out the necessary programming (see Fault finding - Replacement of components) (MR 394, 21B, Sequential gearbox).
D4F, and JA3
REMOVAL
I - REMOVAL PREPARATION OPERATION
- Disconnect the battery (see Battery: Removal - Refitting) (MR 392, 80A, Battery).
II - OPERATION FOR REMOVAL OF PART CONCERNED
- Remove the gear lever cover (1) using a screwdriver.
- Disconnect the gear lever lighting connector (2).
- Remove:
- the rear bolts (3) from the centre console,
- the front bolts (4) from the centre console.
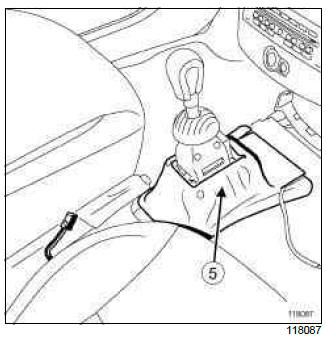
- Remove the soundproofing (5) from the gear lever.
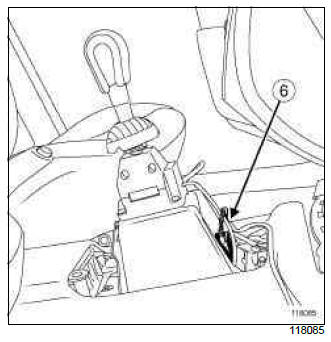
- Detach the connector (6) from the gear lever.
- Disconnect the gear lever connector.
- Remove:
- the bolts (7) from the gear lever base plate,
- the gear lever.
REFITTING
I - REFITTING OPERATION FOR PART CONCERNED
- Refit:
- the gear lever,
- the gear lever base plate bolts,
- Connect the gear lever connector.
- Attach the gear lever connector.
- Refit:
- the gear lever soundproofing,
- the front bolts to the centre console,
- the rear bolts to the centre console.
- Connect the gear lever lighting connector.
- Refit the gear lever cover.
II - FINAL OPERATION.
- Connect the battery (see Battery: Removal - Refitting) (MR 392, 80A, Battery).
- Carry out the necessary programming (see Fault finding - Replacement of components) (MR 394, 21B, Sequential gearbox).
READ NEXT:
 Sequential gearbox oil: Specifications
5-SPEED MANUAL SEQUENTIAL GEARBOX
I - GEARBOX TYPE/OIL TYPE CORRELATIONS:
II - STANDARDS AND PART NUMBERS OF THE
VARIOUS RECOMMENDED OILS:
Sequential gearbox: Bleeding
I - PROCEDURE
WARNING
Even
Automatic gearbox: Identification
DP0
The automatic transmission series number can be
found in two places: on a label on the hydraulic distributor
cover (1) and etched onto the outer casing (2) on
the wheel side.
Automatic gearbox oi
SEE MORE:
Oxygen sensors: Removal - Refitting
D4F, and 740
WARNING
Do not use any product designed to improve electrical
contact in the injection computer connectors
and oxygen sensors and on the oxygen sensor
body. Failure to respect this advice prevents the
oxygen sensor from operating correctly and results
in failure to comply with the emis
Vacuum pump: Removal - Refitting
K9K
REMOVAL
I - REMOVAL PREPARATION OPERATION
Remove:
the engine covers,
the air filter duct.
II - OPERATION FOR REMOVAL OF PART
CONCERNED
Undo the vacuum pump retaining bracket bolt (3).
Remove:
the hose (1) connected to the brake servo,
the pipe (2),
the vacuum pump bolts (4)
© 2016-2024 Copyright Renault Clio Owners Club
