Renault Clio: Rear bumper: Removal - Refitting
EQUIPMENT LEVEL EA1 or EQUIPMENT LEVEL EA2 or EQUIPMENT LEVEL EA3 or EQUIPMENT LEVEL EA4 or EQUIPMENT LEVEL EA5, and DOCUMENTATION PHASE 1 - EQUIPMENT LEVEL E3 LEISURE or EQUIPMENT LEVEL EA1 or EQUIPMENT LEVEL EA2 or EQUIPMENT LEVEL EA3 or EQUIPMENT LEVEL EA5 or EQUIPMENT LEVEL EAG, and DOCUMENTATION PHASE 2

REMOVAL
I - REMOVAL PREPARATION OPERATION
- Remove the rear wing lights (see Rear wing light: Removal - Refitting) (81A, Rear lighting).
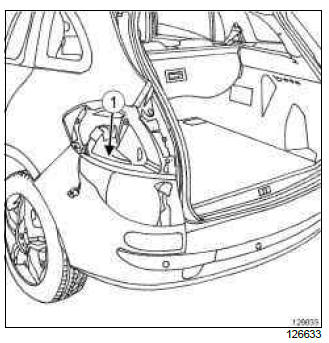
- Disconnect the rear bumper wiring connector (1).
- Position the vehicle on a two-post lift (see Vehicle: Towing and lifting) (02A, Lifting equipment).
- Remove:
- the rear wheels (see Wheel: Removal - Refitting) (35A, Wheels and tyres),
- the rear wheel arch liners (see 55A, Exterior protection, Rear wheel arch liner: Removal - Refitting, 55A-43).
II - OPERATION FOR REMOVAL OF PART CONCERNED
EQUIPMENT LEVEL EA1 or EQUIPMENT LEVEL EA2 or EQUIPMENT LEVEL EA3 or EQUIPMENT LEVEL EA4 or EQUIPMENT LEVEL EA5, and DOCUMENTATION PHASE 1 - EQUIPMENT LEVEL E3 LEISURE or EQUIPMENT LEVEL EA1 or EQUIPMENT LEVEL EA2 or EQUIPMENT LEVEL EA3 or EQUIPMENT LEVEL EA5, and DOCUMENTATION PHASE 2
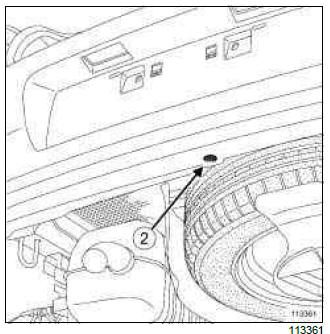
- Remove the bolt (2).
EQUIPMENT LEVEL EAG
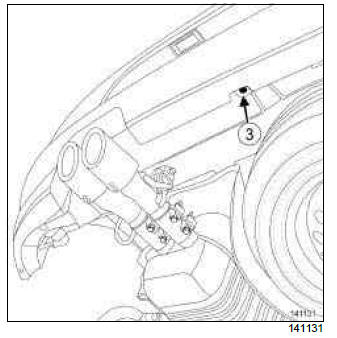
- Remove the bolt (3).
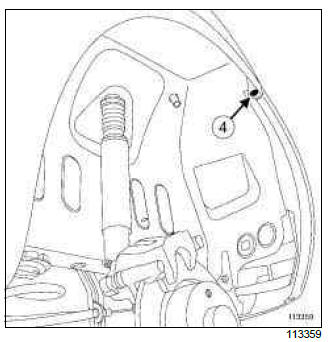
- Remove the bolts (4).
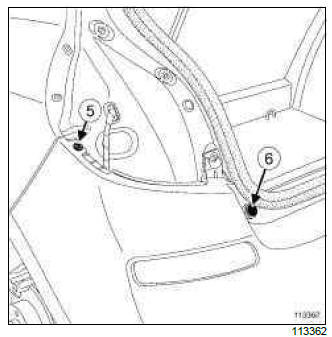
- Remove:
- the clips (5)
- the stops (6)
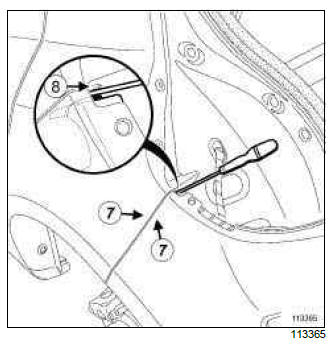
- Protect the bumper and rear wing using masking tape at (7).
- Unclip the rear bumper from the side pressure pieces at the top (8) using a flat-blade screwdriver.
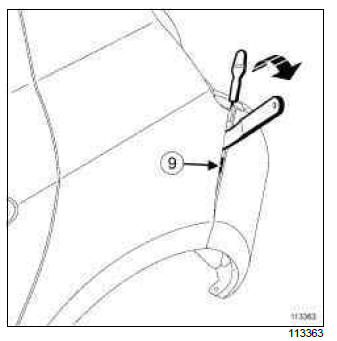
- Keep the rear bumper away using the tool (Car.1363).
- Unclip the rear bumper at (9).
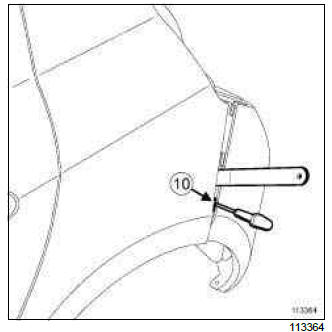
- Keep the rear bumper away using the tool (Car.1363).
- Unclip the rear bumper at (10).
K85
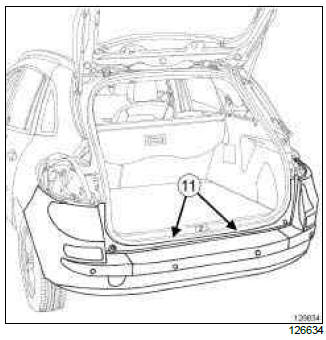
- Unclip the rear bumper at (11).
- Remove the rear bumper(this operation requires two people).
REFITTING
I - REFITTING OPERATION FOR PART CONCERNED
- Refit the rear bumper (this operation requires two people).
K85
- Clip on the rear bumper at (11).
- Clip on the rear bumper at (11).
EQUIPMENT LEVEL EA1 or EQUIPMENT LEVEL EA2 or EQUIPMENT LEVEL EA3 or EQUIPMENT LEVEL EA4 or EQUIPMENT LEVEL EA5, and DOCUMENTATION PHASE 1 - EQUIPMENT LEVEL E3 LEISURE or EQUIPMENT LEVEL EA1 or EQUIPMENT LEVEL EA2 or EQUIPMENT LEVEL EA3 or EQUIPMENT LEVEL EA5, and DOCUMENTATION PHASE 2
- Refit the bolt (2).
EQUIPMENT LEVEL EAG
- Refit the bolt (3).
- Refit:
- the bolts (4)
- the clips (5),
- the stops (6).
II - FINAL OPERATION
- Connect the rear bumper wiring connector (1).
- Refit the rear wing lights (see Rear wing light: Removal - Refitting) (81A, Rear lighting).
- Test all of the functions with a function test (depending on equipment level).
- Refit:
- the rear wheel arch liners (see 55A, Exterior protection, Rear wheel arch liner: Removal - Refitting, 55A-43),
- the rear wheels (see Wheel: Removal - Refitting) (35A, Wheels and tyres).
EQUIPMENT LEVEL EAC or EQUIPMENT LEVEL SPORT

REMOVAL
I - REMOVAL PREPARATION OPERATION
- Position the vehicle on a two-post lift (see Vehicle: Towing and lifting) (02A, Lifting equipment).
- Remove:
- the rear wheel arch liners (see 55A, Exterior protection, Rear wheel arch liner: Removal - Refitting, 55A-43),
- the rear wing lights (see Rear wing light: Removal - Refitting) (81A, Rear lighting).
II - OPERATION FOR REMOVAL OF PART CONCERNED
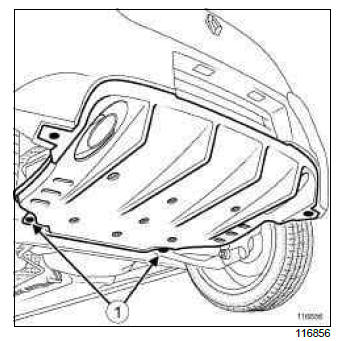
- Remove the nuts (1).
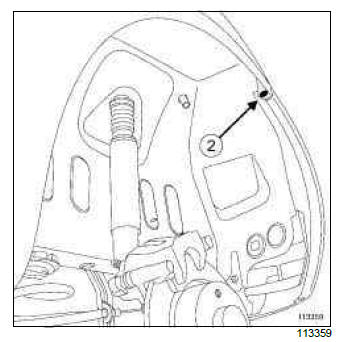
- Remove the bolt (2).
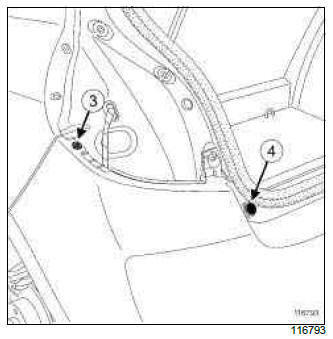
- Remove the clips (3).
- Remove the stops (4).
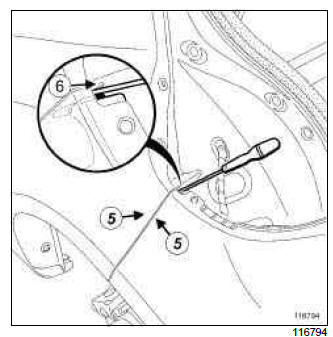
- Protect the bumper and rear wing using masking tape at (5).
- Unclip the bumper from the side pressure pieces at the top (6) using a flat-blade screwdriver.
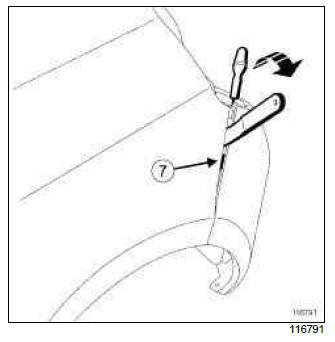
- Keep the bumper away using (Car. 1363).
- Unclip bumper (7).
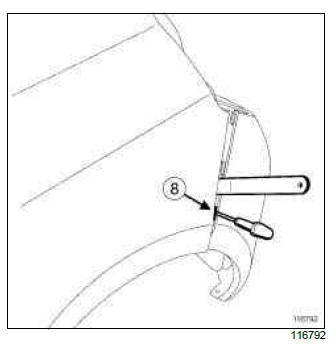
- Keep the bumper away using (Car. 1363).
- Unclip bumper (8).
- Perform the same operation on both sides of the vehicle.
- Remove the bumper (this operation requires two people).
- Disconnect the connectors.
REFITTING
I - REFITTING OPERATION FOR PART CONCERNED
- Connect the connectors.
- Refit the rear bumper (this operation requires two people).
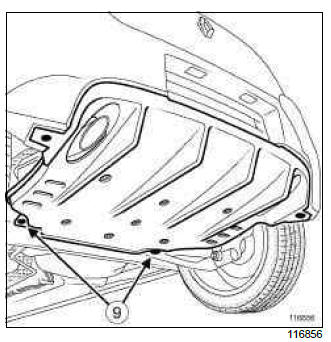
- Refit the nuts (9).
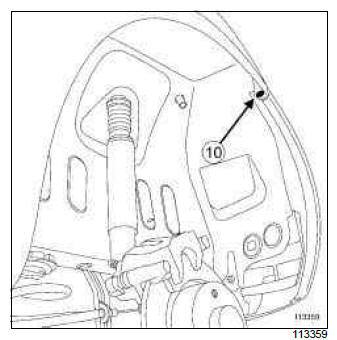
- Refit the bolts (10).
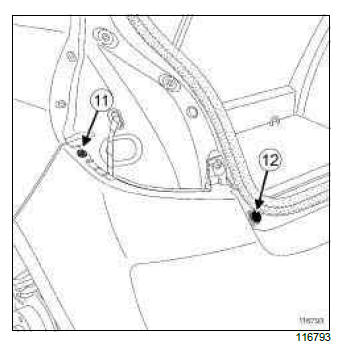
- Refit:
- the clips (11),
- the stops (12).
II - FINAL OPERATION
- Refit:
- the rear wing lights (see Rear wing light: Removal - Refitting) (81A, Rear lighting),
- the rear wheel arch liners (see 55A, Exterior protection, Rear wheel arch liner: Removal - Refitting, 55A-43).
- Test all of the functions with a function test (depending on equipment level).
Rear bumper: Conversion
B85 or C85 or S85, and EQUIPMENT LEVEL EA1 or EQUIPMENT LEVEL EA2 or EQUIPMENT LEVEL EA3 or EQUIPMENT LEVEL EA4 or EQUIPMENT LEVEL EA5, and DOCUMENTATION PHASE 1
ADAPTATION
Note: When a rear bumper is replaced, the replacement part needs to be modified before it is painted so that the proximity sensors can be fitted.
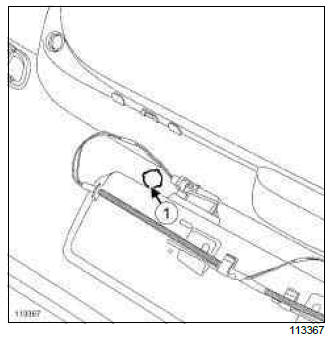
- Drill the rear bumper around the marking (1) using an angular cutter or using the special tool (part no.: 77 11 419 232).
- Finish off using a small file.

