Renault Clio: Rear quarter panel window: Removal - Refitting
C85 or K85 or S85
REMOVAL
I - REMOVAL PREPARATION OPERATION
C85 or S85
- Remove:
- the rear wing panel trim (see Rear panel lining: Removal - Refitting) (71A, Body internal trim),
- the rear roof drip moulding trim (see Side roof rail rear trim: Removal - Refitting) (71A, Body internal trim),
- the upper trim of the C-pillar (see C-pillar upper trim: Removal - Refitting) (71A, Body internal trim).
K85
- Remove:
- the rear inner sill upper trim (see Rear inner sill upper trim: Removal - Refitting) (71A, Body internal trim),
- the rear parcel shelf side trim (see Rear parcel shelf side trim: Removal - Refitting) (71A, Body internal trim).
- Remove the rear quarter panel trim (see Quarter panel trim: Removal - Refitting) (71A, Body internal trim).
II - OPERATION FOR REMOVAL OF PART CONCERNED
C85 or S85
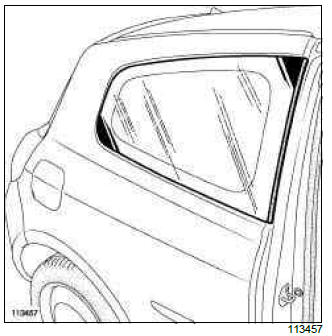
K85
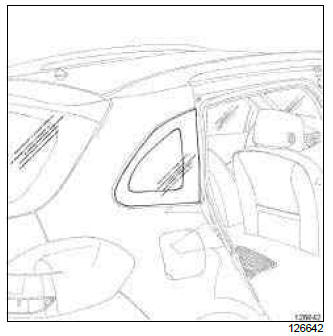
- Protect the edges of the quarter panel window using masking tape.
- Cut the cement bead (see Technical Note 560A).
REFITTING
I - REFITTING PREPARATION OPERATION
C85 or S85
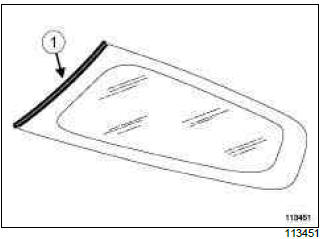
- Replace the seal (1) if necessary (if fitted to the vehicle).
- Always replace the stops.
- For preparation and bonding (see Technical Note 560A).
II - OPERATION FOR REFITTING PART CONCERNED
- Bond the rear quarter panel window.
- Equal out the clearances and shut lines.
- Remove the tabs from the stops when the adhesive has dried.
III - FINAL OPERATION.
- Refit the rear quarter panel trim (see Quarter panel trim: Removal - Refitting) (71A, Body internal trim).
C85 or S85
- Refit:
- the upper trim of the C-pillar (see C-pillar upper trim: Removal - Refitting) (71A, Body internal trim).
- the rear roof drip moulding trim (see Side roof rail rear trim: Removal - Refitting) (71A, Body internal trim),
- the rear wing panel trim (see Rear panel lining: Removal - Refitting) (71A, Body internal trim).
K85
- Remove:
- the rear parcel shelf side trim (see Rear parcel shelf side trim: Removal - Refitting) (71A, Body internal trim),
- the rear inner sill upper trim (see Rear inner sill upper trim: Removal - Refitting) (71A, Body internal trim).
Rear side door fixed window: Removal - Refitting
B85 or K85
REMOVAL
I - REMOVAL PREPARATION OPERATION
- Remove
- Remove the rear door trim (see Rear side door trim: Removal - Refitting) (MR 393, 72A, Side opening element trim),
- Remove the sliding window from the rear side door.
(see 54A, Windows, Rear side door sliding window: Removal - Refitting, 54A-6).
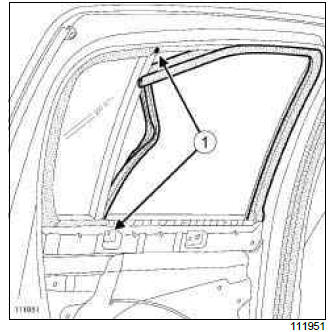
- Remove the rivets (1) using a 5 mm diameter drill bit.
- Retrieve any rivets that may have fallen into the door box section.
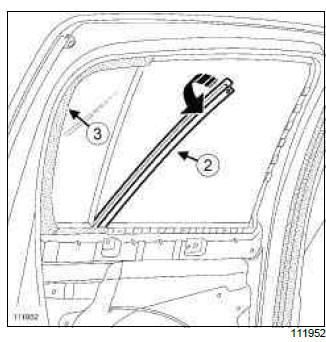
- Remove the fixed upright channel (2).
Note: In the case of right-hand drive vehicles, unclip the fixed window clip underneath the seal at (3).
II - OPERATION FOR REMOVAL OF PART CONCERNED
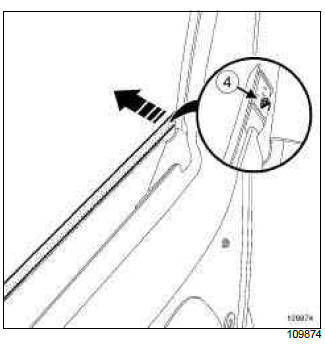
- Unclip the clips (4) using a scratch awl or a small flat-blade screwdriver.
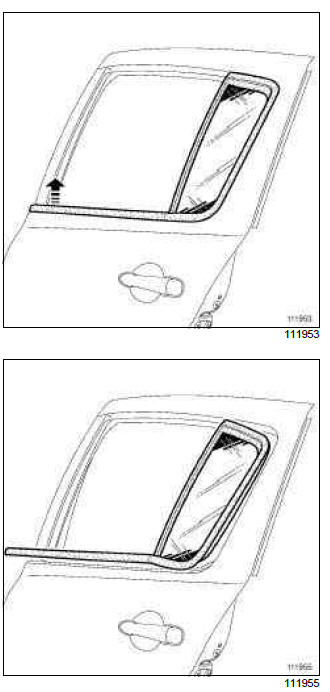
- Remove the exterior weatherstrip - rear side door fixed window assembly.
- Release the fixed window from the frame seal.
REFITTING
I - REFITTING OPERATION FOR PART CONCERNED
- Refit:
- the fixed window in the frame seal,
- the exterior weatherstrip - rear side door fixed window assembly.
II - FINAL OPERATION.
- Fit:
- the fixed upright channel,
- the rivets.
- Clip the exterior weatherstrip on to the door.
- Refit the sliding window in the rear side door (see 54A, Windows, Rear side door sliding window: Removal - Refitting, 54A-6).
- Refit the rear side door trim (see Rear side door trim: Removal - Refitting) (MR 393, 72A, Side opening element trim).
READ NEXT:
 Rear screen: Removal - Refitting
REMOVAL
I - REMOVAL PREPARATION OPERATION
Remove:
the tailgate trim (see Tailgate trim: Removal - Refitting)
(73A, Non-side opening elements trim),
the rear screen wiper arm (see Rear screen w
 Sunroof side trim: Removal - Refitting
REMOVAL
I - REMOVAL PREPARATION OPERATION
Protect the edges of the trim with masking tape.
II - OPERATION FOR REMOVAL OF PART
CONCERNED
Note:
Fixed side trims may be removed in one of two
ways, dep
SEE MORE:
 Solenoid valve assembly pressure sensor: Removal - Refitting
K9K, and JA5
REMOVAL
REMOVAL PREPARATION OPERATION
IMPORTANT
Before any operation on the sequential system,
discharge the accumulator using the Diagnostic
tool.
To discharge the accumulator, run command
" Discharge pressure accumulator " AC081.
To confirm the pressure drop, read the " Hydrauli
 Stop and Start Function
This system enables a reduced fuel
consumption and lower greenhouse
gas emissions. The system is activated
automatically when the vehicle is
started. While driving, the system stops
the engine (standby) when the vehicle
is at a standstill (traffic jam, traffic lights,
etc).
Conditions for en
© 2016-2026 Copyright Renault Clio Owners Club

