Renault Clio: Complete front seat: Removal - Refitting
WITHOUT SPORT SEATS, and DOCUMENTATION PHASE 1
IMPORTANT
Before carrying out any work on a safety or proximity system component, lock the airbag computer using the Diagnostic tool. When this function is activated, all the trigger lines are disabled and the airbag instrument panel warning light is continuously lit when the ignition is switched on.
IMPORTANT
It is forbidden to work on pyrotechnic systems (pretensioner or airbag) near a source of heat or a naked flame; there is a risk of the airbags or pretensioners being triggered.
REMOVAL
I - REMOVAL PREPARATION OPERATION
- Lock the airbag computer using the Diagnostic tool (see Fault finding - Replacement of components) (88C, Airbag and pretensioners).
- Disconnect the battery (see Battery: Removal - Refitting) (80A, Battery).
II - OPERATION FOR REMOVAL OF PART CONCERNED
C85
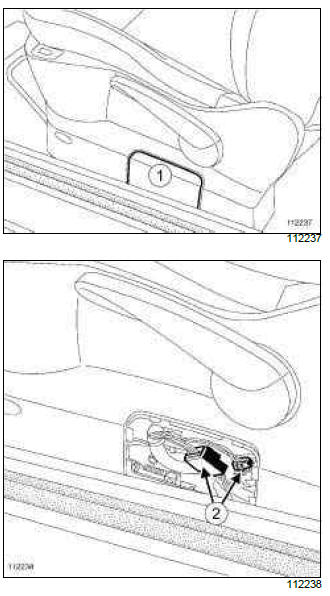
- Remove the flap (1).
- Disconnect and take out the connectors (2).
B85
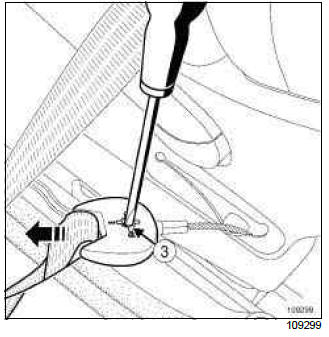
- Detach the seat belt by undoing bolt (3).
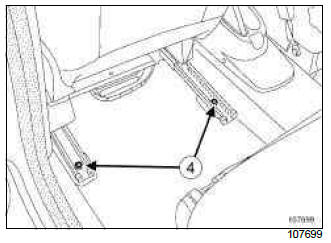
- Move the front seat forwards.
- Remove the bolts (4).
- Move the front seat back.
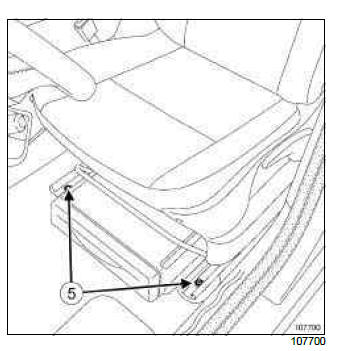
- Remove the bolts (5).
B85
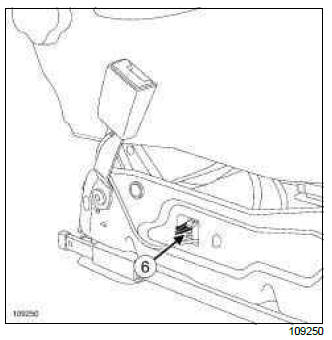
- Move the seat to gain access to the connector unit.
- Undo the clip (6) from the unit.
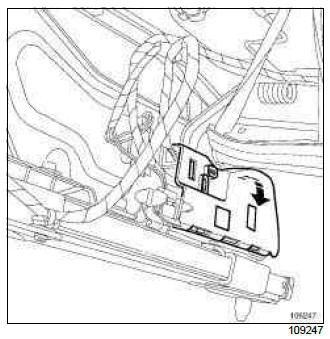
- Open the connector access flap.
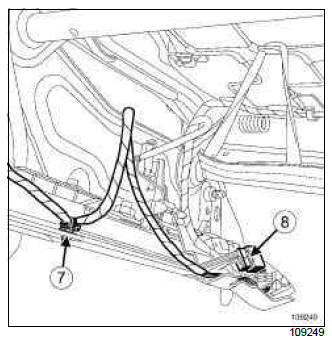
- Unfasten clip (7).
- Disconnect the connector (8).
- Remove the front seat (this operation requires two people).
REFITTING
I - REFITTING PREPARATION OPERATION
- parts always to be replaced: Front seat mounting on body.
II - REFITTING OPERATION FOR PART CONCERNED
- Reposition the front seat.
B85
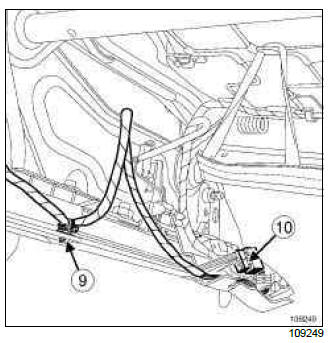
- Engage clip (9).
- Connect the connector (10).
- Close the connector unit.
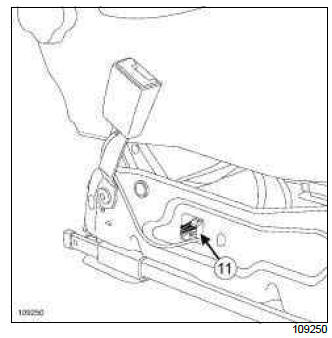
- Clip on the connector unit at (11).
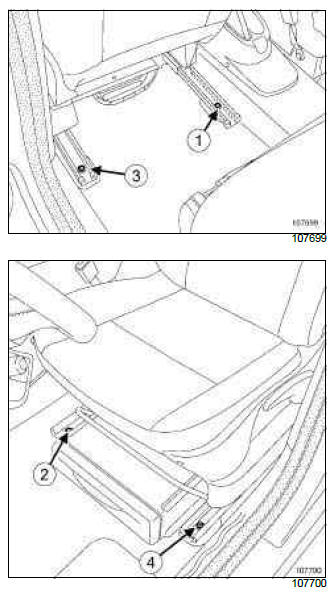
WARNING
Be sure to follow the seat tightening order.
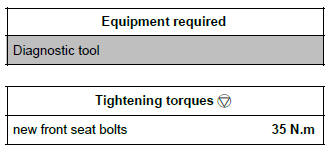
- Torque tighten in order the new front seat bolts (35 N.m).
C85
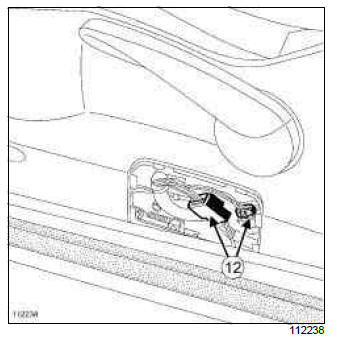
- Refit the wiring.
- Connect the connectors (12).
- Refit the flap.
III - FINAL OPERATION
- Connect the battery (see Battery: Removal - Refitting) (80A, Battery).
- Unlock the airbag computer using the Diagnostic tool (see Fault finding - Replacement of components) (88C, Airbags and pretensioners).
WITHOUT SPORT SEATS, and DOCUMENTATION PHASE 2
IMPORTANT
Before beginning work on any component of the safety system, it is essential to lock the airbag computer using the Diagnostic tool (see Airbag and pretensioners: Precautions for the repair) (88C, Airbag and pretensioners). When this function is activated, all the trigger lines are inhibited and the airbag warning light on the instrument panel is continuously lit (with the ignition on).
IMPORTANT
Never handle the pyrotechnic systems (pretensioners or airbags) near to a source of heat or naked flame - they may be triggered.
REMOVAL
I - REMOVAL PREPARATION OPERATION
- Disconnect the battery (see Battery: Removal - Refitting) (80A, Battery).
- Tilt the front seatback towards the rear.
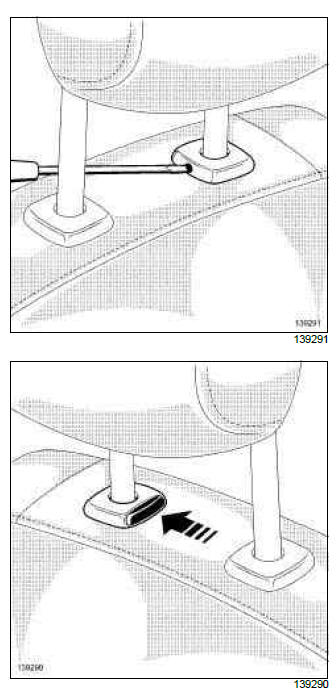
- Press the unlocking button on each headrest guide.
Note: Depending on the type of unlocking button, this operation is performed manually or using a flat-blade screwdriver.
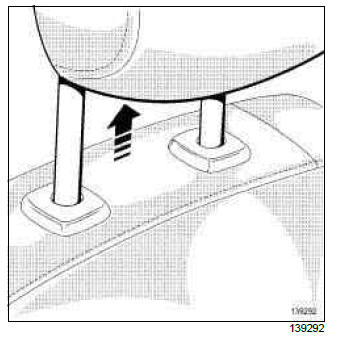
- Remove the front seat headrest.
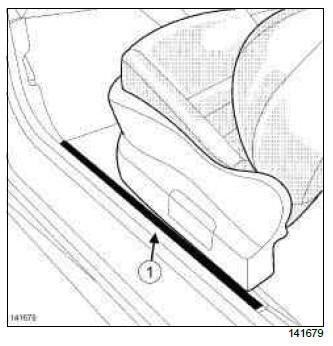
- Protect the door sill lining with masking tape (1).
- Adjust:
- the front seatback angle to the vertical position,
- the height of the front seat base to the lowered position,
- the steering wheel to the highest position and push it in.
B85
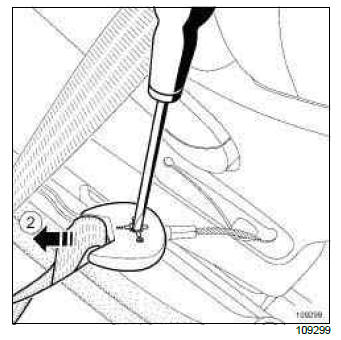
- Unclip the front seat belt at (2) using a flat-blade screwdriver by turning it a quarter of a turn.
II - OPERATION FOR REMOVAL OF PART CONCERNED
- Move the front seat back.
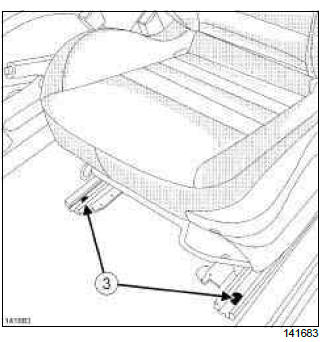
- Remove the front seat bolts (3) on the body.
- Move the front seat forwards.
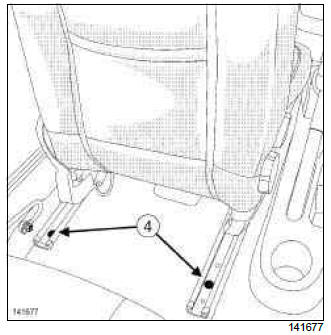
- Remove the front seat bolts (4) on the body.
C85
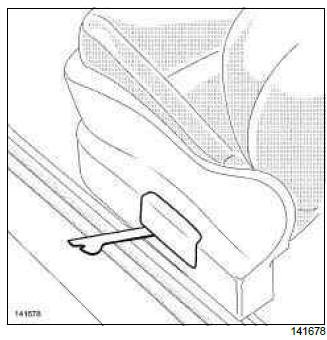
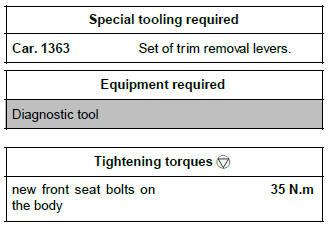
- Remove the flap to access the front seat connectors on the front seat base casing using the tool (Car.1363).
FRONT SEAT WITH HEATING
- Disconnect the heated seat pad connector.
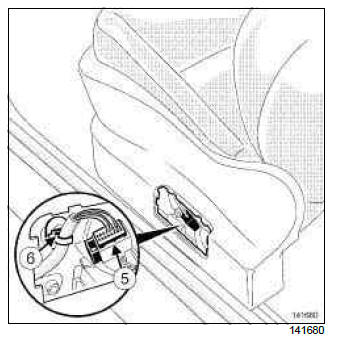
- Unlock the connector (5) from the front seat wiring.
- Disconnect the connectors from the front seat wiring.
- Remove the clip (6) from the front seat wiring.
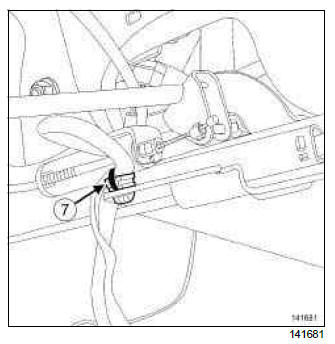
- Tilt the front seat backwards.
- Remove the clip (7) from the front seat wiring.
- Move aside front seat wiring.
B85
- Tilt the front seat forwards.
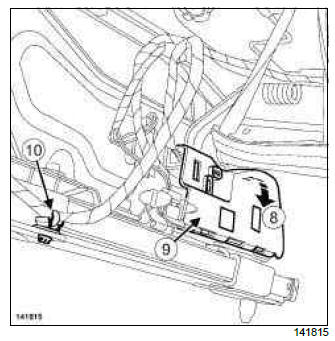
- Open at (8) the front seat connectors support (9).
- Remove the clip (10) from the front seat wiring.
FRONT SEAT WITH HEATING
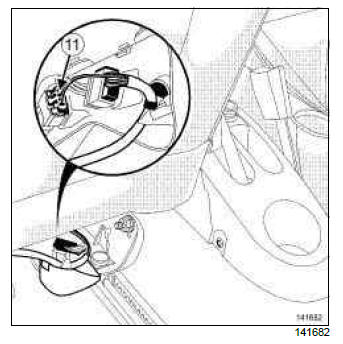
- Disconnect the heated seat pad connector (11).
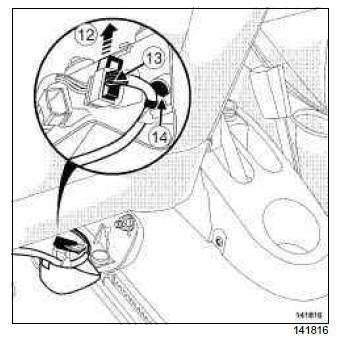
- Unlock the connector of the front seat wiring at (12).
- Disconnect the connector (13) from the front seat wiring.
- Remove the clip (14) from the front seat wiring.
- Move aside front seat wiring.
- Remove the front seat.
REFITTING
I - REFITTING PREPARATION OPERATION
- parts always to be replaced: Front seat mounting on body.
II - REFITTING OPERATION FOR PART CONCERNED
- Position the front seat in the vehicle.
- Refit the front seat wiring.
- Connect the front seat wiring connector.
- Lock the connector of the front seat wiring.
FRONT SEAT WITH HEATING
- Connect the heated seat pad connector.
C85
- Refit the flap to access the front seat connectors on the front seat base casing.
B85
- Close the front seat connectors support.
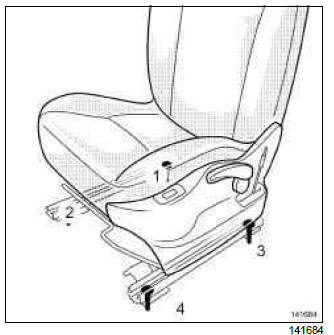
- Torque tighten in order the new front seat bolts on the body (35 N.m).
- Carry out a function test.
III - FINAL OPERATION
B85
- Clip on the front seat belt.
- Tilt the front seatback.
- Refit the front seat headrest.
IMPORTANT
To prevent the headrest coming away from the guide during a collision, check that headrest guide locking system is functioning correctly.
- Adjust the following to their original positions:
- the front seatback angle,
- the height of the front seat base,
- the steering wheel.
- Remove the masking tape from the door sill lining.
- Connect the battery (see Battery: Removal - Refitting) (80A, Battery).
- Unlock the airbag computer using the Diagnostic tool (see Airbag and pretensioners: Precautions for the repair) (see 88C, Airbag and Pretensioners).

