Renault Clio: Damper valve: Removal - Refitting
Renault Clio III (2005-2013) Service Manual / Engine And Peripherals / Fuel Mixture / Damper valve: Removal - Refitting
K9K
REMOVAL
I - REMOVAL PREPARATION OPERATION
- Disconnect the battery (see Battery: Removal - Refitting)
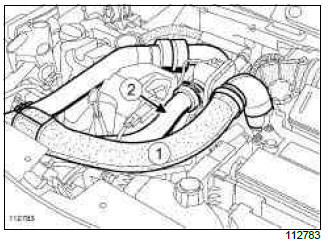
- Remove:
- the air inlet duct (1),
- the damper valve duct (2).
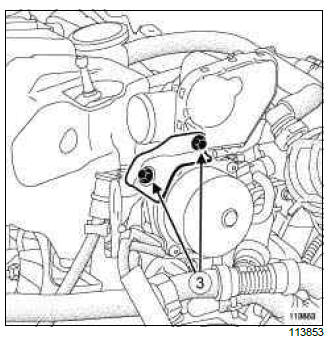
- Remove:
- the retaining bracket bolts (3),
- the retaining bracket.
II - OPERATION FOR REMOVAL OF PART CONCERNED
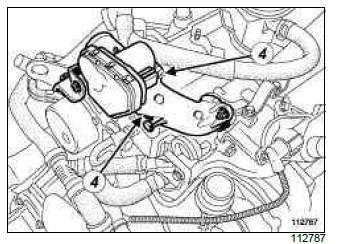
- Remove:
- the damper valve connector,
- the damper valve mounting bolts (4),
- the damper valve.
REFITTING
I - REFITTING PREPARATION OPERATION
- Check the condition of the contact surfaces.
II - REFITTING OPERATION FOR PART CONCERNED
- Refit:
- a new seal,
- the damper valve,
- the damper valve mounting nuts,
- the connector to the damper valve.
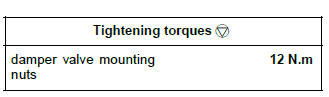
- Torque tighten the damper valve mounting nuts (12 N.m).
III - FINAL OPERATION
- Refit:
- the damper valve bracket,
- the damper valve bracket mounting bolts,
- the damper valve duct,
- the outer air inlet duct.
- Connect the battery (see Battery: Removal - Refitting).
READ NEXT:
 Throttle valve: Removal - Refitting
D4F, and 740 or 742 or 764
REMOVAL
I - REMOVAL PREPARATION OPERATION
Disconnect the battery (see Battery: Removal - Refitting).
Remove the air filter unit (see 12A, Fuel mixture,
Air filter unit:
Throttle valve: Cleaning
D4F or F4R or K4J or K4M or M4R
IMPORTANT
Wear leaktight gloves (Nitrile type) for this operation.
IMPORTANT
Always wear protective gear (gloves, goggles and
breathing masks).
Note:
Be sure to work i
Inlet distributor: Removal - Refitting
D4F, and 740 or 742 or 764
REMOVAL
I - REMOVAL PREPARATION OPERATION
Disconnect the battery (see Battery: Removal - Refitting).
Remove the air filter unit (see 12A, Fuel mixture,
Air filter unit:
SEE MORE:
Compressor: Removal - Refitting
AIR CONDITIONING or CLIMATE CONTROL
IMPORTANT
To avoid all risk of damage to the systems, apply
the safety and cleanliness instructions and operation
recommendations before carrying out any
repair:
(see 62A, Air conditioning, Air conditioning:
Precautions for the repair, 62A-1),
(see Vehicle: P
Expansion valve: Removal - Refitting
AIR CONDITIONING or CLIMATE CONTROL
IMPORTANT
To avoid all risk of damage to the systems, apply
the safety and cleanliness instructions and operation
recommendations before carrying out any
repair:
(see 62A, Air conditioning, Air conditioning:
Precautions for the repair, 62A-1),
(see Vehicle: P
© 2016-2026 Copyright Renault Clio Owners Club - 0.0045
