Renault Clio: Engine wiring: Connector access
Renault Clio III (2005-2013) Service Manual / Electrical Equipment / Wiring Harness / Engine wiring: Connector access
I - LOCATION OF CONNECTORS
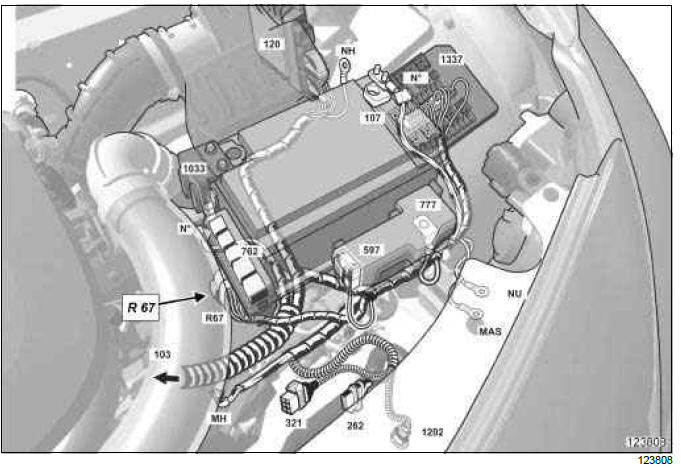

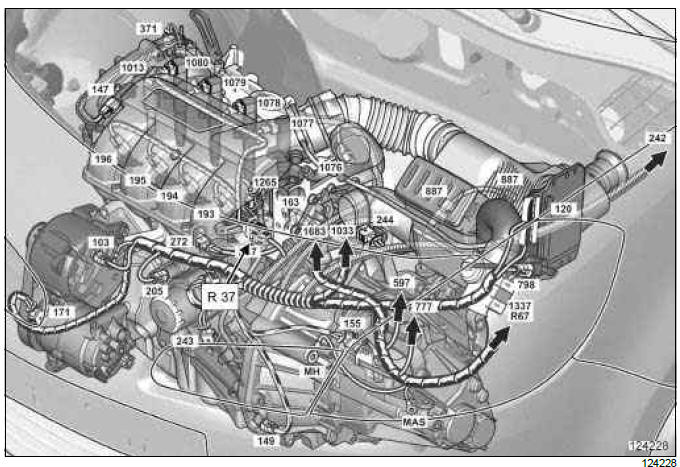
- R 67 connector (Engine wiring harness/front left-hand wiring connection).
- Depending on the engine, connection R 67 is composed of three or four connectors.
K4J or K4M
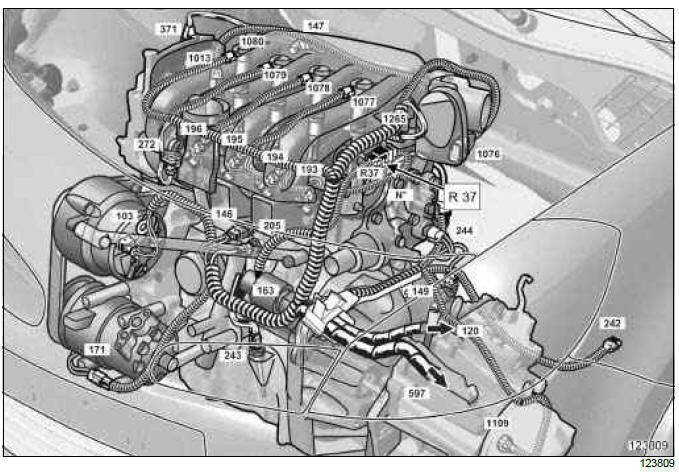
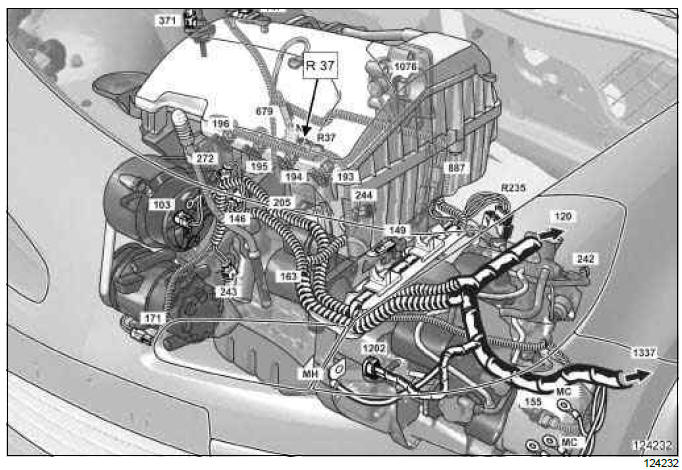
- R 37 connector (Engine wiring harness/injection connection).
D4F
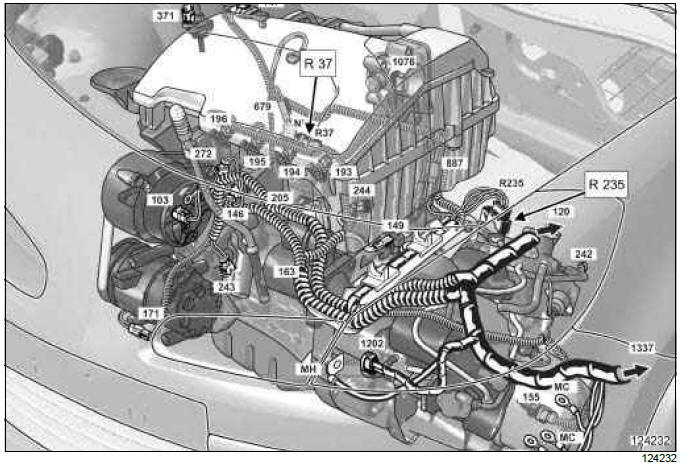
- R 37 connector (Engine wiring harness/injection connection).
- R 235 connector (Automatic transmission wiring/ dashboard wiring connection).
F4R
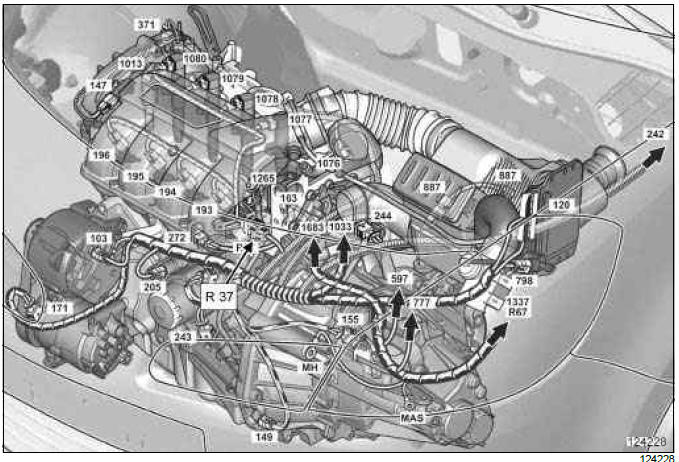
- R 37 connector (Engine wiring harness/injection connection).
M4R
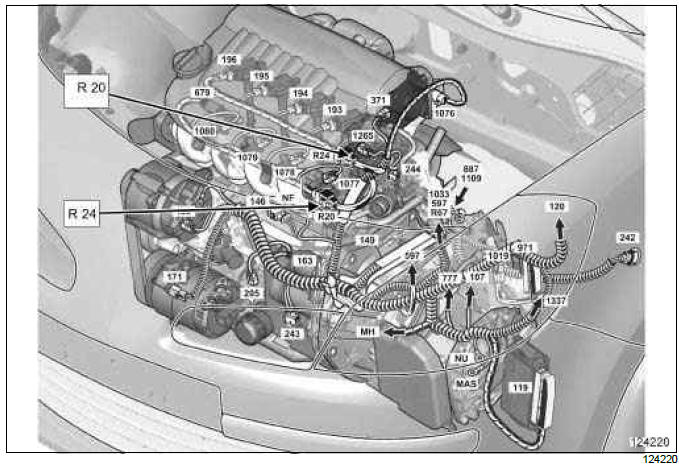
- R 20 connector (Engine wiring harness/injection connection).
- R 24 connector (Engine wiring harness/injection connection).
II - ACCESS TO CONNECTORS
IMPORTANT
Consult the safety and cleanliness advice and operation recommendations before carrying out any repair (see 88A, Wiring harness, Wiring: Precautions for the repair, 88A-5).
WARNING
To prevent damaging the connectors, consult the disconnection procedure (see Connector: Disconnection and reconnection) (Technical Note 6015A, 88A, Wiring).
- Switch off the ignition.
- Disconnect the battery (see 80A, Battery, Battery: Removal - Refitting, 80A-1)
1 - Access to the R 67 connectors

- Remove:
- the bolts (1),
- the Protection and Switching Unit cover.
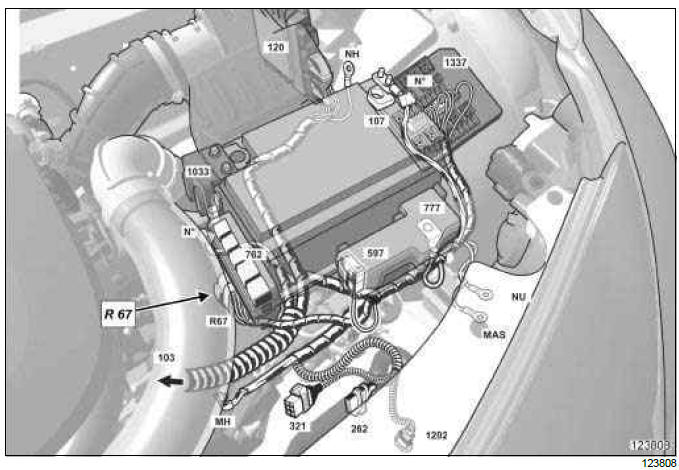
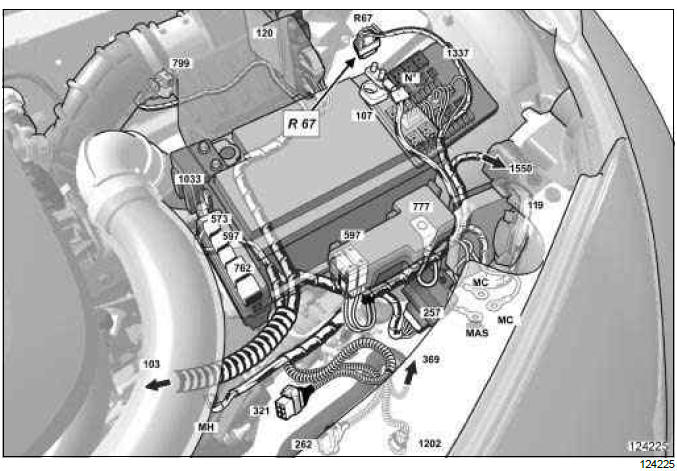
- Disconnect the R 67 connectors.
2 - Access to the R 37 connector
K4J or K4M
- Remove the front engine cover.
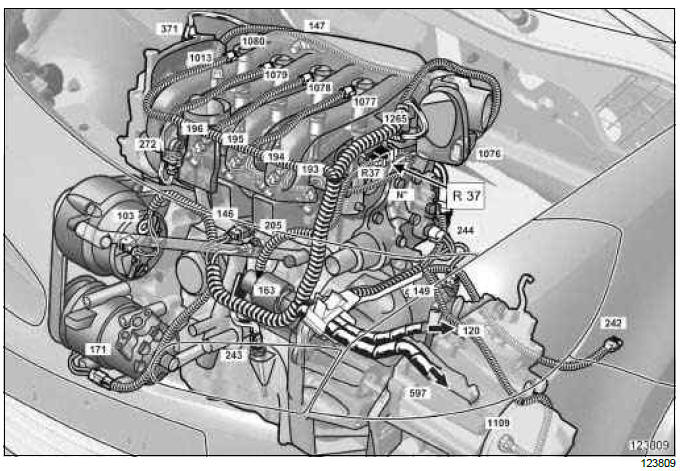
- Disconnect the R 37 connector.
D4F
- Remove the air filter box (see Air filter unit: Removal - Refitting) (MR 392, 12A, Fuel mixture).
- Disconnect the R 37 connector.
F4R
- Disconnect the R 37 connector.
3 - Access to the R 235 connector
D4F
- Remove:
- the battery (see 80A, Battery, Battery: Removal - Refitting, 80A-1),
- the battery tray bracket (see 80A, Battery, Battery tray: Removal - Refitting, 80A-5).

- Disconnect the R 235 connector.
4 - Access to the R 20 and R 24 connectors
M4R
- Remove the front engine cover.
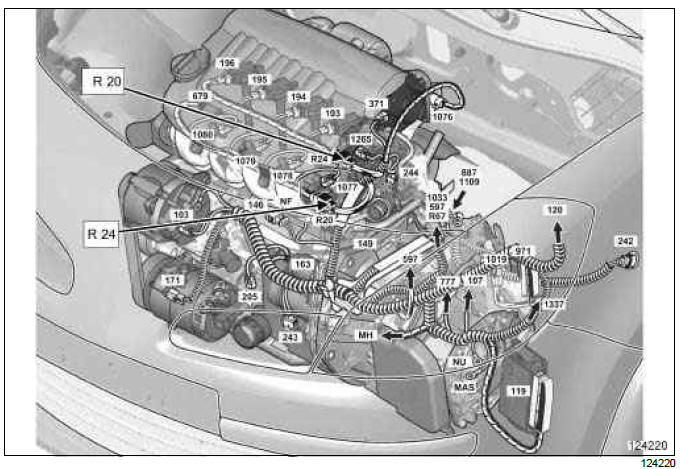
- Disconnect the R 20 and R 24 connectors.
READ NEXT:
 K4J or K4M
IMPORTANT
Consult the safety and cleanliness advice and operation
recommendations before carrying out any
repair (see 88A, Wiring harness, Wiring: Precautions
for the repair, 88A-5).
WARNING
To preve
K9K
IMPORTANT
Consult the safety and cleanliness advice and operation
recommendations before carrying out any
repair (see 88A, Wiring harness, Wiring: Precautions
for the repair, 88A-5).
WARNING
To preve
SEE MORE:
Driving
The Renault Clio IV (2014-2019) offers a satisfying driving experience with its nimble handling and responsive performance. Its compact size and maneuverability make it well-suited for urban driving and tight parking spaces. The precise steering and suspension tuning provide a balanced and confident
Your comfort
The Renault Clio IV (2014-2019) is designed with your comfort in mind. It features a well-crafted interior with quality materials and thoughtful ergonomics. The seats offer excellent support and adjustability, providing a comfortable driving experience. The cabin is designed to minimize noise and vi
© 2016-2026 Copyright Renault Clio Owners Club - 0.0034
