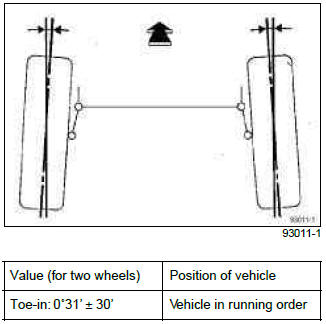
Renault Clio: Rear axle system: Tightening torque
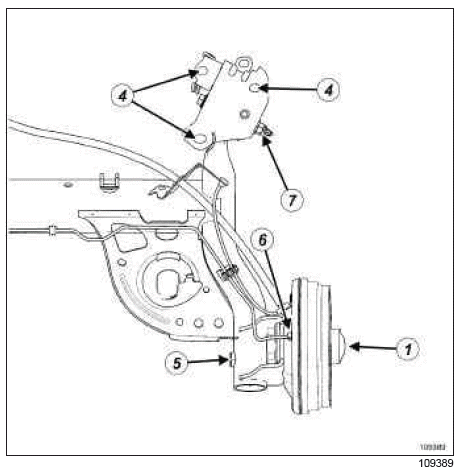
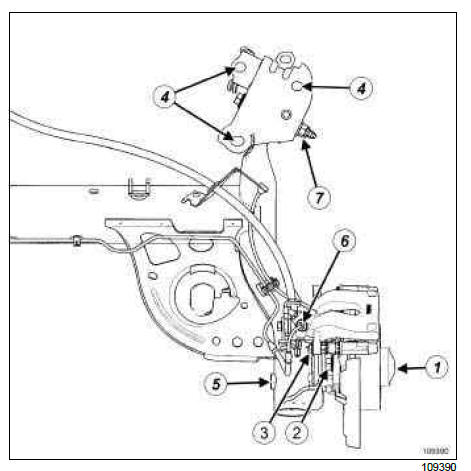
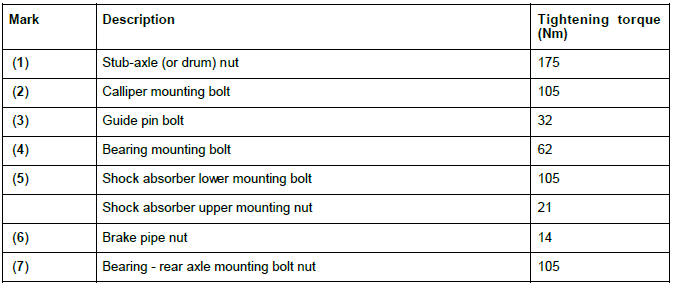
Rear axle assembly: Adjustment values
EQUIPMENT LEVEL E3 LEISURE or EQUIPMENT LEVEL EA1 or EQUIPMENT LEVEL EA2 or EQUIPMENT LEVEL EA3 or EQUIPMENT LEVEL EA4 or EQUIPMENT LEVEL EA5 or EQUIPMENT LEVEL EAG
I - PRELIMINARY OPERATIONS
Before checking the axles on the test bench, check the tyre pressures (see 35A, Wheels and tyres, Tyre pressure: Identification, 35A-15).
WARNING
The vehicle should be empty (no luggage or passengers on board) when the axle assembly values are checked.
Make sure that the steering wheel is positioned straight ahead during wheel alignment, such that the angular position of the steering wheel is correctly aligned with the straight-ahead position of the front wheels. The steering wheel being offset in relation to the position of the wheels may result in the vehicle being returned by the customer.
Position of vehicle: Vehicle in running order

WARNING
Adjust the vehicle ground clearance in accordance with the specifications before checking the geometry of the wheels. If the ground clearance is not correct, adjust it by lowering or raising the body.
II - CAMBER
Not adjustable
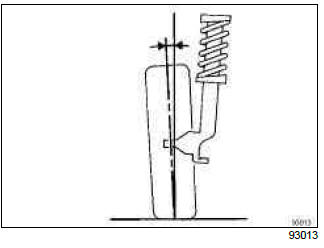

III - WHEEL ALIGNMENT: MEANING OF SYMBOLS
Toe-out: minus sign
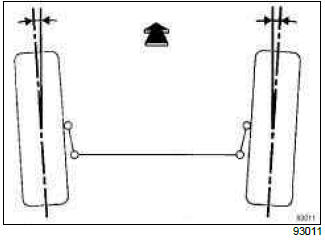
WARNING
Meaning of signs featured in this document, - = toe-out.
Toe-in: plus sign
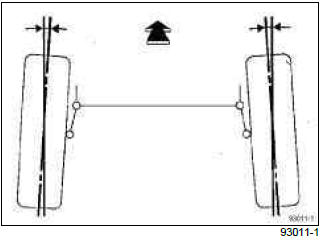
WARNING
Meaning of signs used in this document, + = toe-in.
IV - WHEEL ALIGNMENT
Not adjustable.
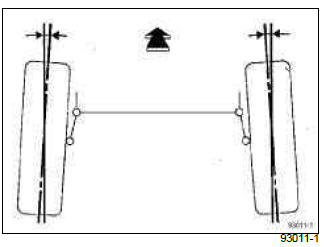
1 - Normal suspension

2 - Reinforced suspension
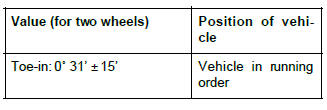
EQUIPMENT LEVEL EAC or EQUIPMENT LEVEL SPORT
I - PRELIMINARY OPERATIONS
Before checking the axles on the test bench, check the tyre pressures (see 35A, Wheels and tyres, Tyre pressure: Identification, 35A-15).
Note: The vehicle should be empty (no luggage or passengers on board) when the axle assembly values are checked.
Make sure that the steering wheel is in the straightahead position straight during wheel alignment adjustment to avoid offsetting the angular position of the steering wheel with the straight-ahead position front wheels. The steering wheel being offset in relation to the position of the wheels may result in the vehicle being returned by the customer.
WITHOUT ADDITIONAL PACK

ADDITIONAL EXTREME PACK

Note: Adjust the vehicle ground clearance in accordance with the specifications before checking the geometry of the wheels. If the ground clearance is not correct, adjust it by lowering or raising the body.
II - CAMBER
Not adjustable
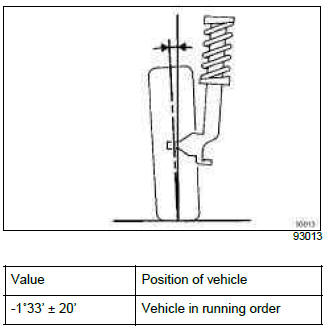
III - WHEEL ALIGNMENT: MEANING OF SYMBOLS
Toe-out: minus sign
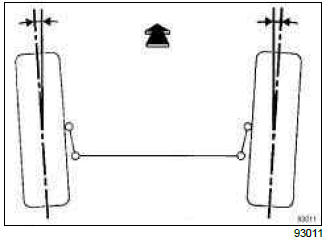
WARNING
Symbols used by RENAULT:
- -: toe-out,
- +: toe-in.
Toe-in: plus sign
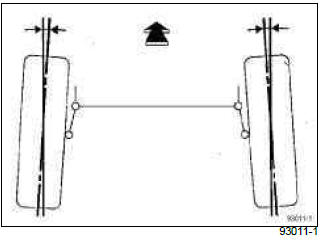
WARNING
Symbols used by RENAULT:
- -: toe-out,
- +: toe-in.
IV - WHEEL ALIGNMENT
Not adjustable
