Renault Clio: Interior Lighting
Interior lighting: Function
I - GENERAL INFORMATION
Vehicles may be fitted with the following units for lighting the interior of the passenger compartment, depending on the level of equipment:
- a courtesy light (front central zone),
- a courtesy light (rear central zone),
- courtesy mirror lights (driver and passenger),
- a glovebox light,
- footwell lights located in the centre of the front door panel,
- a boot light.
The courtesy lights located on the interior roof trim may be equipped as follows:
- for the central front courtesy light:
- a light without map-reading light,
- a light with passenger-side map reading light,
- a light with two map-reading lights.
- for the central rear courtesy light:
- a light without map-reading light,
- a light with two map-reading lights.
II - OPERATIONAL PROGRAMMING FOR THE LIGHTING
The interior lights are automatically and instantly switched on by the UCH:
- when a door or the tailgate is opened,
- on unlocking the opening elements by the remote control or by the detection of presence or movement by the exterior opening control (in hands-free mode),
- on removal of the key or the Renault card.
To switch off the interior lights, the UCH enforces the following, depending on the circumstances:
- the switching off, without delay, on closure of the opening elements by the remote control or the Renault card.
- delayed (progressive) switching off:
- after the last door or the boot is closed,
- on unlocking the opening elements by the remote control or by the detection of presence or movement by the exterior opening control (in hands-free mode),
- after the engine has started.
Note: The UCH controls the switching off of the interior lights after a delay of approximately 20 minutes when the light is in forced on position.
III - OPERATION OF THE COURTESY LIGHT
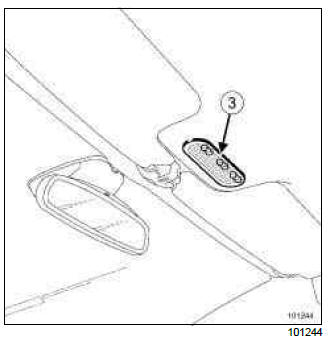
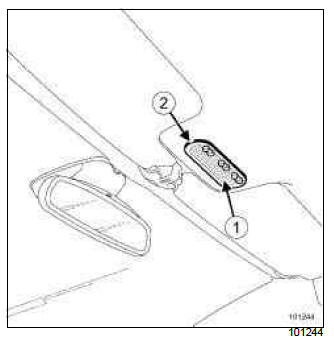
The courtesy mirrors may be fitted with a light incorporated into the headlining.
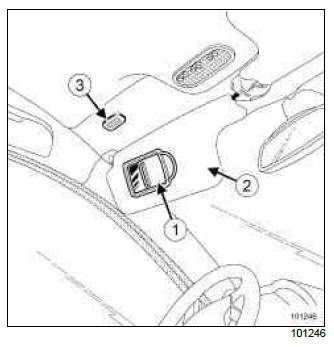
The switch is located on the cover (1) of the sun visor mirror (2).
The courtesy light supply (3) passes via the contact (4) implanted on the central mounting and via the sun visor contact (5).
Note:
Operation of the switch can be checked by connecting a multimeter at (5) :
- mirror cover closed (switch open) = light out = infinite resistance,
- mirror cover open (switch closed) = light on = zero resistance.
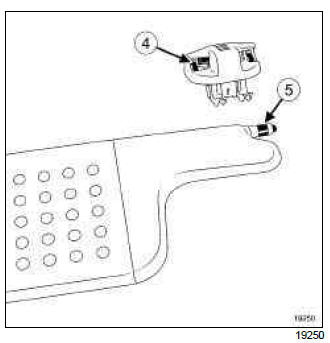
Interior lighting: List and location of components
- UCH
- Passenger compartment fuse and relay box
- Front / rear courtesy light
- Vanity light
- Glovebox light
- Door lower light
- Luggage compartment light
I - UCH
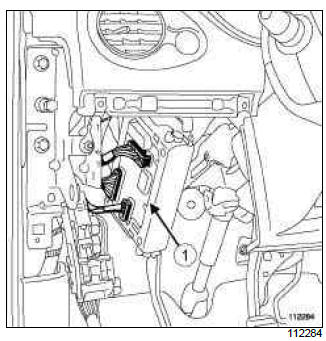
UCH (1)
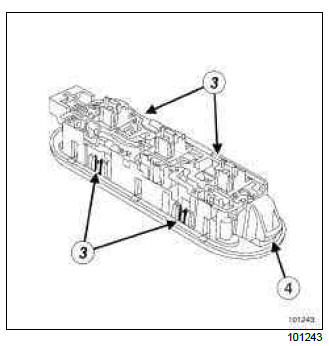
II - PASSENGER COMPARTMENT FUSE AND RELAY BOX
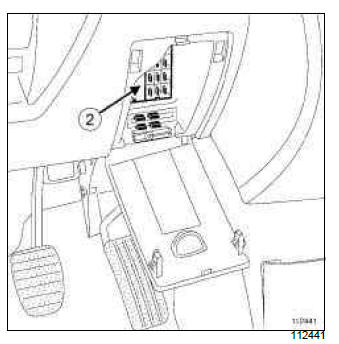
Passenger compartment fuse and relay box (2)
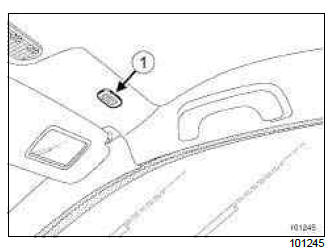
III - FRONT / REAR COURTESY LIGHT
Courtesy light (3) integrated in the headlining
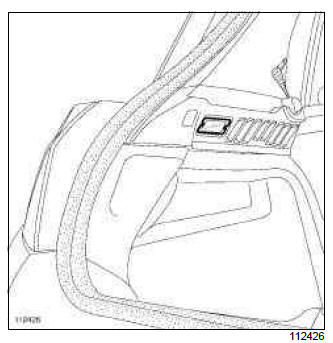
IV - COURTESY LIGHT
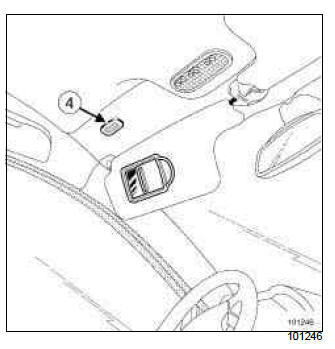
Courtesy light (4)
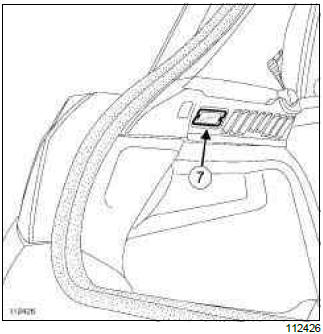
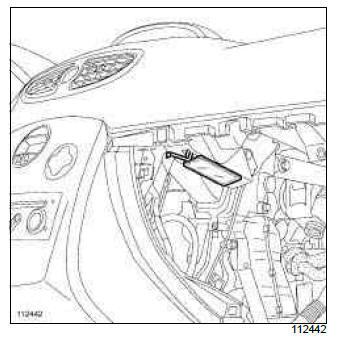
V - GLOVEBOX LIGHT
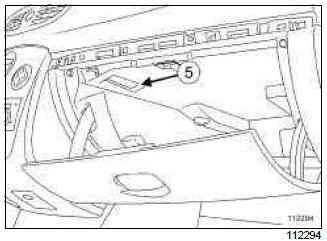
Glovebox light (5)
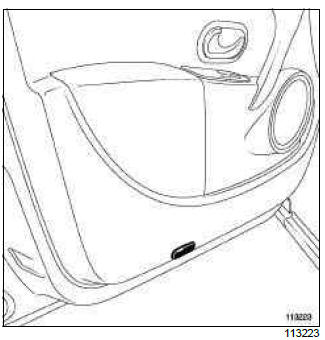
VI - LOWER DOOR LIGHT
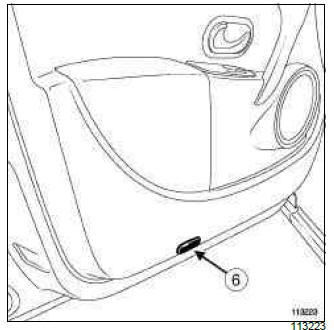
Lower door light (6)
VII - LUGGAGE COMPARTMENT LIGHT
Luggage compartment light (7)
Interior light: Removal - Refitting
REMOVAL
OPERATION FOR REMOVAL OF PART CONCERNED
- Unclip the translucent cover (1) using a flat-blade screwdriver, inserting it into notch (2).
- Pull on the securing tabs.
- Press on the clip (4) using a flat-blade screwdriver to remove the interior light from the headlining.
- Disconnect the connector.
REFITTING
REFITTING OPERATION FOR PART CONCERNED
- Replace the bulb with an approved W5W bulb.
- Connect the connector.
- Refit the courtesy light.
- Clip the translucent cover in place.
Courtesy light: Removal - Refitting
S/VIS MIR+FOLD+LIGHT
REMOVAL
OPERATION FOR REMOVAL OF PART CONCERNED
- Unclip the courtesy light at (1) using the (Car. 1597).
- Remove the courtesy light.
- Disconnect the connector.
REFITTING
REFITTING OPERATION FOR PART CONCERNED
- Replace the bulb with an approved W5W bulb.
- Connect the connector.
- Clip on the light (1).
Lower door light: Removal - Refitting
REMOVAL
OPERATION FOR REMOVAL OF PART CONCERNED
- Unclip the light with a small flat-blade screwdriver.
- Disconnect the connector.
REFITTING
REFITTING OPERATION FOR PART CONCERNED
- Replace the bulb with an approved W5W bulb.
- Connect the connector.
- Refit the light.
Storage compartment light: Removal - Refitting
REMOVAL
I - REMOVAL PREPARATION OPERATION
- Remove the glovebox (see Glovebox: Removal - Refitting) (MR 393, 57A, Interior equipment).
II - OPERATION FOR REMOVAL OF PART CONCERNED
- Remove the glove compartment light.
- Disconnect the connector.
Note: The switch is built into the light.
REFITTING
I - REFITTING OPERATION FOR PART CONCERNED
- Replace the bulb with an approved C5W bulb.
- Connect the connector.
- Clip the light in place.
II - FINAL OPERATION.
- Refit the glovebox (see Glovebox: Removal - Refitting) (MR 393, 57A, Interior equipment).
Luggage compartment light: Removal - Refitting
REMOVAL
OPERATION FOR REMOVAL OF PART CONCERNED
- Unclip the luggage compartment light.
- Disconnect the connector.
REFITTING
REFITTING OPERATION FOR PART CONCERNED
- To replace a bulb, use an approved C5W bulb.
- Connect the connector.
- Clip the boot light in place.
READ NEXT:
 Fuses
Fuses
Fuses: List and location of components
Passenger compartment fuse and
relay box
Consumer cut-out fuse
Additional relay/fuse box
Battery protection fuses
Protection and switching unit
Power sup
Immobiliser system: List and location of components
I - LIST OF COMPONENTS
II - LOCATION OF COMPONENTS
VEHICLE WITH KEY
1 - Antenna/Transponder ring
2 - Ignition switch
3 - UCH
4 - Key
VEHICLE WITH CARD
5 - Front starting aerial
6 - Central start
SEE MORE:
Five-door version
Side lights/brake and direction
indicator lights
Open the boot lid and remove screws 1.
The bulbs are under pressure
and can break when
replaced.
Risk of injury.
To release the light unit, start by moving
the exterior edge away to a sufficient
extent (movement A) t
Five door and estate versions
Reversing lights and rear fog
lights 12
Open the boot lid.
Unclip cover 13 and remove it.
Turn bulb holder 14 fully anticlockwise
and change the bulb.
To reassemble, proceed in the reverse
order to removal.
When the bulb has been changed,
make sure you refit the cover 13 cor
