Renault Clio: Passenger Compartment Connection Unit
UCH: Removal - Refitting
RIGHT-HAND DRIVE

REMOVAL
I - REMOVAL PREPARATION OPERATION
- If replacing the UCH, carry out the necessary programming using the Diagnostic tool. (see Fault finding - Replacement of components) (MR 394, 87B, Passenger compartment connection unit).
- Disconnect the battery (see 80A, Battery, Battery: Removal - Refitting, 80A-1).
- Remove the storage compartment (see Glovebox: Removal - Refitting) (MR 393, 57A, Interior equipment).
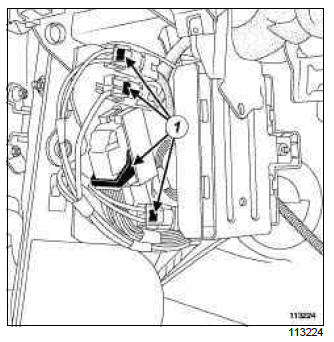
- Unclip the connectors from the beam.
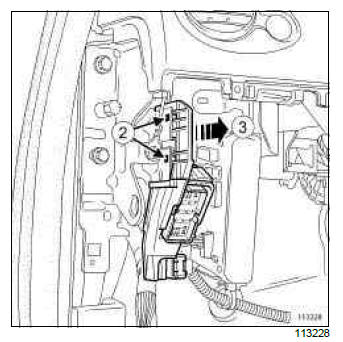
- Unclip the connector mountings on the beam at (2),
- Remove the connector mountings at (3).
II - OPERATION FOR REMOVAL OF PART CONCERNED
VEHICLE WITH KEY
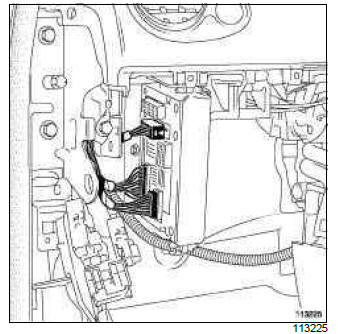
- Unclip the connectors.
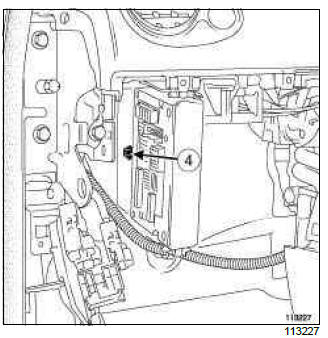
- Remove the bolt (4).
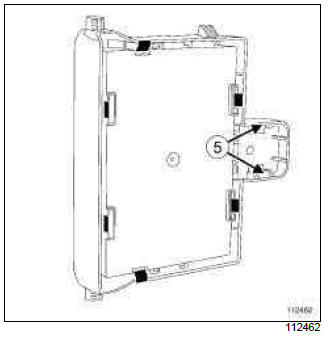
- Unclip the rear section of the UCH by pressing on the lugs (5) with a small flat-blade screwdriver.
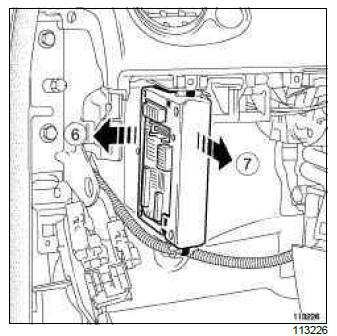
- Remove the UCH at (6), (7).
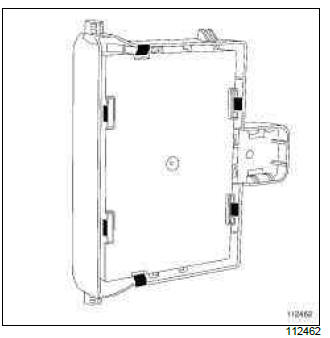
- Unclip the UCH from its mounting.
VEHICLE WITH CARD
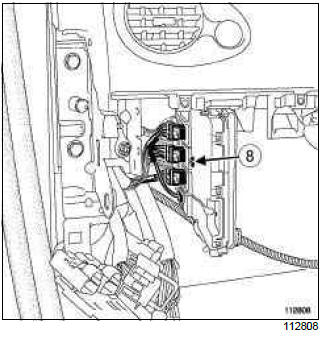
- Unclip the first row of connectors.
- Remove the bolt (8).
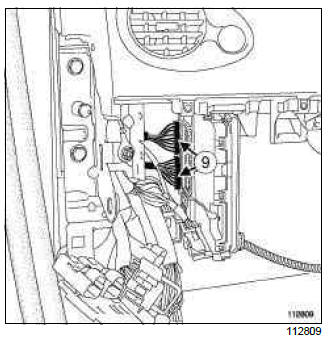
- Unclip the second row of connectors (9).
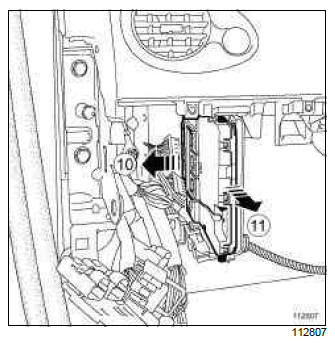
- Remove the UCH (10), (11).
REFITTING
I - REFITTING OPERATION FOR PART CONCERNED
VEHICLE WITH KEY
- Fit the front section of the UCH,
- Clip the rear section of the UCH,
- Tighten the bolt (4),
- Clip the connectors in place.
VEHICLE WITH CARD
- Fit the UCH,
- Tighten the bolt (8),
- Clip the connectors in place.
II - FINAL OPERATION.
- Clip:
- the connector mountings on the beam,
- the connectors.
- Refit the storage compartment (see Glovebox: Removal - Refitting) (MR 393, 57A, Interior equipment).
- Connect the battery (see 80A, Battery, Battery: Removal - Refitting, 80A-1).
- If replacing the UCH, carry out the necessary programming using the Diagnostic tool. (see Fault finding - Replacement of components) (MR 394, 87B, Passenger compartment connection unit).
LEFT-HAND DRIVE

REMOVAL
I - REMOVAL PREPARATION OPERATION
- When replacing the UCH, carry out the necessary operations using the Diagnostic tool (see Fault finding - Replacement of components) (MR 394, 87B, Passenger compartment connection unit).
- Disconnect the battery (see 80A, Battery, Battery: Removal - Refitting, 80A-1).
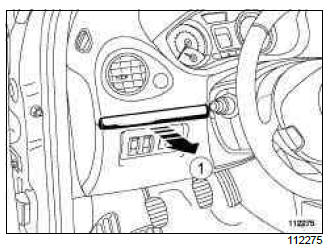
- Unclip the moulding at (1).
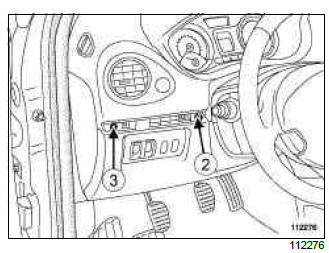
- Remove:
- the plastic rivet (2),
- bolt (3).
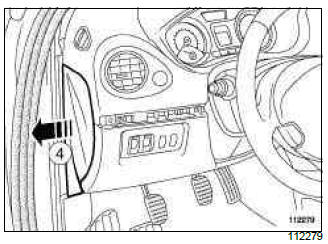
- Remove the door seal,
- Remove the dashboard side face (4).
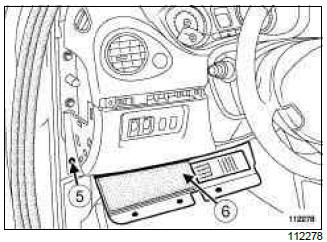
- Remove:
- the bolt (5),
- the dashboard lower trim (6).
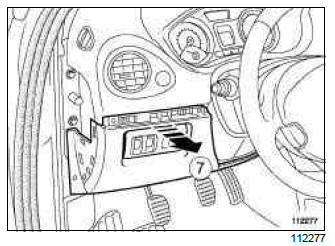
- Remove the dashboard trim (7) while unclipping the connectors.
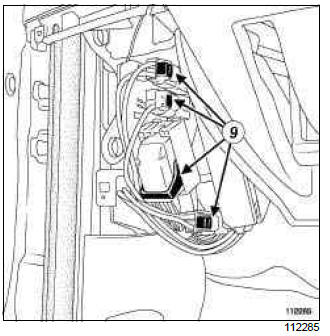
- Unclip the connectors on the beam (9).
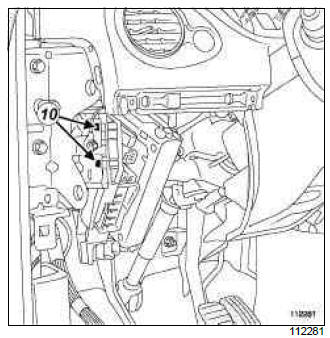
- Unclip the connector mountings on the beam at (10)
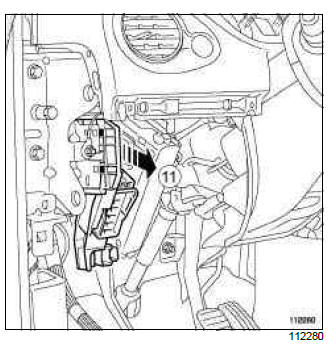
- Remove the connector mountings at (11).
II - REMOVAL STAGE FOR THE PART CONCERNED.
VEHICLE WITH KEY
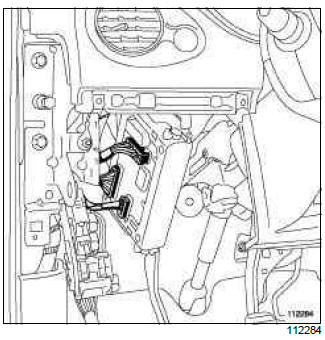
- Unclip the connectors.
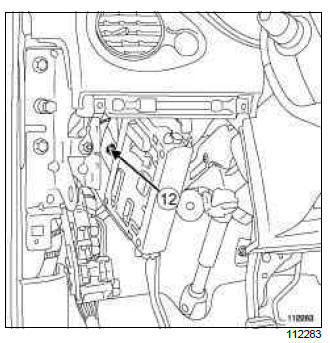
- Remove the bolt (12).
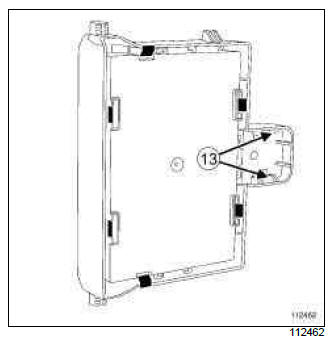
- Unclip the rear section of the UCH by pressing on the lugs (13) with a small flat-blade screwdriver.
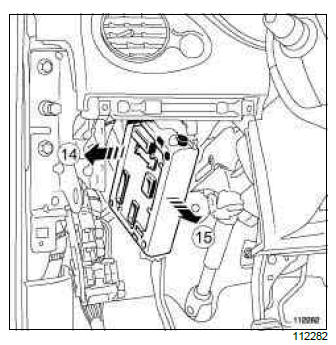
- Remove the UCH at (14), (15).
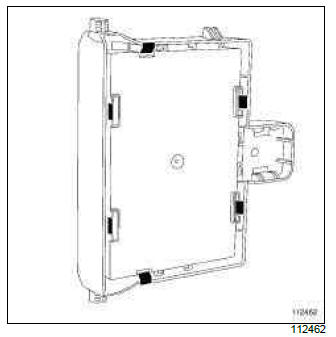
- Unclip the UCH from its mounting.
VEHICLE WITH CARD
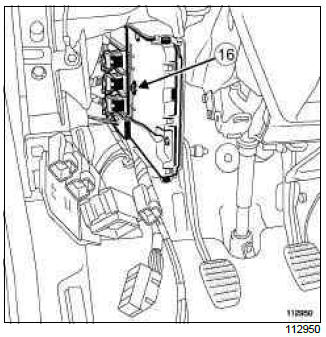
- Unclip the first row of connectors,
- Remove the bolt (16).
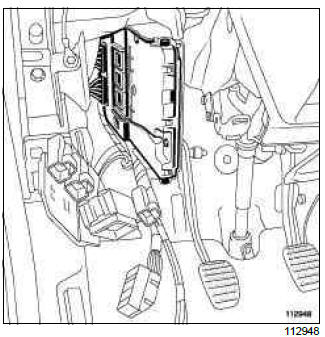
- Unclip the second row of connectors.
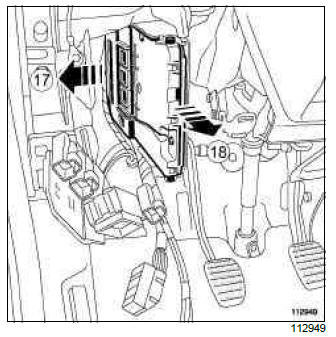
- Remove the UCH (17), (18).
REFITTING
I - REFITTING STAGE FOR THE PART CONCERNED.
VEHICLE WITH KEY
- Fit the front section of the UCH,
- Clip the rear section of the UCH,
- Tighten the bolt (12),
- Clip the connectors in place.
VEHICLE WITH CARD
- Fit the UCH,
- Tighten the bolt (16),
II - FINAL OPERATION.
- Clip:
- the connector mountings on the beam,
- the connectors on the beam,
- the dashboard trim.
- Tighten the bolts (3), (5),
- Clip:
- the plastic rivet,
- the dashboard side panel,
- the dashboard moulding,
- the door seal,
- the dashboard lower trim (6).
- Connect the battery (see 80A, Battery, Battery: Removal - Refitting, 80A-1).
- If replacing the UCH, carry out the necessary programming using the Diagnostic tool. (see Fault finding - Replacement of components) (MR 394, 87B, Passenger compartment connection unit).
READ NEXT:
 Opening Element Management
Opening elements management: List and location of components
UCH
Renault card (simple or hands-free)
Key equipped with remote control
locking
Locking - unlocking motor
Specific reception receiv
 Electric Windows - Sunroof
Electric window: List and location of components
ELECTRIC FRONT WINDOW or ONE-TOUCH ELECTRIC FRONT WINDOW or PASSENGER
ELECTRIC ONETOUCH
WINDOW CONTROL, and ELECTRIC REAR WINDOW
UCH
Driver's windo
 Parking Distance Control
Parking distance control: List and location of
components
REAR PROXIMITY RADAR
I - LIST OF COMPONENTS
The parking distance control function consists of:
rear proximity sensors,
a parking distance
SEE MORE:
 Air conditioning: information and advice on use
Advice on use
In some situations, (air conditioning
off, air recirculation activated, ventilation
speed at zero or low, etc.) you may
notice that condensation starts to form
on the windows and windscreen.
If there is condensation, use the “Clear
View” function to remove it, then use
th
 Wiping - Washing
Wiping and washing: List and location of components
Passenger compartment
fuse and relay box
Protection and Switching
Unit
Power supply fuse board
UCH
Rain sensor
Wiper switch
Windscreen wiper motor
Rear screen wiper motor
Washer pump
Headlight washer pump
I - PASSENGER COMPARTMENT FUS
© 2016-2026 Copyright Renault Clio Owners Club

