Renault Clio: Rear Lower Structure
Luggage retaining cross member: Removal - Refitting

I - REMOVAL
1 - REMOVAL PREPARATION OPERATION
- Remove the luggage compartment carpet.
Remove the rear bench seat.
Remove the protective carpet of the luggage retaining cross member.
2 - OPERATION FOR REMOVAL OF PART CONCERNED
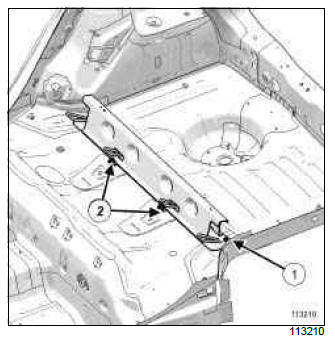
- Remove:
- the mounting bolts (1) on each side,
- the mounting bolts (2) on each side.
II - REFITTING
1 - OPERATION FOR REFITTING PART CONCERNED
- Refit:
- the mounting bolts (1) on each side,
- the mounting bolts (2) on each side.
- Tighten to torque:
- the mounting bolts (1) (21 N.m),
- the mounting bolts (2) (21 N.m).
2 - FINAL OPERATION
- Refit the protective carpet of the luggage retaining
cross member.
Refit the rear bench seat.
Refit the luggage compartment carpet.
Rear floor, front section: General description
WARNING
The information contained in the following describes the general repair procedure for all vehicles having the same design for this part.
Before reading the following general information, make sure that there are no special notes associated with the vehicle. These special notes are specified if necessary in other parts of the sub-section dealing with the component.
Note: For a detailed description of a particular connection, see MR 400.
I - DESIGN OF THE STRUCTURAL COMPONENT
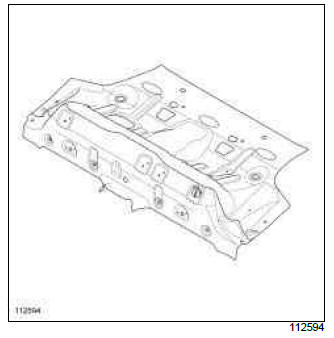
This is a basic part; its only function is that of rear floor front section.
II - AREA TO BE CUT FOR PARTIAL REPLACEMENT
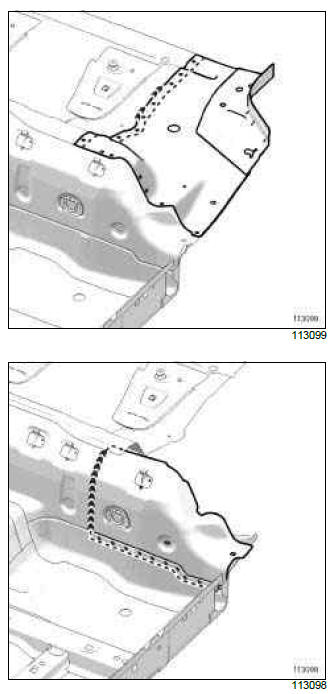
Cut 1: This line marks the area in which it is possible to make a partial replacement.
III - ASSEMBLY INSTRUCTIONS FOR A PARTIAL REPLACEMENT
Only the connections which are specific to the partial replacement by cutting are indicated.
WARNING
If the mating faces of the parts to be welded are not accessible, make EGW plug welds to replace the original resistance welds (see MR 400).
If there are other issues regarding access to mating faces, the various replacement options are described in the basic instructions for structural bodywork repair (see MR 400).
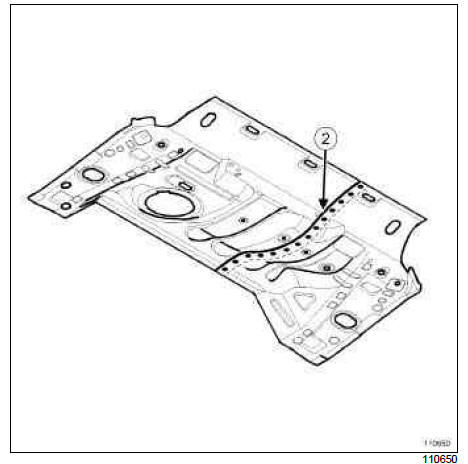
Line (2) on the diagram shows a joint made by joggling connected with plug welds at regular intervals.
Rear floor, front section: Description
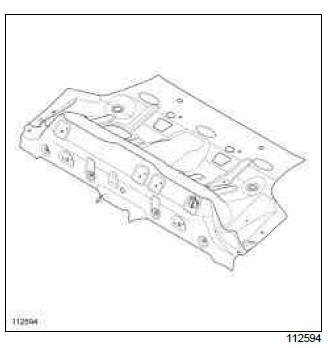
The options for replacing this part are as follows:
- partial replacement of the rear section,
- complete replacement.
I - COMPOSITION OF THE SPARE PART
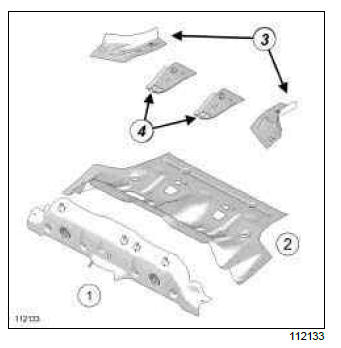
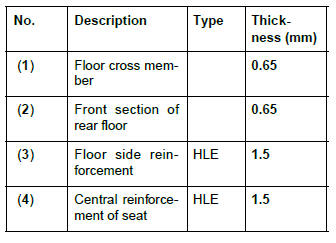
B85 or C85 or S85
K85
II - PART FITTED
Partial replacement of the rear section
WARNING
To maintain mechanical properties during a partial replacement of parts constituting a single structural component, stagger the welds of each of the components.
WARNING
Respect the position of this cut which has been determined in accordance with the position of the inner stiffeners or acoustic inserts, in order to prevent damaging the parts (inner stiffener and/or acoustic insert).
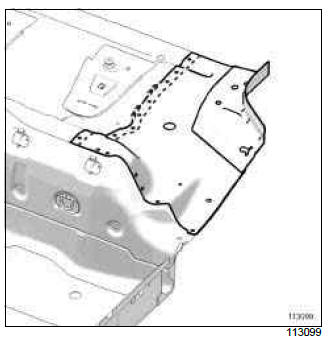
Note: Carry out partial replacement by superposition of panels, and make two welds.
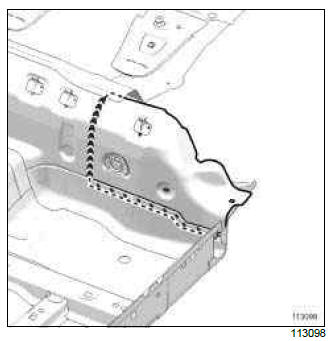
WARNING
If the mating faces of the parts to be welded are not accessible, make EGW plug welds to replace the original resistance welds (see MR 400).
Rear floor, rear section: General description
Note: The information contained in the following describes the general repair procedure for all vehicles having the same design for this part.
Before reading the following general information, make sure that there are no special notes associated with the vehicle. These special notes are specified if necessary in other parts of the sub-section dealing with the component.
Note: For a detailed description of a particular connection, see MR 400.
I - DESIGN OF THE STRUCTURAL COMPONENT
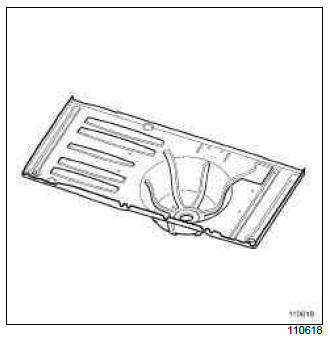
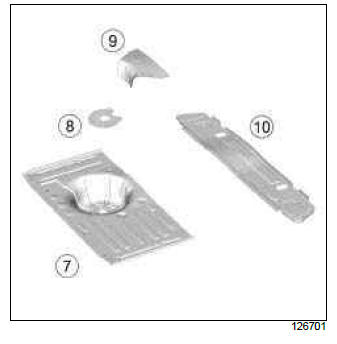
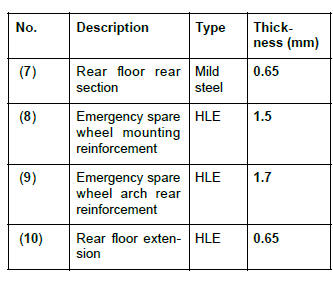
The distinctive feature of this part is that it combines the functions of the rear section of the rear floor and the emergency spare wheel mounting bracket.
Partial replacement is not possible for this part.
II - ASSEMBLY INSTRUCTIONS FOR A PARTIAL REPLACEMENT
Only the connections which are specific to the partial replacement by cutting are indicated.
WARNING
If the mating faces of the parts to be welded are not accessible, make EGW plug welds to replace the original resistance welds (see MR 400).
If there are other issues regarding access to mating faces, the various replacement options are described in the basic instructions for structural bodywork repair (see MR 400).
Rear floor, rear section: Description
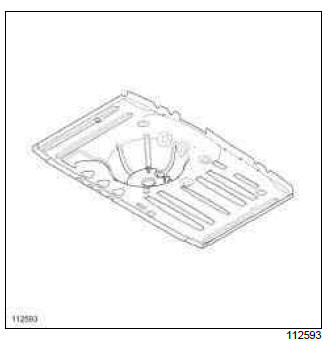
There is only one way of replacing this part:
- complete replacement.
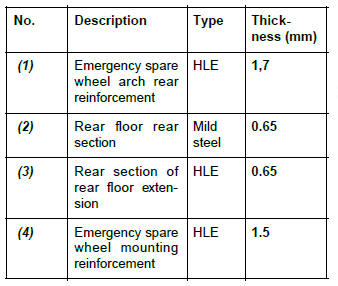
I - COMPOSITION OF THE SPARE PART
B85 or C85 or S85, and EQUIPMENT LEVEL E3 LEISURE or EQUIPMENT LEVEL EA1 or EQUIPMENT LEVEL EA2 or EQUIPMENT LEVEL EA3 or EQUIPMENT LEVEL EA4 or EQUIPMENT LEVEL EA5 or EQUIPMENT LEVEL EAG
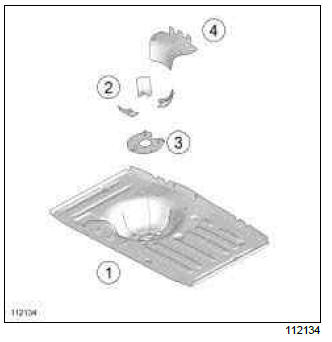
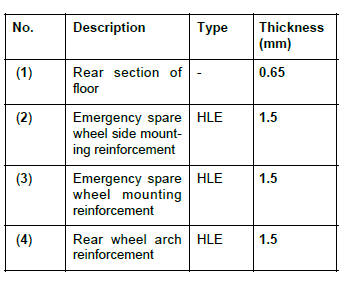
C85, and EQUIPMENT LEVEL EAC or EQUIPMENT LEVEL SPORT
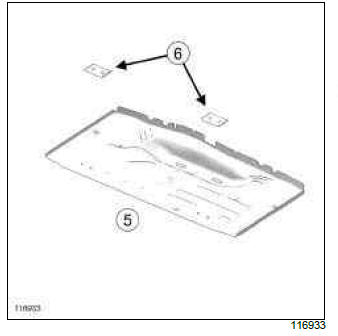
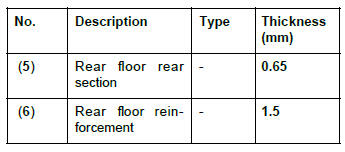
K85
II - PART IN POSITION
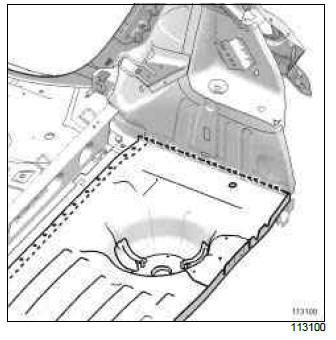
Complete replacement
B85 or C85 or S85, and EQUIPMENT LEVEL E3 LEISURE or EQUIPMENT LEVEL EA1 or EQUIPMENT LEVEL EA2 or EQUIPMENT LEVEL EA3 or EQUIPMENT LEVEL EA4 or EQUIPMENT LEVEL EA5 or EQUIPMENT LEVEL EAG
C85, and EQUIPMENT LEVEL EAC or EQUIPMENT LEVEL SPORT
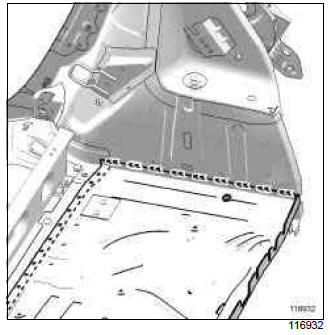
K85
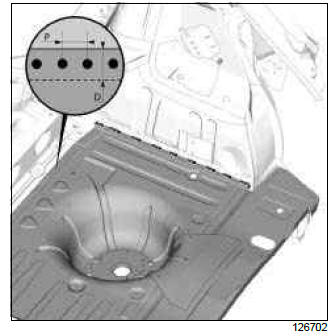
P = pitch
D = distance covered
WARNING
If the spot welds cannot be made as they were originally using an electrical spot welding machine, these should be replaced with anchoring beading.
WARNING
If the mating faces of the parts to be welded are not accessible, make EGW plug welds to replace the original resistance welds (see MR 400).
Rear side member assembly: Description
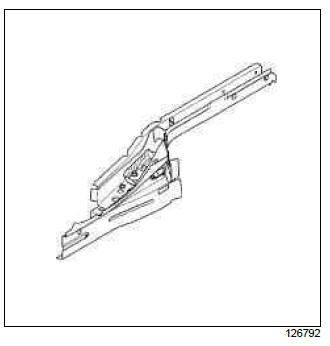
There is only one way of replacing this part:
- complete replacement.
IMPORTANT
Use a repair bench to ensure the positioning of the points and the geometry of the axle assemblies.
I - COMPOSITION OF THE SPARE PART
B85 or C85 or S85
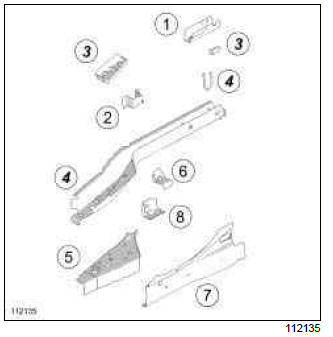
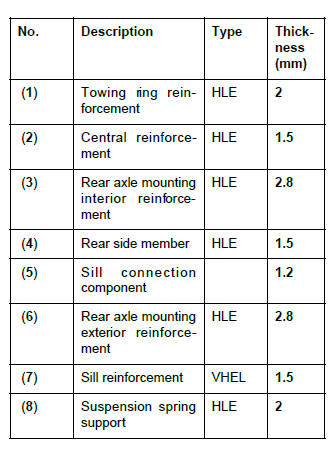
K85
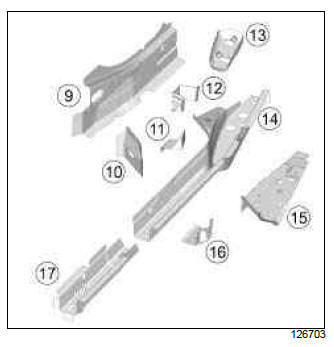
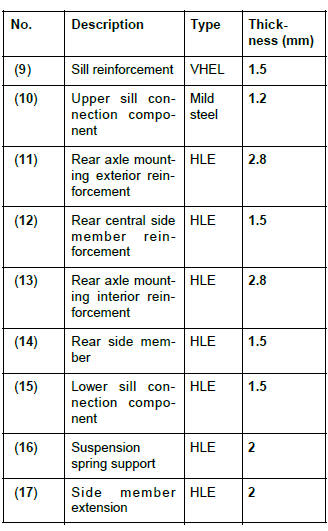
II - PART IN POSITION
Complete replacement
B85 or C85 or S85
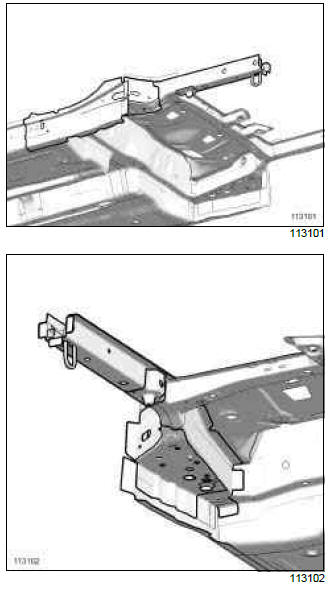
K85
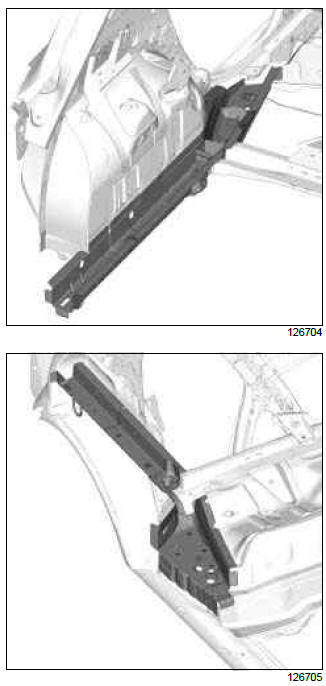
WARNING
If the mating faces of the parts to be welded are not accessible, make EGW plug welds to replace the original resistance welds (see MR 400).
Note: For more detailed information on welded connections with three thicknesses, see MR 400.
Rear side member: General description
IMPORTANT
Use a repair bench to ensure the positioning of the points and the geometry of the axle assemblies.
Note: The information contained in the following describes the general repair procedure for all vehicles having the same design for this part.
Before reading this general information, check that there are no special notes associated with this vehicle.
These special notes will be specified if applicable in other parts of this subsection dealing with the part.
Note: For a detailed description of a particular connection, see MR 400.
I - DESIGN OF THE STRUCTURAL COMPONENT
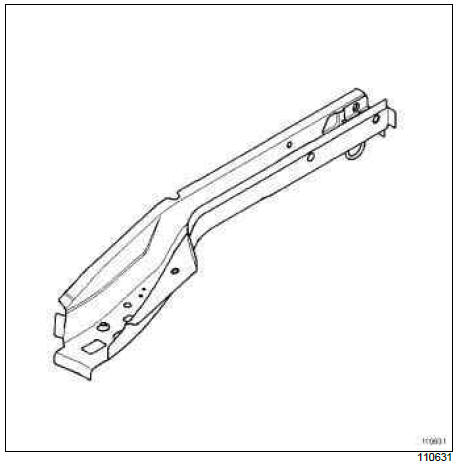
This is a basic part; it simply fulfils the function of a rear side member.
II - AREA TO BE CUT FOR PARTIAL REPLACEMENT
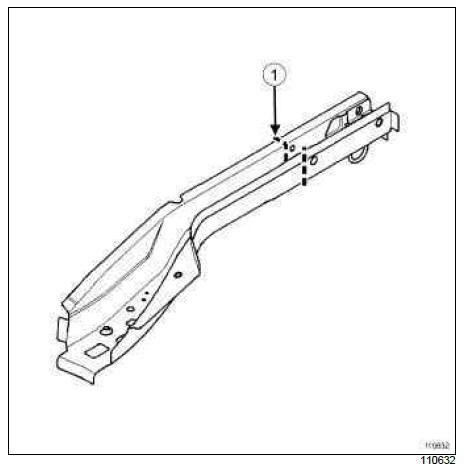
Cut 1: This line marks the area in which it is possible to make a partial replacement.
III - ASSEMBLY INSTRUCTIONS FOR A PARTIAL REPLACEMENT
Only the connections which are specific to the partial replacement by cutting are indicated.
WARNING
If the mating faces of the parts to be welded are not accessible, make EGW plug welds to replace the original resistance welds (see MR 400).
If there are other issues regarding access to mating faces, the various replacement options are described in the basic instructions for structural bodywork repair (see MR 400).
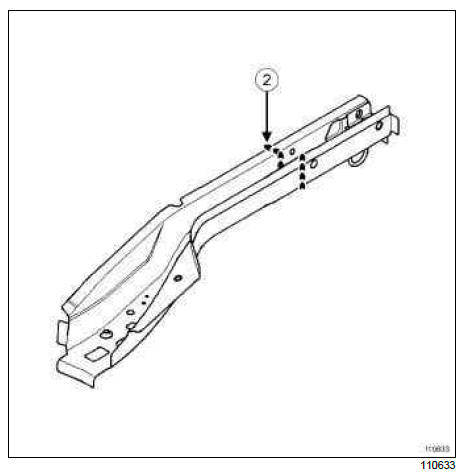
The line (2) on the drawing shows a butt weld made by continuous GMAW welding.
Rear side member, rear section: Description
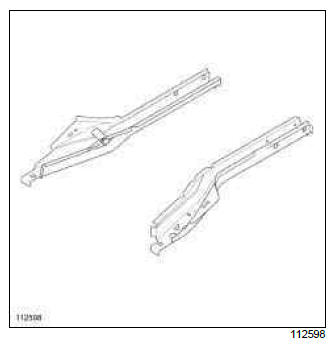
There is only one way of replacing this part:
- Partial replacement of the rear section.
IMPORTANT
The straightening bench must be used.
I - COMPOSITION OF THE SPARE PART
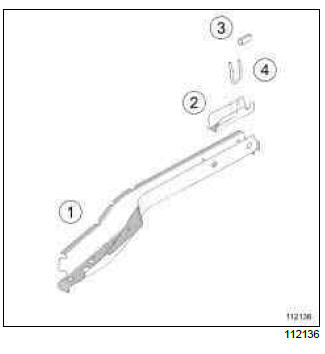
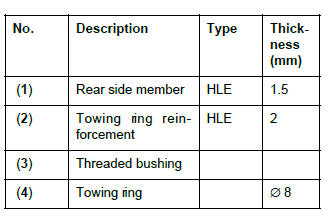
II - PART IN POSITION
Partial replacement of the rear section
WARNING
The correct position of this cut must be observed, as it is determined according to the mounting points for the mechanical components.
WARNING
If the spot welds cannot be made as they were originally using an electrical spot welding machine, they should be replaced with plug welds after holes have been drilled in the first panel.
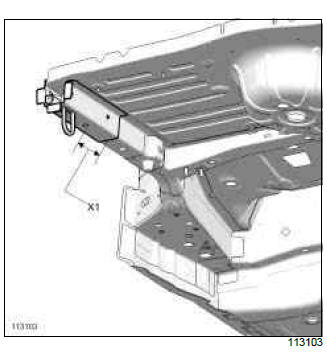
X1 = 70 mm
Rear floor front cross member reinforcement: General description
WARNING
The information contained in the following describes the general repair procedure for all vehicles having the same design for this part.
Before reading this general information, check that there are no special features associated with this vehicle. These special features will be specified if applicable in other parts of this sub-section dealing with the part.
Note: For detailed information on a specific connection.
I - STRUCTURAL COMPONENT DESIGN
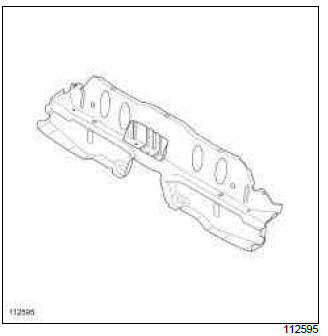
This is a basic part; it simply fulfils the function of a rear floor front cross member stiffener.
II - AREA TO BE CUT FOR PARTIAL REPLACEMENT
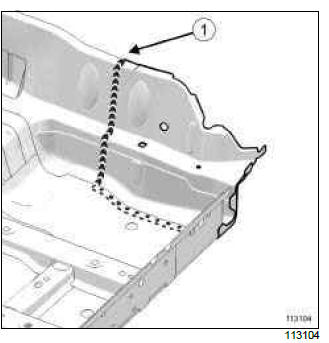
This line (1) marks the place in which it is possible to make a partial replacement.
This operation allows you to access the inside of the hollow section of the structural element to straighten it.
III - ASSEMBLY INSTRUCTIONS FOR A PARTIAL REPLACEMENT
Only the connecting pieces relevant to partial replacement by cutting are shown.
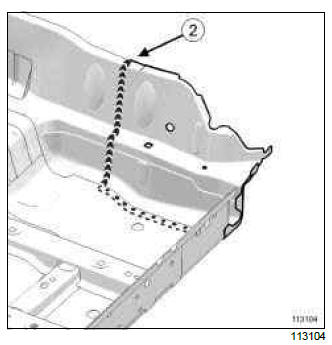
Line (2) of the drawing shows a butt weld by continuous MAG welding.
WARNING
If the spot welds cannot be made as they were originally using an electrical spot welding machine, these should be replaced with plug welds after holes have been drilled in the first panel.
If there are other issues regarding access to mating faces, the various replacement options are described in the basic instructions for structural bodywork repair (see MR 400, 40A, General information).
Rear floor front cross member reinforcement: Description
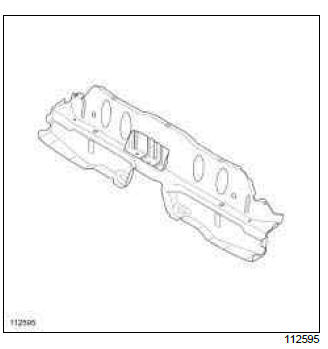
The options for replacing this part are as follows:
- partial replacement of side section,
- complete replacement.
I - COMPOSITION OF THE SPARE PART
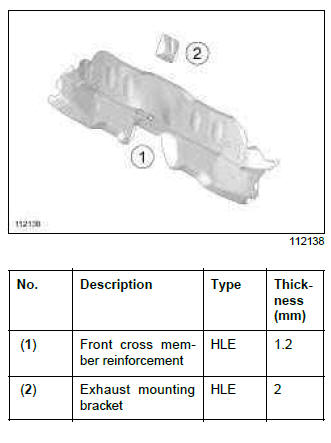
II - PART IN POSITION
Partial replacement of side section
WARNING
The correct position of this cut must be observed, as it is determined according to the position of the reinforcements and the areas to be cut on adjacent parts.
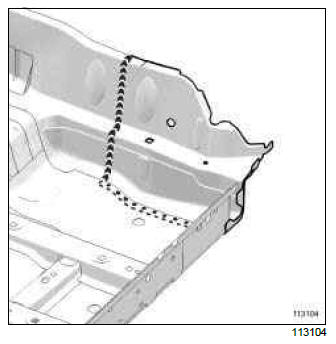
WARNING
If the spot welds cannot be made as they were originally using an electrical spot welding machine, they should be replaced with plug welds after holes have been drilled in the first panel.
Rear floor centre cross member: General description
WARNING
The information contained in the following describes the general repair procedure for all vehicles having the same design for this part.
Before reading this general information, check that there are no special notes associated with this vehicle.
These special notes will be specified if applicable in other parts of this subsection dealing with the part.
Note: For a detailed description of a particular connection, see MR 400, 40A, General Information.
DESIGN OF THE STRUCTURAL COMPONENT
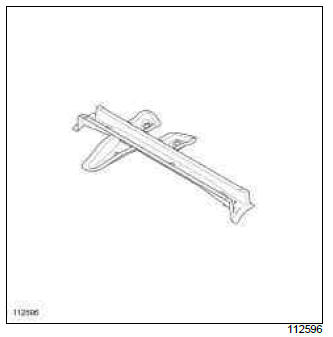
This is a basic part; it only fulfils the function of a rear floor centre cross member.
Rear floor centre cross member: Description
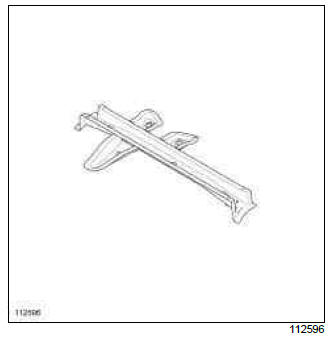
There is only one way of replacing this part:
- complete replacement.
I - COMPOSITION OF THE SPARE PART
B85 or C85 or S85
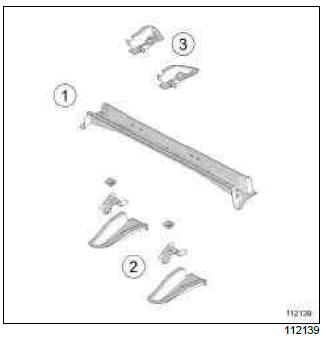
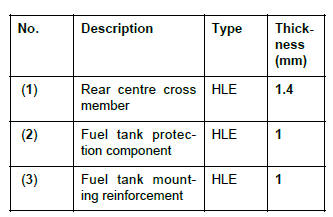
K85
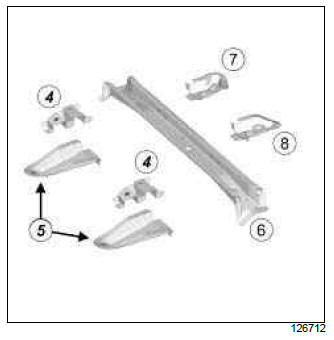
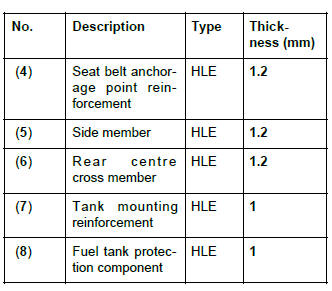
II - PART IN POSITION
Complete replacement
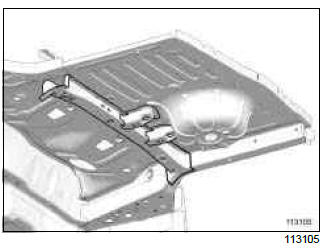
WARNING
If the mating faces of the parts to be welded are not accessible, make EGW plug welds to replace the original resistance welds (see MR 400).
Note: For more detailed information on welded connections with three thicknesses, see MR 400.
Rear floor rear cross member: Description
K85
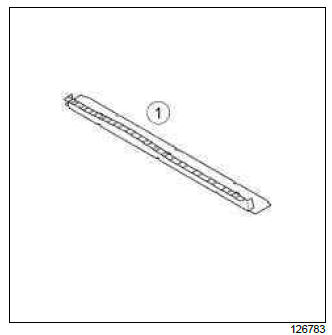
There is only one way of replacing this part:
- complete replacement.
I - COMPOSITION OF THE SPARE PART

II - PART IN POSITION
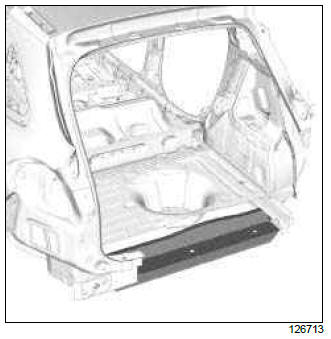
WARNING
If the mating faces of the parts to be welded are not accessible, make EGW plug welds to replace the original resistance welds (see MR 400).
Rear impact lower cross member: Removal - Refitting

I - REMOVAL
1 - REMOVAL PREPARATION OPERATION
- Remove the two rear wing lights (see Rear wing light: Removal -
Refitting).
- Remove the rear bumper (see Rear bumper: Removal - Refitting).
2 - OPERATION FOR REMOVAL OF PART CONCERNED
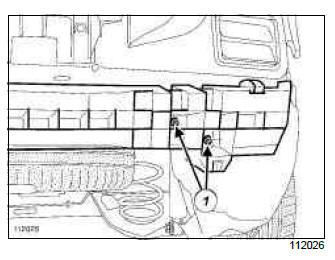
- Remove the side mounting nuts (1) (two on each side).
II - REFITTING
1 - OPERATION FOR REFITTING PART CONCERNED
- Refit the side mounting nuts.
Torque tighten the (1) side mounting nuts (12 Nm).
2 - FINAL operation
- Refit the rear bumper (see Rear bumper: Removal - Refitting).
- Refit the two rear wing lights (see Rear wing light: Removal - Refitting).
Rear towing eye: General description
WARNING
The information contained in the following describes the general repair procedure for all vehicles having the same design for this part.
Before reading this general information, check that there are no special notes associated with this vehicle.
These special notes will be specified if applicable in other parts of this subsection dealing with the part.
Note: For detailed information about a specific connecting piece, see:
DESIGN OF THE STRUCTURAL COMPONENT
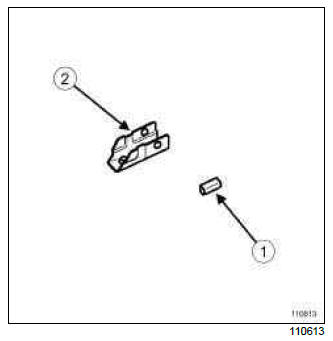
This component is composed of two parts:
- tapped and welded tow eye (1),
- tow eye mounting (2).
WARNING
If the spot welds cannot be made as they were originally using an electrical spot welding machine, they should be replaced with plug welds after holes have been drilled in the first panel.
Rear floor extension: Description
K85
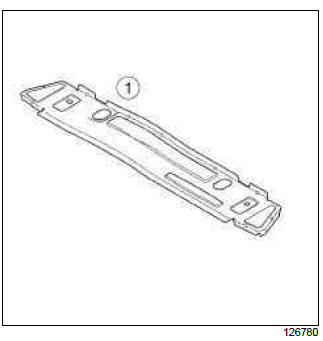
To replace this part, also order the centre floor reinforcement.
There is only one way of replacing this part:
- complete replacement.
I - COMPOSITION OF THE SPARE PART

II - PART IN POSITION
Complete replacement
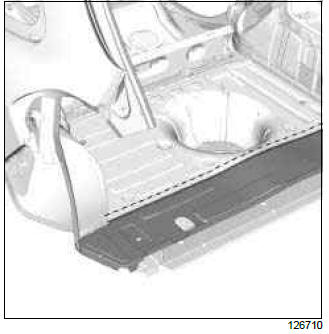
Vue de dREAD NEXT:
Note:
The information contained in the following
describes the general repair procedure for all vehicles
having the same design for this part.
Before reading the following general information,
make s
 Front wing: General description
WARNING
The information contained in the following
describes the general repair procedure for all vehicles
having the same design for this part.
Before reading the following general information,
make
 Front wing lower mounting support: General description
SEE MORE:
Radio: List and location of components
I - LIST OF COMPONENTS
The radio system comprises:
a radio control satellite (see 86A, Radio, Radio control
satellite: Removal - Refitting, 86A-19)
a radio aerial (see 86A, Radio, Radio aerial: Removal
- Refitting, 86A-11)
a radio (see 86A, Radio, Radio:
 Radio
Radio
REMOVAL
I - REMOVAL PREPARATION OPERATION
Disconnect the battery (see Battery: Removal - Refitting).
Remove:
the mounting clips (1) on the lower trim of the driver's
side dashboard,
the lower trim (2) of the driver's side dashboard.
Remove:
the bolt-cover protective strip,
the i
 Steering column adjustment handle: Removal - Refitting
