Renault Clio: Specialised bodywork tools: Use
USING THE DASHBOARD CROSS MEMBER REMOVAL TOOL Car. 1765
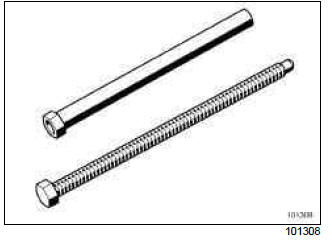
- Use this tool as indicated in the dashboard removal procedure.
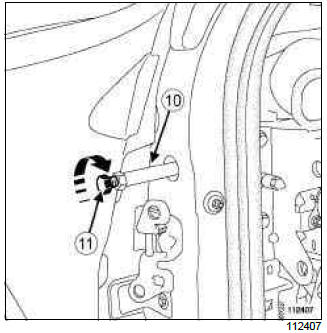
- Fit the tool Car. 1765 as far as the stop (10).
Screw the rod (11) onto the body (10) as far as the stop.
Firmly lock tool body in the same way as a lock nut against the dashboard cross member nut while holding hexagon bolt.
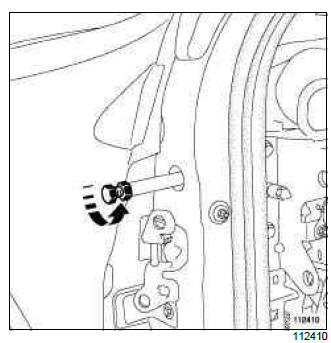
- Unscrew the whole tool as far as the stop and tighten it gently (during this operation, the beam nut, which has a left-hand thread, screws into the beam and disengages it from the A-pillar).
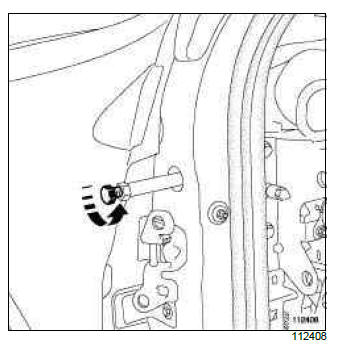
- Hold the tool body (10) and unlock the rod (11).
Unscrew dashboard cross member rod to remove the tool.
WARNING
To maintain the adjustment of the dashboard cross member and therefore make refitting easier, only loosen the lock nut on one side.
USING THE DASHBORAD PROTECTION TOOL Car. 1764
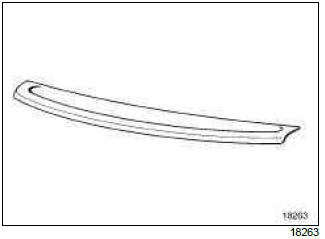
- Use this tool when replacing the windscreen:
- remove the A-pillar trims,
- position the dashboard protector to prevent damage.
PREPARING THE TOOL Car. 1504
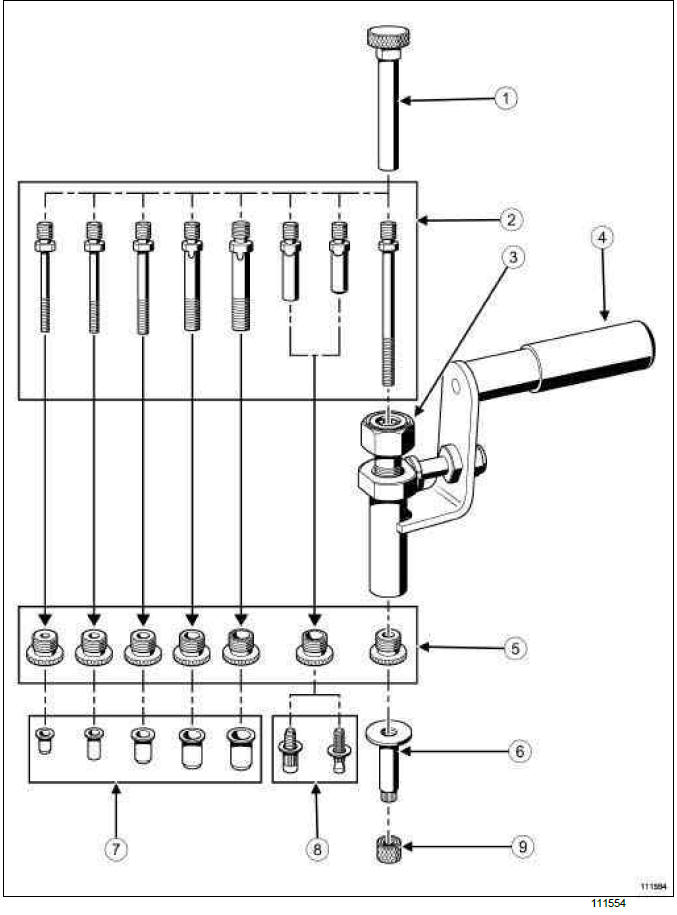
- Mandrel mounting
- Mandrels
- Tightening bolt
- Body
- Anvils
- Special nut
- Nuts
- Studs
- Thrust nut
- Select the mandrel, anvil and insert assembly adapted to the crimping operation to be carried out.
- Into the mandrel mounting (1), screw the mandrel (2) (left-hand thread).
- Tighten the bolt (3) onto the body (4) until the stop (left-hand thread).
- Into the body (4), screw the anvil (5) (left-hand thread).
- Fit the assembly (1) and (2) into the body of the tool.
- Screw the insert (left-hand thread) onto the pull rod.
To fit the special nut (6), position the mandrel across the crimped nut and tighten it onto the thrust nut (9).
WARNING
Each time a panel is stripped in the workshop (e.g. when drilling), degrease and wipe the area and then use a fine paintbrush to apply the following:
- a pre-treatment primer,
- a two-part primer,
- paint in the vehicle body colour.
USING TOOL CAR. 1504
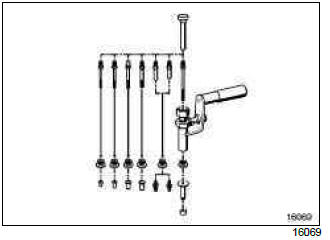
- Turn the bolt using a 24 spanner, holding the tool handle manually.
WARNING
The operator should be able to feel when the crimping is complete (more force required for tightening). The insert has been crimped correctly when there is no more rotational play, carry out this check before unscrewing the "pull rod - mandrel" assembly.
READ NEXT:
 Structural bodywork documentation: Use
B85 or C85
I - CLASSIFYING INFORMATION
This information is classified in two complementary
documents:
1 - Vehicle structure bodywork repair procedures
(MR of the vehicle concerned)
This document compr
Vehicle on repair bench: Description
I - MAIN REFERENCE POINTS BEFORE TRIM-SETTING
1 - Front sub-frame in place
The jig crowns the front sub-frame rear mounting bolt (A).
Use this situation for a rear impact or a light frontal impact
w
Structural components to be positioned on the repair bench: Description
I - PARTS REQUIRING THE USE OF A BODY JIG
BENCH
Radiator cross member support
Centre floor front side cross member
Front side member closure panel
Front side member
Engine stand
Front half-uni
SEE MORE:
Front side member closure panel, front section:
General description
IMPORTANT
Use a repair bench to ensure the positioning of the
points and the geometry of the axle assemblies.
Note:
The information contained in the following
describes the general repair procedure for all vehicles
having the same design for this part.
Before reading the following general informati
Radiator cross member mounting: General description
WARNING
The information contained in the following
describes the general repair procedure for all vehicles
having the same design for this part.
Before reading the following general information,
make sure that there are no special notes associated
with the vehicle. These special notes are specified
