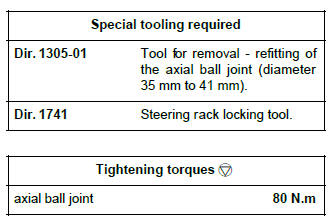
Renault Clio: Axial ball joint linkage: Removal - Refitting
Renault Clio III (2005-2013) Service Manual / Chassis / Steering Assembly / Axial ball joint linkage: Removal - Refitting
REMOVAL
I - REMOVAL PREPARATION OPERATION
- Position the vehicle on a two-post lift (see Vehicle: Towing and lifting).
- Remove the front wheel (see 35A, Wheels and tyres, Wheel: Removal - Refitting, 35A-1).
- Remove the track rod (see 36A, Steering assembly, Track rod: Removal - Refitting, 36A-3).
- Remove the steering rack gaiter (see 36A, Steering assembly, Steering box gaiter: Removal - Refitting, 36A-13).
- Unlock the steering column.
Note: During this operation, the steering rack must be in place on the vehicle.
II - OPERATION FOR REMOVAL OF PART CONCERNED
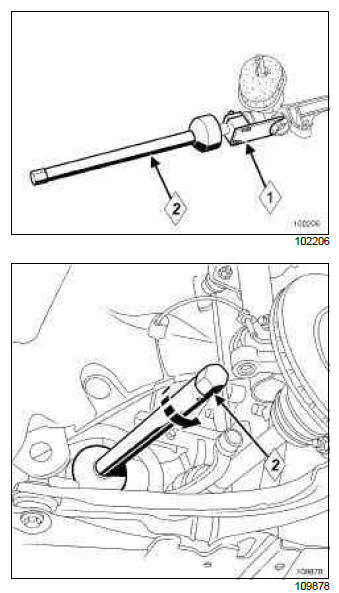
- Set up the (1) Dir. 1741 on the steering rack, at the pinion end.
- Unlock the axial ball joint using tool (2) Dir. 1305- 01.
- Remove the axial ball joint.
REFITTING
I - REFITTING PREPARATION OPERATION
- parts always to be replaced: Steering axial ball joint washer (13,04,02,04)
II - REFITTING OPERATION FOR PART CONCERNED

- Refit:
- a new washer (1),
- the axial ball joint (2).
- Torque tighten the axial ball joint (80 N.m) using the tool (Dir. 1305-01).
- Remove the (Dir. 1741).
- Coat with SILICONE GREASE (see Vehicle: Parts
and consumables for the repair) :
- the steering rack,
- the axial ball joint.
III - FINAL OPERATION.
- Refit the steering box gaiter (see 36A, Steering assembly, Steering box gaiter: Removal - Refitting, 36A-13).
- Refit the track rod (see 36A, Steering assembly, Track rod: Removal - Refitting, 36A-3).
- Refit the wheel (see 35A, Wheels and tyres, Wheel: Removal - Refitting, 35A-1).
- Check the axle geometry (see Axle assemblies: Check).
- If necessary, adjust the axle assemblies' geometry (see 30A, General information, Front axle system: Adjustment, 30A-23).
READ NEXT:
 Steering column: List and location of components
VEHICLE WITH KEY
Intermediate shaft
Steering column adjustment
handle
Key-operated switch
VEHICLE WITH CARD
Intermediate shaft
Electric steering column lock
Steering column adjustment
han
Intermediate shaft: Removal - Refitting
REMOVAL
I - REMOVAL PREPARATION OPERATION
Disconnect the battery (see Battery: Removal - Refitting).
Remove:
the mounting clips (1) from the lower trim of the
driver's side dashboard,
the
Steering column adjustment handle: Removal - Refitting
REMOVAL
I - REMOVAL PREPARATION OPERATION
Disconnect the battery (see Battery: Removal - Refitting).
Remove:
the mounting clips (1) on the lower trim of the driver's
side dashboard,
the lo
SEE MORE:
Renault anti-intruder device (raid)
Operating principle
After the vehicle is started, the system
automatically locks the doors when
you are driving at approximately 6 mph
(10 km/h) and over.
The door can be unlocked:
by pressing the door unlocking
button 1.
by opening a front door (vehicle stationary).
NB: if a d
Front headrests
To raise the headrest
Pull the headrest upwards to the desired
height. Check that it is correctly
locked.
To lower the headrest
Press button 1 and guide the headrest
down to the desired height. Check that
it is correctly locked.
To raise the headrest
Raise the headrest to its highest po
© 2016-2026 Copyright Renault Clio Owners Club - 0.0036
