Renault Clio: Engine oil: Draining - Refilling
D4F or K4J or K4M or K9K
I - RECOMMENDATIONS FOR REPAIR
- Direction of fitting of the drain plug seal.
K4J or K4M or K9K
For an aluminium engine oil sump
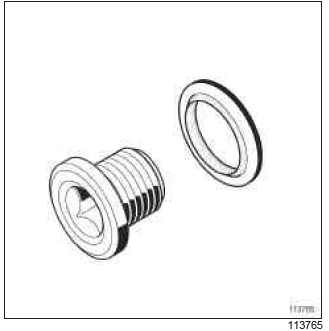
- There is no direction of fitting for a seal fitted with a rubber lip.
D4F
For a sheet metal engine oil sump
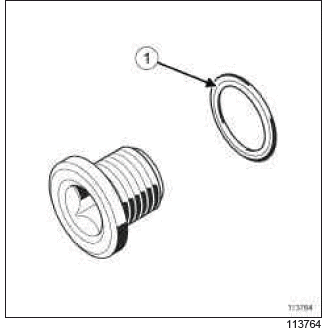
- Position the slot (1) of the seal towards the drain plug.
II - PARTS AND CONSUMABLES FOR REPAIR
- parts always to be replaced: Drain plug seal on engine oil sump.
- Consumable:
- engine oil (see Engine oil: Specifications) (Technical Note 6013A, 04A, Lubricants).
III - DRAINING
- Position the vehicle on a two-post lift (see Vehicle: Towing and lifting) (02A, Lifting equipment).
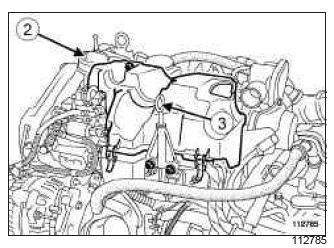
- Remove
- the engine oil filler cap (2),
- the dipstick (3),
- the engine undertray.
- Place the oil recovery tray under the engine.
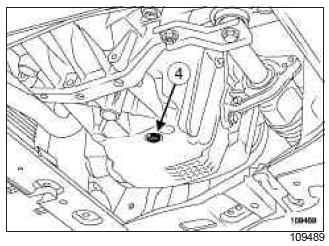
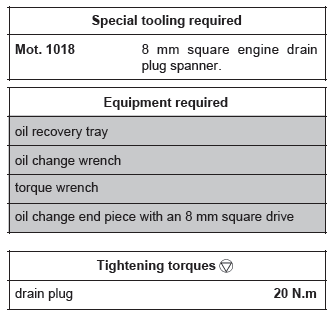
- Remove the drain plug (4) from the engine oil sump using the (Mot. 1018) or a oil change wrench.
- Let the engine oil flow out.
- Remove the seal from the drain plug.
- Fit the new seal on the drain plug, positioning it correctly.
- Screw the drain plug onto the engine oil sump.
- Torque tighten the drain plug (20 N.m) using a torque wrench and a oil change end piece with an 8 mm square drive.
- Use a cloth to wipe away any oil drips on the engine oil sump.
- Remove the oil recovery tray.
- Refit the engine undertray.
IV - FILLING
WARNING
Always check the oil level using the dipstick.
Do not exceed the maximum level on the dipstick (could destroy the engine).
Correct the engine oil level if necessary before delivering the vehicle to the customer.
Note: Prevent oil outflow on the engine to avoid damaging the surrounding components.
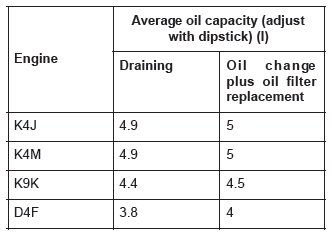
- Use a funnel to fill the engine with engine oil recommended by the manufacturer (see Engine oil: Specifications) (Technical Note 6013A, 04, Lubricants).
Note: When filling up the engine oil, always leave at least 10 minutes for the oil to drain down before checking the level on the dipstick.
- Top up the oil level if necessary.
- Refit:
- the engine oil filler cap,
- the dipstick.
M4R
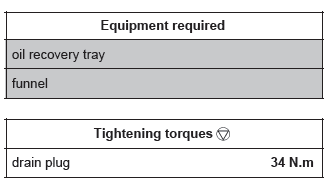
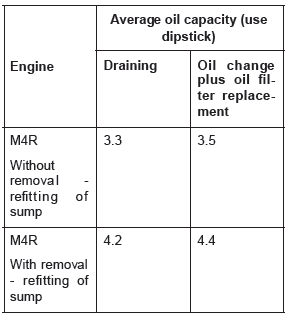
I - DRAINING
- Position the vehicle on a two-post lift (see Vehicle: Towing and lifting).
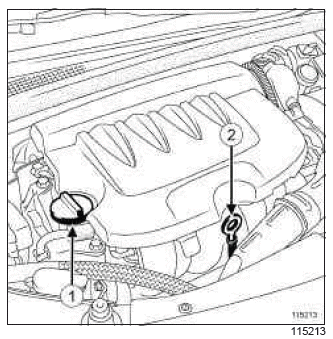
- Remove:
- the oil filler cap (1),
- the dipstick (2).
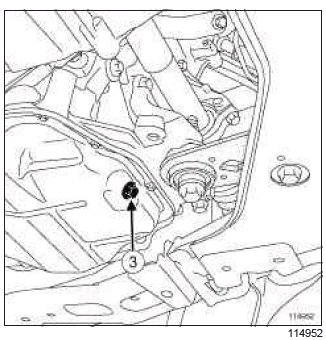
- Fit a oil recovery tray under the engine oil drain plug.
- Remove the drain plug (3).
- Allow the engine oil to flow into the oil recovery container.
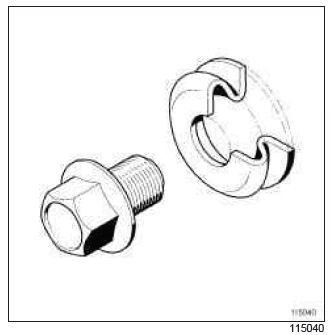
- Refit the new seal onto the drain plug, respecting the direction indicated in the diagram.
- Torque tighten the drain plug (34 N.m).
- Clean the traces of oil around the drain plug so that any possible leaks can be detected.
II - FILLING
WARNING
Always check the oil level using the dipstick.
Do not exceed the maximum level on the dipstick (as this could damage the engine).
Correct the engine oil level if necessary before delivering the vehicle to the customer.
Note: Prevent oil outflow on the engine to avoid damaging the surrounding components.
- Use a funnel to fill the engine with engine oil recommended by the manufacturer (see Engine oil: Specifications) (Technical Note 6013A, 04, Lubricants)
Note: When filling up the engine oil, always leave at least 10 minutes for the oil to drain down before checking with a dipstick
- Check the oil level with the dipstick.
- Refit the engine oil filler cap.
F4R
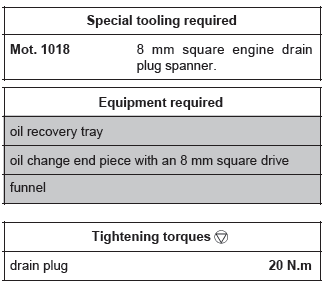
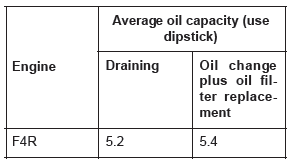
- parts always to be replaced: Drain plug seal on engine oil sump
I - DRAINING
- Position the vehicle on a two-post lift (see Vehicle: Towing and lifting) (02A, Lifting equipment).
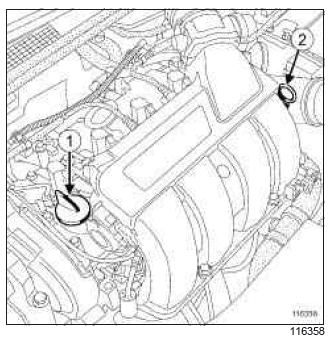
- Remove:
- the oil filler cap (1),
- the dipstick (2).
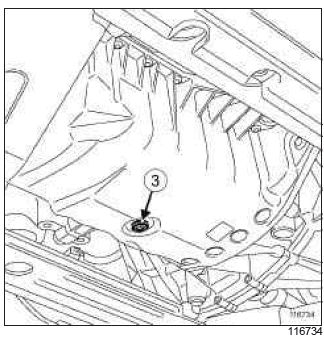
- Fit a oil recovery tray under the drain plug (3).
- Remove the drain plug (3) using the (Mot. 1018).
- Allow the engine oil to flow into the oil recovery container.
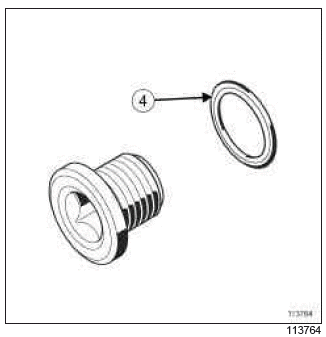
- Fit the new drain plug seal (position the seal groove (4) facing the drain plug).
- Torque tighten the drain plug (20 N.m) using a oil change end piece with an 8 mm square drive.
- Clean the traces of oil around the drain plug so that any possible leaks can be detected.
II - FILLING
WARNING
Always check the oil level using the dipstick.
Do not exceed the maximum level on the dipstick (as this could damage the engine).
Correct the engine oil level if necessary before delivering the vehicle to the customer.
Note: Prevent oil outflow on the engine to avoid damaging the surrounding components.
- Use a funnel to fill the engine with engine oil recommended by the manufacturer (see Engine oil: Specifications) (Technical Note 6013A, 04, Lubricants).
Note: When filling up the engine oil, always leave at least 10 minutes for the oil to drain down before checking the level on the dipstick.
- Check the engine oil level using the dipstick.
- Refit:
- the oil filler cap,
- the dipstick.

