Renault Clio: Oil pressure sensor: Removal - Refitting
D4F, and 740 or 742 or 764
REMOVAL
I - REMOVAL PREPARATION OPERATION
- Put the vehicle on a two-post lift (see Vehicle: Towing and lifting).
- Disconnect the battery (see Battery: Removal - Refitting).
- Remove the engine undertray.
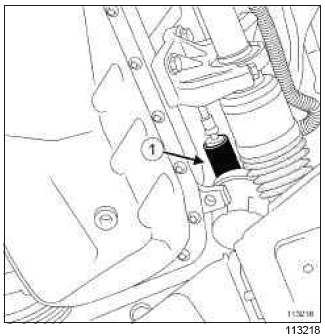
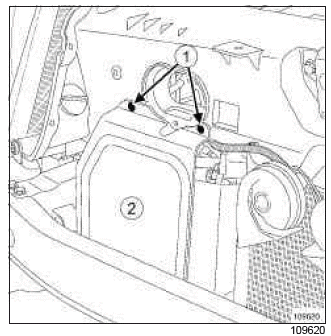
- Unclip the connector cover (1).
- Remove the oil pressure sensor connector.
II - OPERATION FOR REMOVAL OF PART CONCERNED
- Remove the oil pressure sensor.
REFITTING
I - REFITTING OPERATION FOR PART CONCERNED
- Refit the oil pressure sensor.
- Torque tighten the oil pressure sensor (32 N.m).
II - FINAL OPERATION.
- Refit the oil pressure sensor connector.
- Clip the connector cover.
- Refit the engine undertray.
- Connect the battery (see Battery: Removal - Refitting).
K9K
REMOVAL
I - REMOVAL PREPARATION OPERATION
- Disconnect the battery (see Battery: Removal - Refitting) (MR 392, 80A, Battery).
- Remove the engine undertray.
II - OPERATION FOR REMOVAL OF PART CONCERNED
REFITTING
I - REFITTING OPERATION FOR PART CONCERNED
- Refit the oil pressure sensor.
- Torque tighten the oil pressure sensor (40 N.m).
- Connect the oil pressure sensor connector.
II - FINAL OPERATION
- Refit the engine undertray.
- Connect the battery (see Battery: Removal - Refitting) (MR 392, 80A, Battery).
REMOVAL
I - REMOVAL PREPARATION OPERATION
- Disconnect the battery (see Battery: Removal - Refitting) (80A, Battery).
- Remove the front engine cover.
K4M, and 862
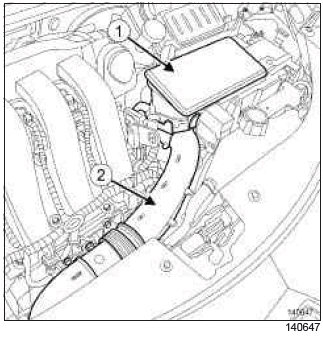
- Remove:
- the air resonator (1),
- the air inlet pipe (2) from the air filter unit.
II - OPERATION FOR REMOVAL OF PART CONCERNED
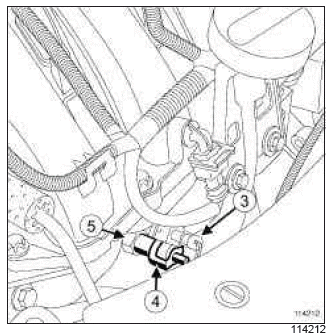
- Disconnect:
- the pinking sensor connector (3),
- the oil pressure sensor connector (4).
- Remove the oil pressure sensor (5).
REFITTING
I - REFITTING OPERATION FOR PART CONCERNED
- Use SURFACE CLEANER (see ) (04B, Consumables - Products) to degrease the bearing face of the oil pressure sensor on the cylinder block.
- Refit the oil pressure sensor.
- Connect:
- the oil pressure sensor connector,
- the pinking sensor connector.
II - FINAL OPERATION
K4M, and 862
- Refit:
- the air filter unit air inlet pipe,
- the air resonator.
- Refit the engine cover.
- Connect the battery (see Battery: Removal - Refitting) (80A, Battery).
M4R
REMOVAL
I - REMOVAL PREPARATION OPERATION
- Position the vehicle on a two-post lift (see Vehicle: Towing and lifting) (MR 392, 02A, Lifting equipment).
- Disconnect the battery (see Battery: Removal - Refitting) (MR 392, 80A, Battery).
- Remove:
- the engine undertray,
- the front bumper (see Front bumper: Removal - Refitting) (MR 393, 55A, Exterior protection),
- the frontal impact cross member (see Front impact cross member: Removal - Refitting) (MR 393, 41A, Front lower structure),
- the front end panel air resonator (see 12A, Fuel mixture, Air resonator: Removal - Refitting, 12A-10).
- Disconnect the oil pressure sensor connector (1).
II - REMOVAL OF PART CONCERNED
- Remove the oil pressure sensor.
REFITTING
I - REFITTING PREPARATIONS OPERATION
- Coat the oil pressure sensor wire with SILICONE ADHESIVE SEALANT (77 11 227 484) to ensure a good seal.
II - REFITTING PART CONCERNED
- Refit the oil pressure sensor.
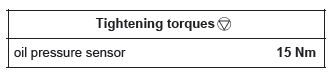
- Tighten to torque the oil pressure sensor (15 Nm).
III - FINAL OPERATION.
- Connect the oil pressure sensor connector.
- Refit:
- the front end panel air resonator (see 12A, Fuel mixture, Air resonator: Removal - Refitting, 12A-10),
- the frontal impact cross member (see Front impact cross member: Removal - Refitting) (MR 393, 41A, Front lower structure),
- the front bumper (see Front bumper: Removal - Refitting) (MR 393, 55A, Exterior protection),
- the engine undertray.
- Connect the battery (see Battery: Removal - Refitting) (MR 392, 80A, Battery).
F4R
REMOVAL
I - REMOVAL PREPARATION OPERATION
- Position the vehicle on a two-post lift (see Vehicle: Towing and lifting) (MR 392, 02A, Lifting equipment).
- Disconnect the battery (see Battery: Removal - Refitting) (MR 392, 80A, Battery).
- Remove:
- the front bumper (see Front bumper: Removal - Refitting) (MR 393, 55A, Exterior protection),
- the frontal impact cross member (see Front impact cross member: Removal - Refitting) (MR 393, 41A, Front lower structure).
- Remove:
- the plastic cover retaining clips,
- the plastic cover.
II - OPERATION FOR REMOVAL OF PART CONCERNED

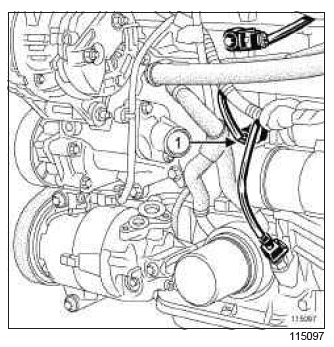
- Disconnect the oil pressure sensor connector (3).
- Remove the oil pressure sensor (4).
REFITTING
I - REFITTING OPERATION FOR PART CONCERNED
- Refit the oil pressure sensor.
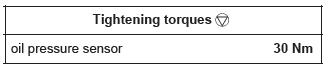
- Torque tighten the oil pressure sensor (30 Nm).
- Connect the oil pressure sensor connector.
II - FINAL REFITTING OPERATION
- Position the plastic cover.
- Refit:
- the plastic cover retaining clips,
- the frontal impact cross member (see Front impact cross member: Removal - Refitting) (MR 393, 41A, Front lower structure),
- the front bumper (see Front bumper: Removal - Refitting) (MR 393, 55A, Exterior protection).
- Connect the battery (see Battery: Removal - Refitting) (MR 392, 80A, Battery).
D4F, and 784 or 786
REMOVAL
I - REMOVAL PREPARATION OPERATION
- Position the vehicle on a two-post lift (see Vehicle: Towing and lifting) (MR 392, 02A, Lifting equipment).
- Remove the front engine cover.
II - OPERATION FOR REMOVAL OF PART CONCERNED
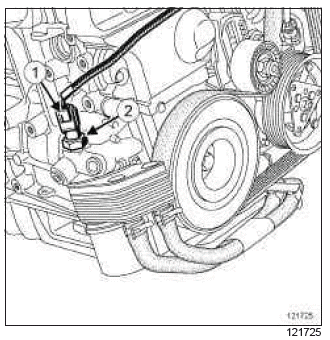
- Disconnect the oil pressure sensor connector (1).
- Remove the oil pressure sensor (2).
REFITTING
I - REFITTING OPERATION FOR PART CONCERNED
- Refit the oil pressure sensor.
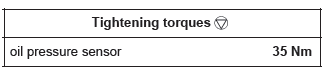
- Torque tighten the oil pressure sensor (35 Nm).
- Connect the oil pressure sensor connector.
II - FINAL OPERATION.
- Refit the engine undertray.
READ NEXT:
 Oil level sensor: Removal -
Refitting
Oil level sensor: Removal -
Refitting
D4F, and 740 or 742 or 764
REMOVAL
I - REMOVAL PREPARATION OPERATION
Disconnect the battery (see Battery: Removal - Refitting)
(MR 392, 80A, Battery).
Move the air inlet hose to one side.
Dis
Lower cover: Removal -
Refitting
K9K
REMOVAL
Position the vehicle on a two-post lift (see Vehicle:
Towing and lifting) (02A, Lifting equipment).
Remove:
the resonator on the battery,
the battery covers.
Disconnect the b
Conrod bearing shell:
Removal - Refitting
K9K
IMPORTANT To avoid all risk of damage to the systems, apply the
safety and cleanliness instructions and operation recommendations before
carrying out any repair (see Vehicle: Precautions for th
SEE MORE:
Side Upper Structure
A-pillar: General description
C85
WARNING
The information contained in the following
describes the general repair procedure for all vehicles
having the same design for this part.
Before reading the following general information,
make sure that there are no special notes associated
with the vehicle.
Rear Upper Structure
Rear wing panel: General description
Note:
The information contained in the following
describes the general repair procedure for all vehicles
having the same design for this part.
Before reading the following general information,
make sure that there are no special notes associated
with the vehicle
