Renault Clio: Mixing motor: Removal - Refitting
LEFT-HAND DRIVE, and CLIMATE CONTROL

REMOVAL
I - REMOVAL PREPARATION OPERATION
- Remove the centre console (see Centre console: Removal - Refitting) (MR 393, 57A, Interior equipment).
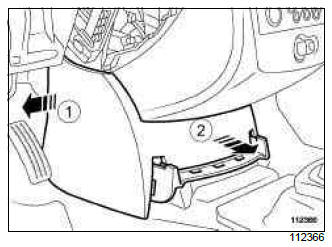
- Unclip the trim at (1) and (2) at the base of the dashboard.
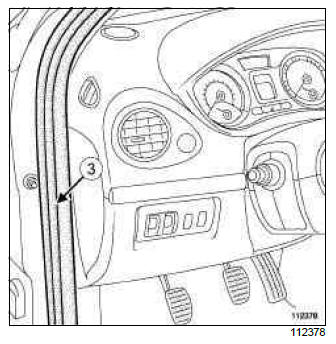
- Partially remove seal (3).
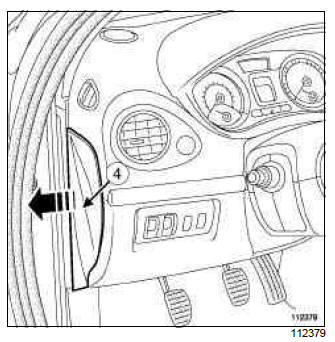
- Remove the side panel (4).
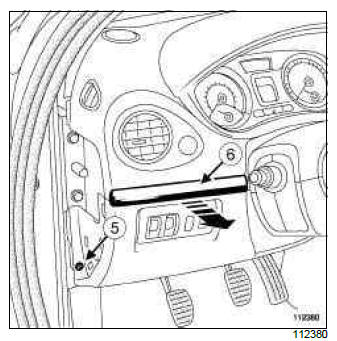
- Remove the bolt (5) from the base of the dashboard.
- Unclip the trim piece (6) from the driver's side dashboard lower cover.
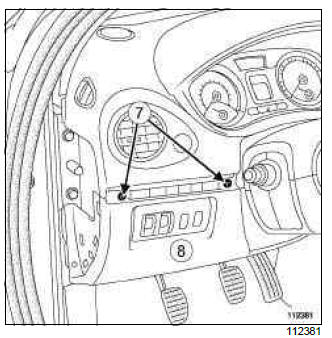
- Remove the bolts (7) from the driver's side dashboard lower cover.
- Take out the driver's side dashboard lower cover (8).
- Disconnect the connectors from the driver's side dashboard lower cover (depending on the equipment level).
- Lift the carpet to access the stiffener bolts.
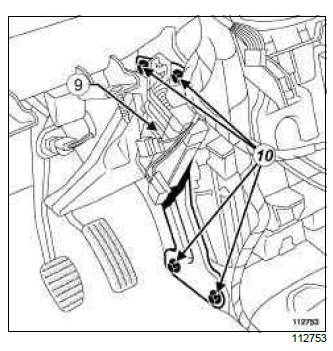
- Unclip the fuse holder unit (9).
- Move the fuse holder to one side.
- Remove:
- the dashboard cross member reinforcement bolts (10),
- the dashboard cross member reinforcement.
II - OPERATION FOR REMOVAL OF PART CONCERNED
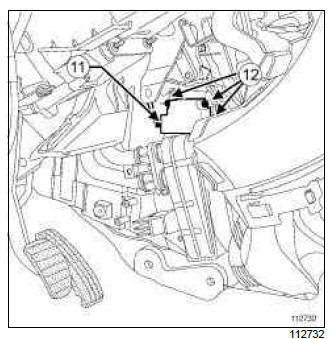
- Disconnect the connector (11) from the mixer motor.
- Remove:
- the bolts (12) from the air mixing motor,
- the air mixing motor.
REFITTING
I - REFITTING OPERATION FOR PART CONCERNED
- Refit:
- the air mixing motor,
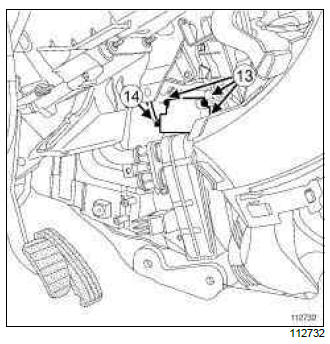
- the air mixing motor bolts (13).
- Connect the connector (14) to the mixer motor.
II - FINAL OPERATION.
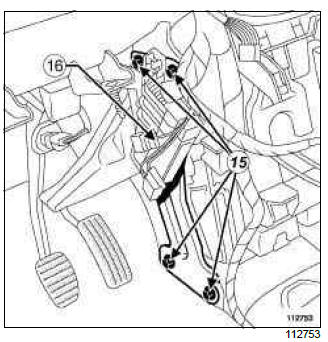
- Refit:
- the dashboard cross member stiffener,
- the bolts (15) from the dashboard cross member stiffener.
Note: Check the presence of the rubber filter block on the dashboard cross member reinforcement plate before refitting.
- Torque tighten the dashboard cross member reinforcement bolt (21 Nm).
- Clip in the fuse holder unit (16).
- Refit the floor carpet.
Note: Check that the floor carpet reaches under the accelerator pedal end-stop.
- Connect the connectors to the driver's side dashboard lower cover.
- Position the driver's side dashboard lower cover.
- Refit:
- the driver's side dashboard lower cover bolts,
- the bolts to the base of the dashboard.
- Clip on the driver's side dashboard lower cover trim piece.
- Refit:
- the side panel,
- the seal.
- Clip on the dashboard lower trim.
- Refit the centre console (see Centre console: Removal - Refitting) (MR 393, 57A, Interior equipment).
RIGHT-HAND DRIVE, and CLIMATE CONTROL
REMOVAL
I - REMOVAL PREPARATION OPERATION
- Remove:
- the glovebox (see Glovebox: Removal - Refitting) (MR 393, 57A, Interior equipment),
- the centre console (see Centre console: Removal - Refitting) (MR 393, 57A, Interior equipment).
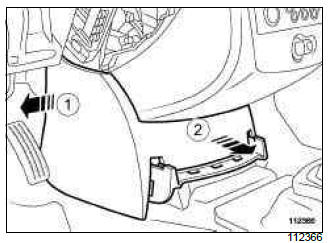
- Unclip the trim at (1) and (2) at the base of the dashboard.
II - OPERATION FOR REMOVAL OF PART CONCERNED
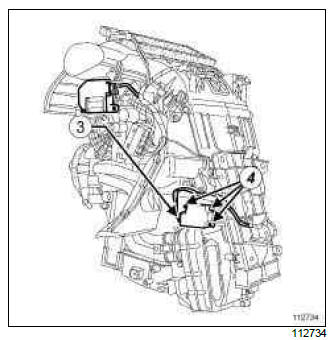
- Disconnect the connector (3) from the mixer motor.
- Remove:
- the bolts (4) from the air mixing motor,
- the air mixing motor.
REFITTING
I - REFITTING OPERATION FOR PART CONCERNED
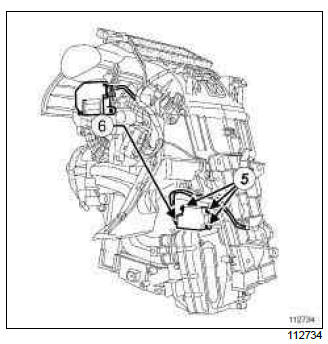
- Refit:
- the air mixing motor,
- the air mixing motor bolts (5).
- Connect the connector (6) to the mixer motor.
II - FINAL OPERATION.
- Clip on the dashboard lower trim.
- Refit:
- the centre console (see Centre console: Removal - Refitting) (MR 393, 57A, Interior equipment),
- the glovebox (see Glovebox: Removal - Refitting) (MR 393, 57A, Interior equipment)).
READ NEXT:
 Distribution motor: Removal - Refitting
LEFT-HAND DRIVE, and CLIMATE CONTROL
REMOVAL
I - REMOVAL PREPARATION OPERATION
Remove the centre console (see Centre console:
Removal - Refitting) (MR 393, 57A, Interior equipment).
Unclip the
 Passenger compartment temperature sensor: Removal - Refitting
REMOVAL
I - REMOVAL PREPARATION OPERATION
Unclip the upper casing.
Unclip the lower casing (1).
II - OPERATION FOR REMOVAL OF PART
CONCERNED
Disconnect the passenger compartment temperature
SEE MORE:
 Rear bench seat: functions
Position for use
Raise the headrest as far as possible to
use it in the high position. Check that it
is correctly locked.
Storage position
Press button A and lower the headrest
completely.
When the headrest is set at the
lowest position, this is for storage
only. It should not be in t
 Sunroof sun visors: Removal - Refitting
PANORAMIC SUNROOF
IMPORTANT
Before working on or near a safety system component;
make sure that the airbag computer is
locked using the Diagnostic tool. When this
function is activated, all the triggering lines are
inhibited and the airbag warning light on the
instrument panel is continuously lit (
© 2016-2026 Copyright Renault Clio Owners Club

