Renault Clio: Rear loading trim: Removal - Refitting
Renault Clio III (2005-2013) Service Manual / Trim And Upholstery / Body Internal Trim / Rear loading trim: Removal - Refitting
S85
REMOVAL
I - REMOVAL PREPARATION OPERATION
- Remove:
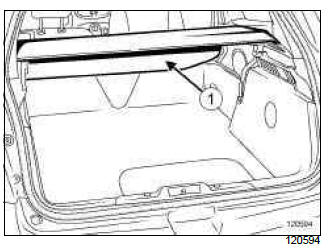
- the rear parcel shelf,
- the centre rear parcel shelf (1).
II - OPERATION FOR REMOVAL OF PART CONCERNED
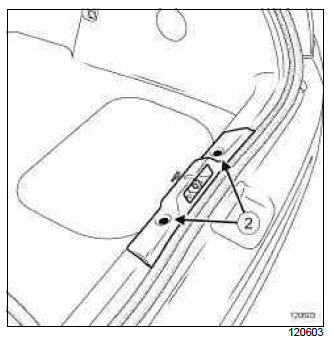
- Unclip the clips (2).
- Remove the rear end panel central trim assembly.
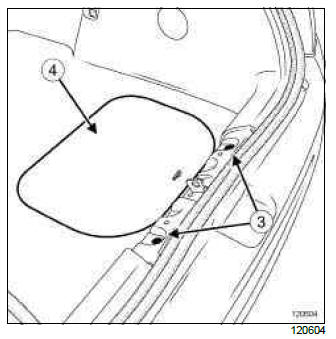
- Unclip the clips (3).
- Remove the emergency spare wheel flap (4).
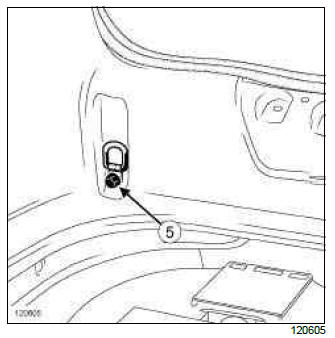
- Remove:
- the bolts (5),
- the retaining hooks.

- Remove the bolts (6).
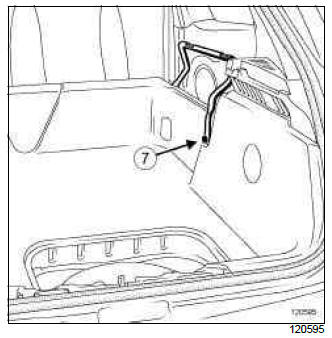
- Remove:
- the bolts (7),
- the centre rear parcel shelf supports.
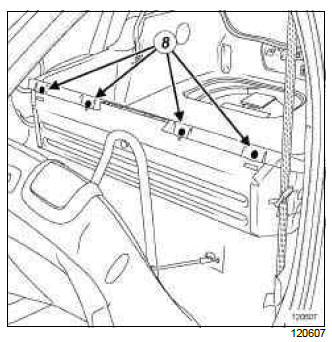
- Remove the bolts (8).
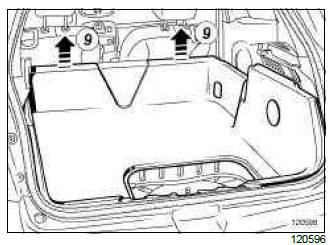
- Gently lift the luggage compartment tray (9).
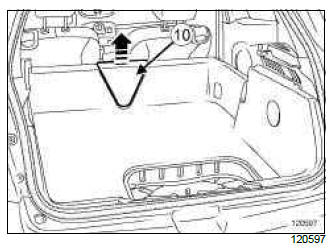
- Remove the trim (10).
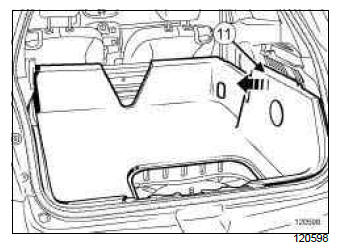
- Detach the rear side sections (11) of the luggage compartment.
- Remove the luggage compartment tray through the tailgate by bending it slightly (this operation requires two people).

- Remove the soundproofing.

- Remove the luggage compartment tray mounting (12).
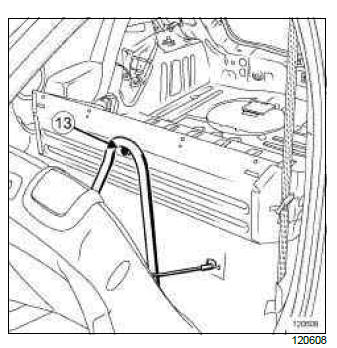
- Remove:
- the bolt (13),
- the load stop bracket.

- Remove the bolts (14).

- Remove the load stop floor by unclipping it towards the rear (15) (this operation requires two people).
REFITTING
I - REFITTING OPERATION FOR PART CONCERNED
- Refit:
- the load stop floor (this operation requires two people),
- the bolts (14),
- the load stop bracket,
- the bolt (13),
- the luggage compartment tray mounting (12),
- the soundproofing,
- the luggage compartment tray (this operation requires two people),
- the trim (10),
- the bolts (8).
- Attach the rear side sections (11) of the luggage compartment tray.
- Refit:
- the centre rear parcel shelf supports,
- the bolts (7) and (6),
- the retaining hooks,
- the bolts (5),
- the emergency spare wheel flap (4).
- Attach the clips (3).
- Refit the rear end panel central trim assembly.
- Attach the clips (2).
II - FINAL OPERATION.
- Refit:
- the centre rear parcel shelf, (1)
- the rear parcel shelf.
READ NEXT:
 Front side door trim: Removal - Refitting
REMOVAL
I - REMOVAL PREPARATION OPERATION
Remove the front speaker (see Front speakers:
Removal - Refitting) (MR 392, 86A, Radio).
Unclip the door mirror trim piece (1).
II - OPERATION FOR REM
Rear side door trim: Removal - Refitting
B85 or K85
REMOVAL
I - REMOVAL PREPARATION OPERATION
Special features of vehicles fitted with manual
window winders
Unclip the winder handle (1) using a pair of unclipping
pliers (protect the door
SEE MORE:
Driving
The Renault Clio IV (2014-2019) offers a satisfying driving experience with its nimble handling and responsive performance. Its compact size and maneuverability make it well-suited for urban driving and tight parking spaces. The precise steering and suspension tuning provide a balanced and confident
Your comfort
The Renault Clio IV (2014-2019) is designed with your comfort in mind. It features a well-crafted interior with quality materials and thoughtful ergonomics. The seats offer excellent support and adjustability, providing a comfortable driving experience. The cabin is designed to minimize noise and vi
© 2016-2026 Copyright Renault Clio Owners Club - 0.0031
