Renault Clio: Front lighting: List and location of components
DOCUMENTATION PHASE 1
I - LIST OF COMPONENTS
The front lighting consists of:
- headlights (see 80B, Headlights, Headlight: Removal - Refitting, 80B-7)
- halogen bulbs (see 80B, Headlights, Headlight bulb: Removal - Refitting, 80B-17)
- headlight beam adjustment actuator (see 80B, Headlights, Remote headlight beam adjustment actuator: Removal - Refitting, 80B-31)
- side indicators (see 80B, Headlights, Side indicator: Removal - Refitting, 80B-30)
FOG LIGHTS
- front fog lights (see 80B, Headlights, Front fog light: Removal - Refitting, 80B-28)
- front fog lights bulbs (see 80B, Headlights, Front fog light bulb: Removal - Refitting, 80B-27)
DISCHARGE LAMPS
- xenon bulbs (see 80B, Headlights, Headlight bulb: Removal - Refitting, 80B-17)
- a headlight beam adjustment front sensor (see 80B, Headlights, Headlight beam adjustment front sensor: Removal - Refitting, 80B-35)
- a headlight beam adjustment rear sensor (see 80B, Headlights, Headlight beam adjustment rear sensor: Removal - Refitting, 80B-37)
- xenon headlights high voltage unit (see 80B, Headlights, Xenon headlight high voltage unit: Removal - Refitting, 80B-38)
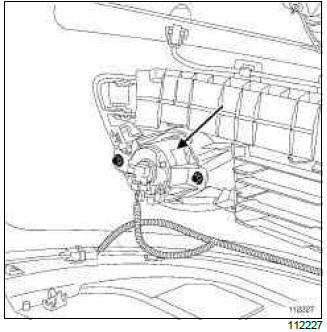
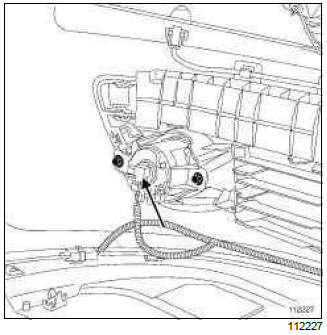
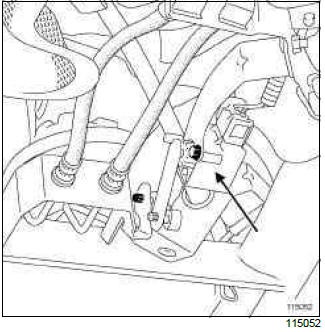
- a front lighting computer (see 80B, Headlights, Front lighting computer: Removal - Refitting, 80B- 40)
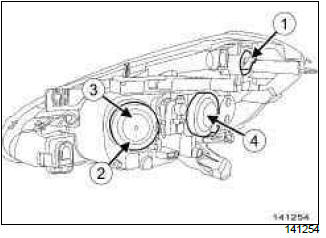
II - POSITION OF THE COMPONENTS
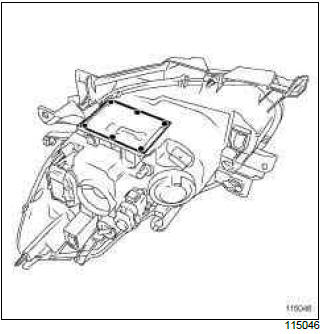
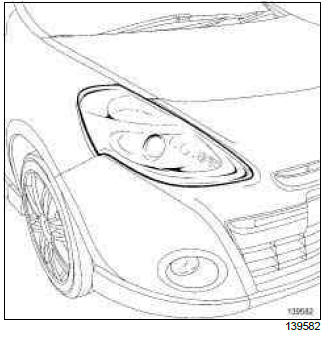
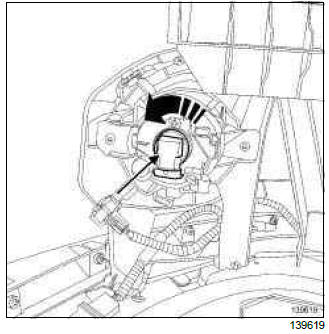
Headlight
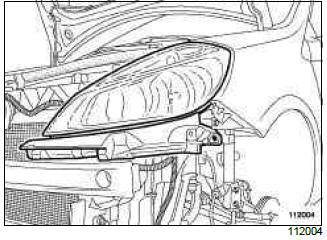
Halogen bulbs

- Direction indicator bulb
- Side light bulbs
- Main beam headlight bulbs
- Additional cornering light bulb
WITHOUT DISCHARGE LAMPS
Halogen bulb (dipped beam headlight)
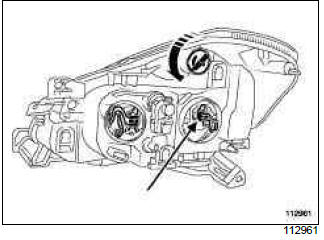
Beam adjustment actuator
Side indicator
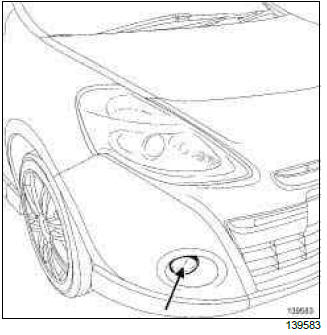
FOG LIGHTS
Front fog light
Front fog light bulb
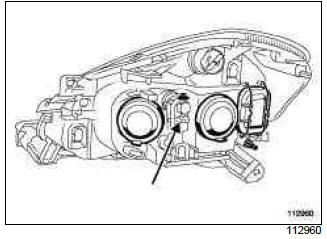
DISCHARGE LAMPS
Xenon bulb (dipped beam headlight)
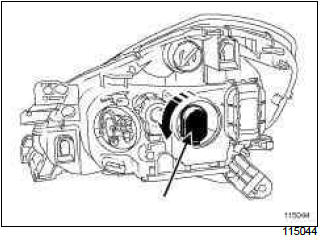
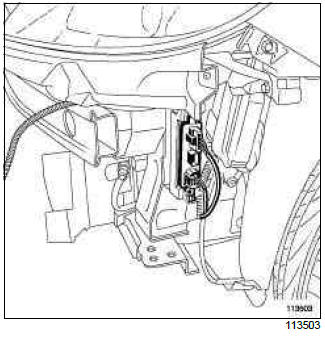
Headlight adjustment front sensor
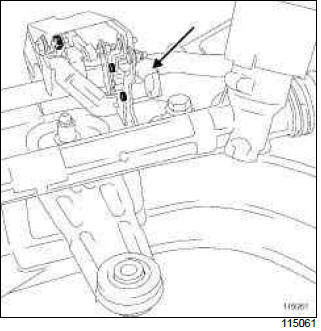
Headlight adjustment rear sensor
Xenon headlight high voltage unit
Front lighting computer
DOCUMENTATION PHASE 2
I - LIST OF COMPONENTS
The front lighting consists of:
- headlights (see 80B, Headlights, Headlight: Removal - Refitting, 80B-7)
- halogen bulbs (see 80B, Headlights, Headlight bulb: Removal - Refitting, 80B-17)
- headlight beam adjustment actuators (see 80B, Headlights, Remote headlight beam adjustment actuator: Removal - Refitting, 80B-31)
- side indicators (see 80B, Headlights, Side indicator: Removal - Refitting, 80B-30)
FOG LIGHTS
- front fog light (see 80B, Headlights, Front fog light: Removal - Refitting, 80B-28)
- front fog lights bulbs (see 80B, Headlights, Front fog light bulb: Removal - Refitting, 80B-27)
II - POSITION OF THE COMPONENTS
Headlight
Halogen bulbs (without additional cornering light)
- Direction indicator bulb
- Side light bulbs
- Main beam headlight bulbs
- Dipped beam headlight bulb
Halogen bulbs (with additional cornering light)
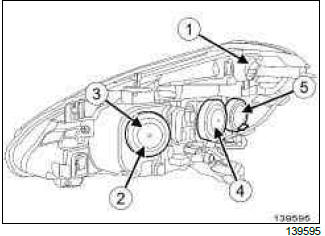
- Direction indicator bulb
- Side light bulbs
- Main beam headlight bulbs
- Dipped beam headlight bulb
- Additional cornering light bulb
Headlight beam adjustment actuator
Side indicator
FOG LIGHTS
Front fog light
Front fog light bulb
READ NEXT:
 Headlight: Removal - Refitting
DISCHARGE LAMPS, and DOCUMENTATION
PHASE 1
IMPORTANT
To prevent eye injuries:
do not look at a xenon bulb when lit (voltage
when lit 20000 V),
do not light a bulb which has not been fitted into
i
Headlight: Adjustment
DOCUMENTATION PHASE 1
ADJUSTMENT
I - PREPARATION OPERATION FOR CHECK
Place the vehicle in a working area equipped with a
two-post lift.
Note:
Check that the lift is on flat, horizontal ground.
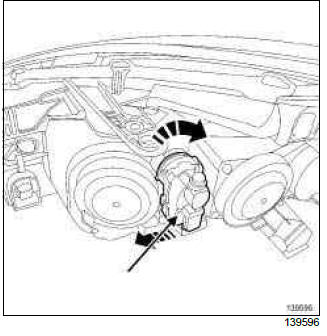
Headlight bulb: Removal - Refitting
DOCUMENTATION PHASE 1
REMOVAL
DISCHARGE LAMPS
IMPORTANT
To prevent eye injuries:
do not look at a xenon bulb when lit (voltage
when lit 20000 V),
do not light a bulb which has not been fitted into
SEE MORE:
Driving
The Renault Clio IV (2014-2019) offers a satisfying driving experience with its nimble handling and responsive performance. Its compact size and maneuverability make it well-suited for urban driving and tight parking spaces. The precise steering and suspension tuning provide a balanced and confident
Your comfort
The Renault Clio IV (2014-2019) is designed with your comfort in mind. It features a well-crafted interior with quality materials and thoughtful ergonomics. The seats offer excellent support and adjustability, providing a comfortable driving experience. The cabin is designed to minimize noise and vi
