Renault Clio: Front side member: General description
IMPORTANT
Use a repair bench to ensure the positioning of the points and the geometry of the axle assemblies.
Note: The information contained in the following describes the general repair procedure for all vehicles having the same design for this part.
Before reading the following general information, make sure that there are no special notes associated with the vehicle. These special notes are specified if necessary in other parts of the sub-section dealing with the component.
Note: For a detailed description of a particular connection, see MR 400.
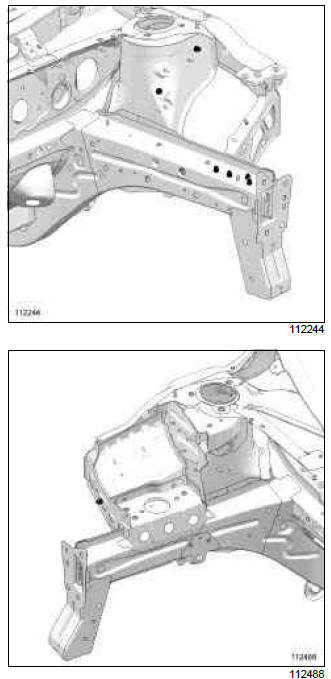
I - DESIGN OF THE STRUCTURAL COMPONENT
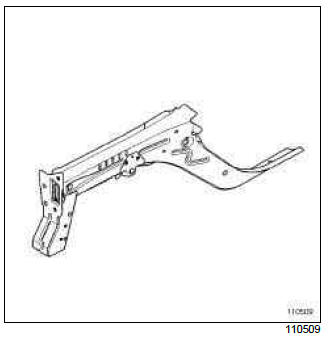
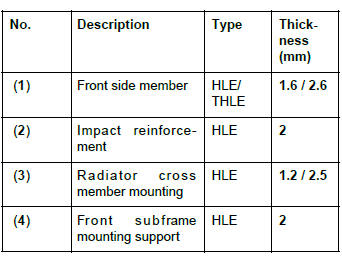
The special feature of this type of part is that it combines the functions of front section and rear section of the front side member and that it is made of two different kinds of panels of different thicknesses assembled by laser butt welding.
II - AREA TO BE CUT FOR PARTIAL REPLACEMENT
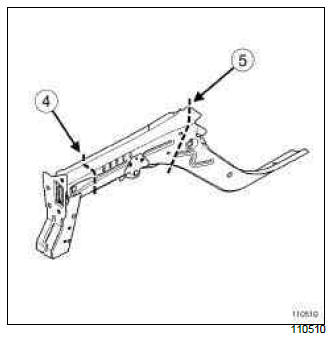
1 - Cut 1:
This line shows the centre of the area in which it is possible to carry out a partial replacement.
This operation allows you to access the inside of the hollow section of the structural element to straighten it.
Note: For the partial replacement of parts constituting a single structural component, it is essential to stagger the welds of each of the components.
In this case, the side member weld line must be staggered from that of its closure panel.
2 - Cut 2:
The cut is made along the butt weld.
III - ASSEMBLY METHOD FOR A PARTIAL REPLACEMENT
Only the connections which are specific to the partial replacement by cutting are indicated.
WARNING
If the mating faces of the parts to be welded are not accessible, make EGW plug welds to replace the original resistance welds (see MR 400).
If there are other issues regarding access to mating faces, the various replacement options are described in the basic instructions for structural bodywork repair (see MR 400).
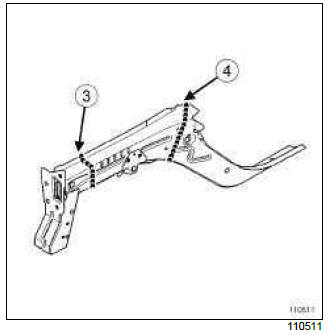
Lines (3) and (4) on the diagram show a butt weld by continuous EGW welding.
Weld (4) along the butt weld line.
Front side member: Description
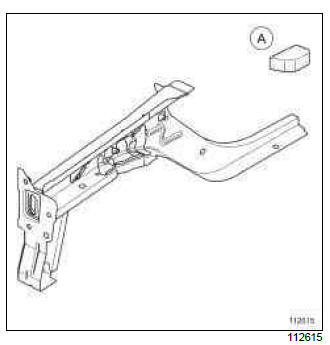
To replace this part, order the front side member expanding insert (A).
The options for replacing this part are as follows:
- partial replacement of front end section,
- partial replacement of the front section.
IMPORTANT
The straightening bench must be used.
I - COMPOSITION OF THE SPARE PART
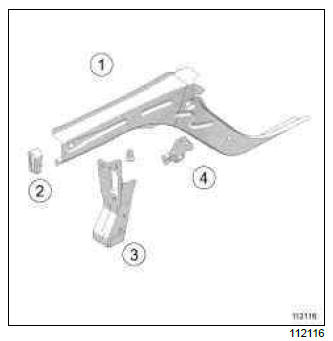
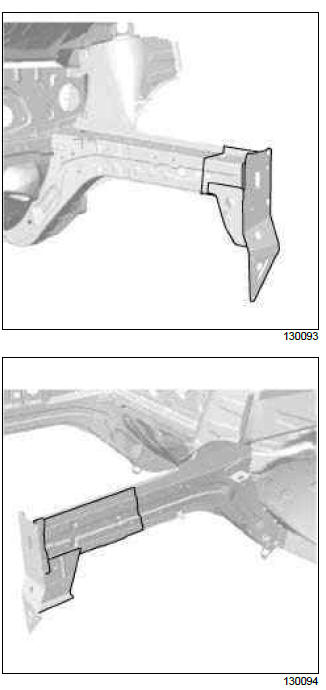
II - PART FITTED
1 - Partial replacement of front end section (right-hand side)
WARNING
Position this part correctly; its position is determined by the position of the inner reinforcements.
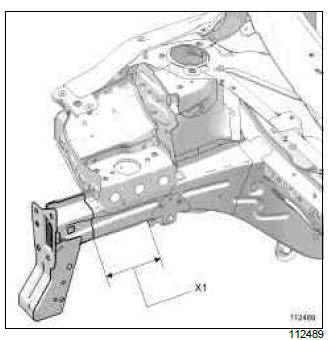
(X1) = 180 mm
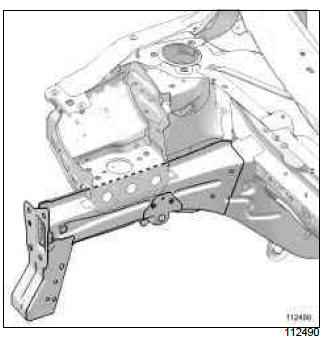
2 - Partial replacement of the front section
WARNING
The cut is made along the line of the original butt weld.
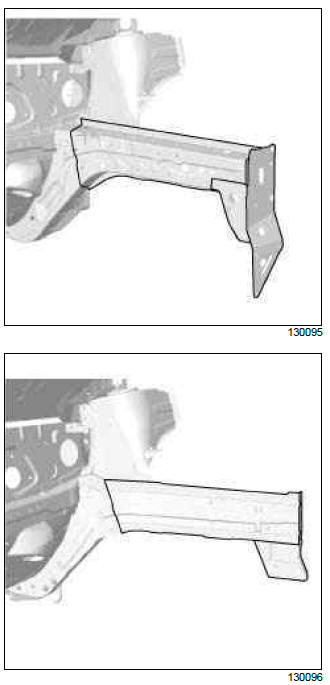
3 - Partial replacement of front end section (left-hand side)
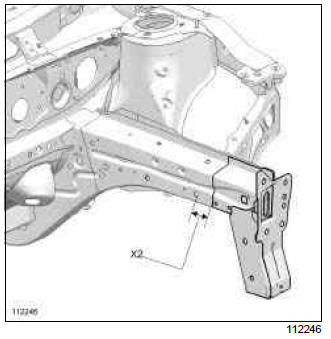
(X2) = 60 mm
WARNING
Position this part correctly; its position is determined by the position of the inner reinforcements.
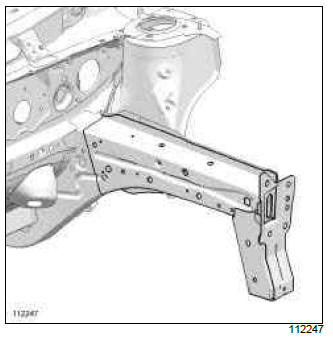
4 - Partial replacement of the front section
WARNING
The cut is made along the line of the original butt weld.
III - POSITIONING OF LOCAL ELECTRICAL EARTHS
WARNING
- To avoid damaging the vehicle's electrical and electronic components, be sure to disconnect the earths of any wiring near the weld zone.
- The welding machine earth must be placed as close as possible to the weld zone.
READ NEXT:
 Front side member, centre section: General description
IMPORTANT
Use a repair bench to ensure the positioning of the
points and the geometry of the axle assemblies.
Note:
The information contained in the following
describes the general repair procedure fo
Front side member closure panel, front section:
General description
IMPORTANT
Use a repair bench to ensure the positioning of the
points and the geometry of the axle assemblies.
Note:
The information contained in the following
describes the general repair procedure fo
Radiator cross member mounting: General description
WARNING
The information contained in the following
describes the general repair procedure for all vehicles
having the same design for this part.
Before reading the following general information,
make
SEE MORE:
Driving
The Renault Clio IV (2014-2019) offers a satisfying driving experience with its nimble handling and responsive performance. Its compact size and maneuverability make it well-suited for urban driving and tight parking spaces. The precise steering and suspension tuning provide a balanced and confident
Your comfort
The Renault Clio IV (2014-2019) is designed with your comfort in mind. It features a well-crafted interior with quality materials and thoughtful ergonomics. The seats offer excellent support and adjustability, providing a comfortable driving experience. The cabin is designed to minimize noise and vi
