Renault Clio: Sequential gearbox gear lever: Removal - Refitting
Renault Clio III (2005-2013) Service Manual / Transmission / Sequential Gearbox / Sequential gearbox gear lever: Removal - Refitting
K9K, and JA5
REMOVAL
I - REMOVAL PREPARATION OPERATION
- Disconnect the battery (see Battery: Removal - Refitting) (MR 392, 80A, Battery).
II - OPERATION FOR REMOVAL OF PART CONCERNED
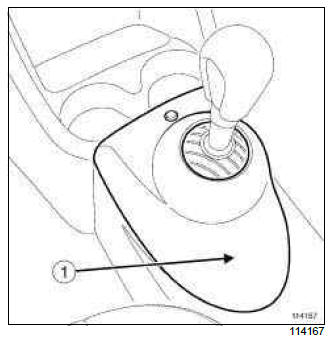
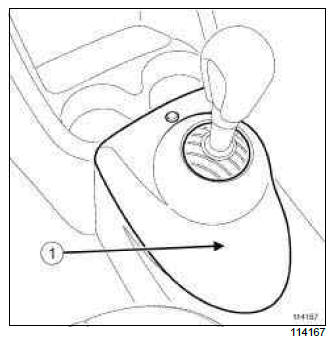
- Remove the gear lever cover (1) using a screwdriver.
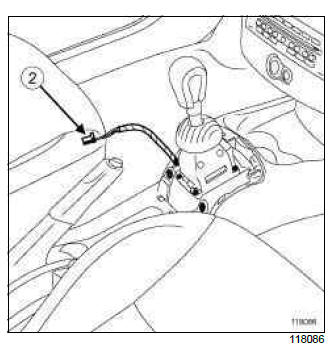
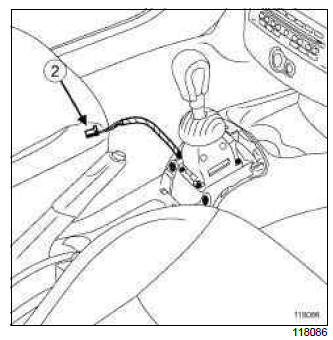
- Disconnect the gear lever lighting connector (2).

- Remove:
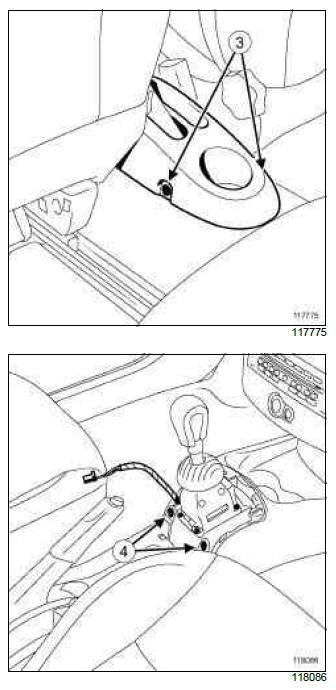
- the rear bolts (3) from the centre console,
- the front bolts (4) from the centre console.
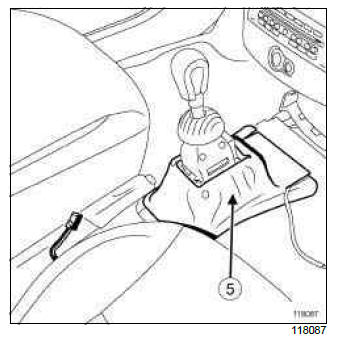
- Remove the soundproofing (5) from the gear lever.
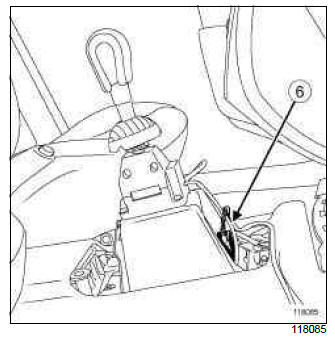
- Detach the connector (6) from the gear lever.
- Disconnect the gear lever connector.
- Remove:
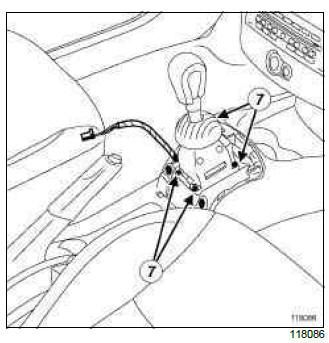
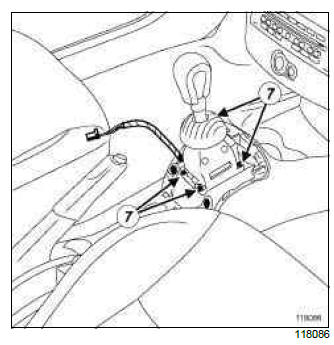
- the bolts (7) from the gear lever base plate,
- the gear lever.
REFITTING
I - REFITTING OPERATION FOR PART CONCERNED
- Refit:
- the gear lever,
- the gear lever base plate bolts,
- Connect the gear lever connector.
- Attach the gear lever connector.
- Refit:
- the gear lever soundproofing,
- the front bolts to the centre console,
- the rear bolts to the centre console.
- Connect the gear lever lighting connector.
- Refit the gear lever cover.
II - FINAL OPERATION.
- Connect the battery (see Battery: Removal - Refitting) (MR 392, 80A, Battery).
- Carry out the necessary programming (see Fault finding - Replacement of components) (MR 394, 21B, Sequential gearbox).
D4F, and JA3
REMOVAL
I - REMOVAL PREPARATION OPERATION
- Disconnect the battery (see Battery: Removal - Refitting) (MR 392, 80A, Battery).
II - OPERATION FOR REMOVAL OF PART CONCERNED
- Remove the gear lever cover (1) using a screwdriver.
- Disconnect the gear lever lighting connector (2).
- Remove:
- the rear bolts (3) from the centre console,
- the front bolts (4) from the centre console.
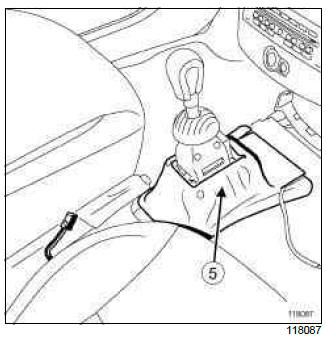
- Remove the soundproofing (5) from the gear lever.
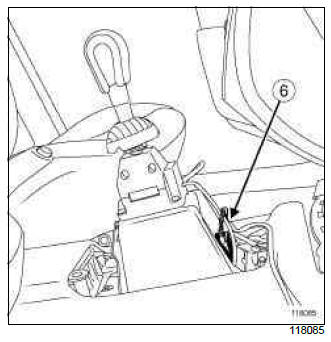
- Detach the connector (6) from the gear lever.
- Disconnect the gear lever connector.
- Remove:
- the bolts (7) from the gear lever base plate,
- the gear lever.
REFITTING
I - REFITTING OPERATION FOR PART CONCERNED
- Refit:
- the gear lever,
- the gear lever base plate bolts,
- Connect the gear lever connector.
- Attach the gear lever connector.
- Refit:
- the gear lever soundproofing,
- the front bolts to the centre console,
- the rear bolts to the centre console.
- Connect the gear lever lighting connector.
- Refit the gear lever cover.
II - FINAL OPERATION.
- Connect the battery (see Battery: Removal - Refitting) (MR 392, 80A, Battery).
- Carry out the necessary programming (see Fault finding - Replacement of components) (MR 394, 21B, Sequential gearbox).
READ NEXT:
 Sequential gearbox oil: Specifications
5-SPEED MANUAL SEQUENTIAL GEARBOX
I - GEARBOX TYPE/OIL TYPE CORRELATIONS:
II - STANDARDS AND PART NUMBERS OF THE
VARIOUS RECOMMENDED OILS:
Sequential gearbox: Bleeding
I - PROCEDURE
WARNING
Even
Automatic gearbox: Identification
DP0
The automatic transmission series number can be
found in two places: on a label on the hydraulic distributor
cover (1) and etched onto the outer casing (2) on
the wheel side.
Automatic gearbox oi
SEE MORE:
Driving
The Renault Clio IV (2014-2019) offers a satisfying driving experience with its nimble handling and responsive performance. Its compact size and maneuverability make it well-suited for urban driving and tight parking spaces. The precise steering and suspension tuning provide a balanced and confident
Your comfort
The Renault Clio IV (2014-2019) is designed with your comfort in mind. It features a well-crafted interior with quality materials and thoughtful ergonomics. The seats offer excellent support and adjustability, providing a comfortable driving experience. The cabin is designed to minimize noise and vi
© 2016-2026 Copyright Renault Clio Owners Club - 0.0043
