Renault Clio: Xenon headlight high voltage unit: Removal - Refitting

REMOVAL
I - REMOVAL PREPARATION OPERATION
IMPORTANT
- To prevent eye injuries, do not look at a xenon bulb when lit (lighting voltage of 20,000 V).
- Wait until the " computer-power unit " assemblies have cooled before removing them.
- It is forbidden to switch on a xenon bulb if the bulb is not fitted in the headlight (risk of serious eye injury).
- Disconnect the battery (see 80A, Battery, Battery: Removal - Refitting, 80A-1).
- Remove the headlight (see Xenon headlight: Removal - Refitting).
II - OPERATION FOR REMOVAL OF PART CONCERNED
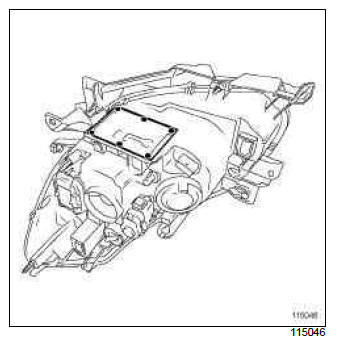
- Remove the mounting bolts from the high voltage unit.
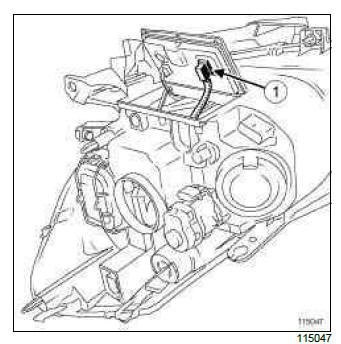
- Disconnect the connector (1).
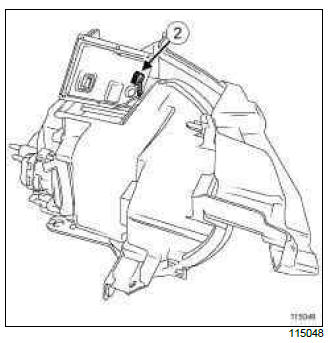
Note: Locking the connector is a delicate operation.
- Disconnect the connector with caution (2).
- Remove the high voltage unit.
REFITTING
I - REFITTING PREPARATION OPERATION
WARNING
The seal must be replaced when replacing the high voltage unit.
II - REFITTING OPERATION FOR PART CONCERNED
- Connect the connectors.
Note: Check that the connectors are locked correctly.
- Refit the high voltage unit with a new seal.
- Tighten to torque the high voltage unit mounting bolts (12 Nm).
III - FINAL OPERATION
- Refit the headlight (see Xenon headlight: Removal - Refitting).
- Connect the battery (see 80A, Battery, Battery: Removal - Refitting, 80A-1).
Front lighting computer: Removal - Refitting
DISCHARGE LAMPS

REMOVAL
I - REMOVAL PREPARATION OPERATION
- Disconnect the battery (see 80A, Battery, Battery: Removal - Refitting, 80A-1).
- Remove the front bumper (see Front bumper: Removal - Refitting) (MR 393, 55A, Exterior protection).
Note: The computer controls the additional cornering lights and the xenon bulbs (depending on the vehicle equipment level).
II - OPERATION FOR REMOVAL OF PART CONCERNED
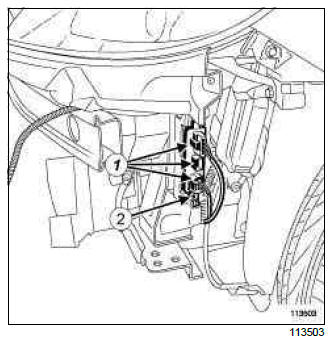
- Disconnect the connectors (1).
- Remove:
- the bolt (2),
- the computer.
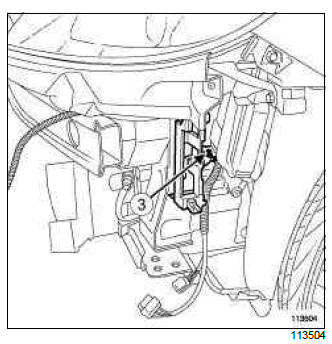
- Remove the nut (3) from the computer mounting.
- Withdraw the mounting.
REFITTING
I - REFITTING OPERATION FOR PART CONCERNED
- Fit the computer support.
- Refit the computer.
- Connect the connectors.
II - FINAL OPERATION.
- Refit the front bumper (see Front bumper: Removal - Refitting) (MR 393, 55A, Exterior protection).
- Connect the battery (see 80A, Battery, Battery: Removal - Refitting, 80A-1).
- If replacing the discharge bulb computer, carry out the necessary operations using the Diagnostic tool (see Fault finding - Replacement of components) (MR 394, 80B, Headlights).
READ NEXT:
 Rear lighting: List and location of components
I - LIST OF COMPONENTS
The rear lighting is composed of:
the rear lights on the wing (see 81A, Rear lighting,
Rear wing light: Removal - Refitting, 81A-5)
rear light bulbs (see 81A, Rear lighting,
 Rear wing light: Removal - Refitting
B85 or C85 or S85
REMOVAL
OPERATION FOR REMOVAL OF PART
CONCERNED
Open the luggage compartment.
Remove the bolts from the rear wing light (1).
Remove the rear wing light.
Disconnect the connec
SEE MORE:
 Driver correction devices and aids
Depending on the vehicle, this is composed
of:
anti-lock braking system (ABS);
electronic stability program (ESC)
with understeer control and traction
control;
emergency brake assist;
hill start assistance.
These functions are an additional
aid in the event of
critical
 Braking circuit: Bleed
IMPORTANT
To avoid all risk of damage to the systems, apply
the safety and cleanliness instructions and operation
recommendations before carrying out any
repair (see 30A, General information, Brake circuit:
Precautions for the repair, 30A-2).
This procedure must be applied after one of the followin
© 2016-2026 Copyright Renault Clio Owners Club

