Renault Clio: Air filter unit: Removal - Refitting
D4F, and 740 or 742 or 764
REMOVAL
I - REMOVAL PREPARATION OPERATION

- Apply pressure to (1).
- Pull at (2).
- Remove the air breather sleeve (3) from the front end panel.
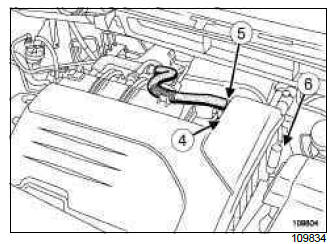
- Undo the clip (4) mounting the air filter unit to the motorised throttle valve.
- Disconnect the oil vapour rebreathing hoses at (5).
- Unclip the gearbox breather at (6).
II - OPERATION FOR REMOVAL OF PART CONCERNED
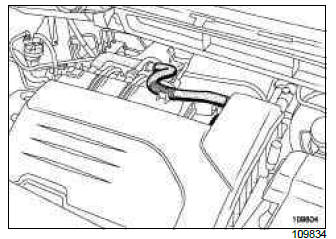
- Remove the air filter unit:
- lift out the air filter unit to remove it from the rocker cover,
- push the air filter unit towards the right to remove it from the motorised throttle valve.
REFITTING
I - REFITTING OPERATION FOR PART CONCERNED
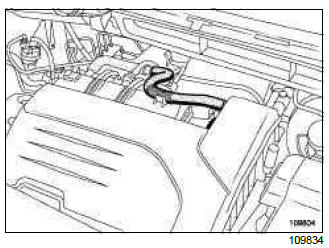
- Refitting the air filter unit:
- push the air filter unit towards the left to attach it to the motorised throttle valve,
- lower the air filter unit to attach it to the rocker cover.
II - FINAL OPERATION.
- Retighten the clip securing the air filter unit onto the motorised throttle valve.
- Connect the oil vapour rebreathing hoses.
- Clip the gearbox breather into place.
- Connect the breather sleeve onto the front end panel.
K4J or K4M or K9K or M4R - D4F, and 784 or 786

REMOVAL
I - REMOVAL PREPARATION OPERATION
- Remove the battery (see Battery: Removal - Refitting) (80A, Battery).
K4J or K9K or M4R - D4F, and 784 - K4M, and 800 or 801 or 804
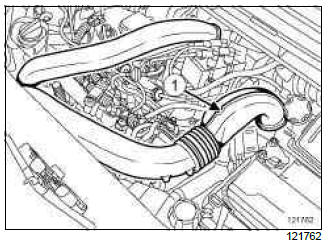
- Disconnect the air inlet pipe (1) from the air filter unit.
K4M, and 862
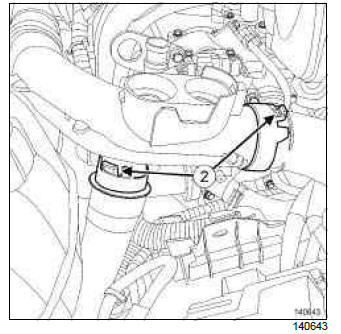
- Unclip the air inlet pipe from the air filter unit at (2).
- Move aside the air inlet pipe from the air filter unit.
K4J or K4M or K9K or M4R
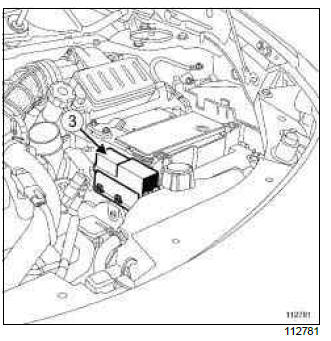
- Remove the relay unit (3) from the thermal protection tray.
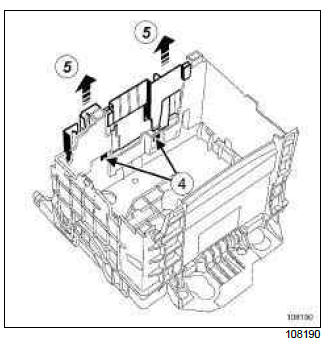
- Unclip the power feed fuse board support at (4).
- Move aside the power feed fuse board support at (5).
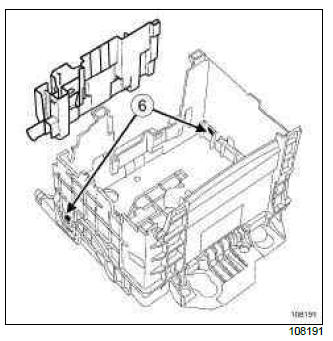
- Unclip the thermal protection shield at (6).
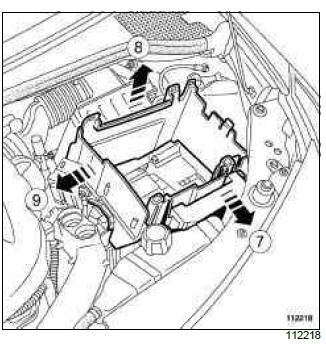
- Hold the power feed fuse board mounting aside at (7).
- Remove the thermal protection tray at (8) and (9).
K4J or K9K or M4R - D4F, and 784 - K4M, and 800 or 801 or 804
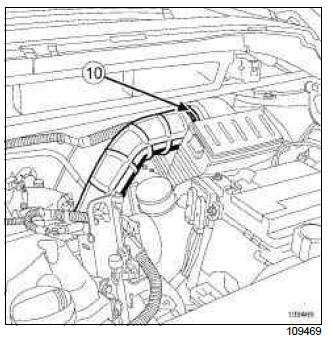
- Loosen the air inlet duct clip (10).
- Disconnect the air inlet duct.
K4M, and 862
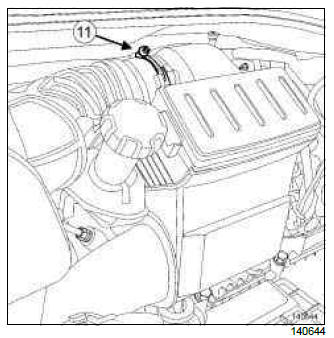
- Loosen the air inlet duct clip (11).
- Disconnect the pipe from the air inlet duct.
K9K or M4R
- Disconnect the air flowmeter connector.
II - OPERATION FOR REMOVAL OF PART CONCERNED
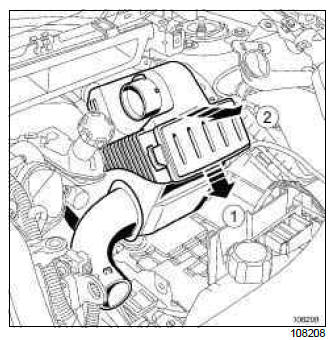
- Remove the air filter box in the direction of the arrows (1) and (2).
REFITTING
I - REFITTING OPERATION FOR PART CONCERNED
- Refit the air filter unit.
II - FINAL OPERATION
K9K or M4R
- Connect the air flowmeter connector.
- Connect the air inlet duct.
- Torque tighten the air inlet duct clip (6 N.m).
- Refit the thermal protection shield.
- Clip on the thermal protection shield.
- Refit the power feed fuse board mounting.
- Clip on the power feed fuse board support.
K4J or K4M or K9K or M4R
- Refit the relay unit on the thermal protection tray.
- Connect the air inlet pipe to the air filter unit.
- Refit the battery (see Battery: Removal - Refitting) (80A, Battery).
F4R
REMOVAL
I - REFITTING PREPARATIONS OPERATION
- Remove the battery (see Battery: Removal - Refitting) ( (MR 392, 80A, Battery).
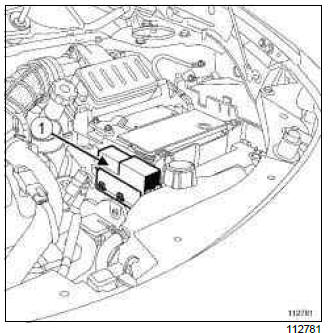
- Unclip the relay unit from the thermal protection shield (1).
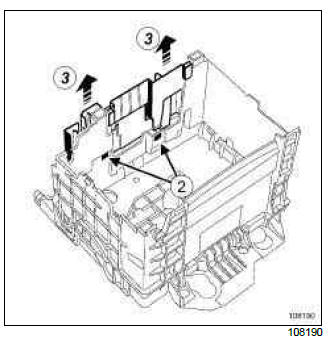
- Unclip the power feed fuse board support at (2).
- Move aside the power feed fuse board support at (3)
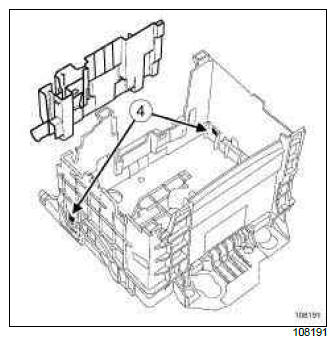
- Unclip the thermal protection shield at (4).
- Hold the power feed fuse board support aside.
- Remove the thermal protection shield.

- Remove:
- the air inlet duct (A) :
- unclip it from the front end panel (1),
- turn it and disconnect it (2).
- the air inlet pipe (B) :
- air resonator side,
- air filter unit side.
- the air inlet duct (A) :
II - OPERATION FOR REMOVAL OF PART CONCERNED
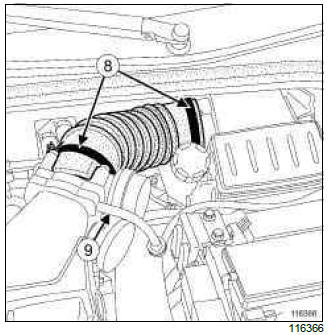
- Unfasten the clips (8).
- Remove the air inlet pipe between the throttle valve and the air filter box.
- Disconnect the vacuum pipe (9) from the throttle valve.
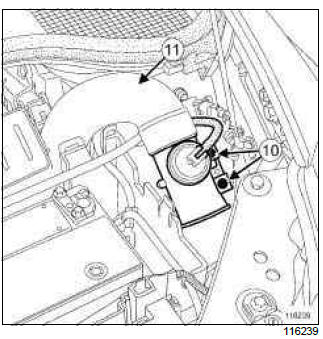
- Remove the mounting nuts (10) from the soundproofing unit.
- Disconnect the air inlet pipe (11).
- Move aside the " soundproofing unit - secondary pipe " assembly.
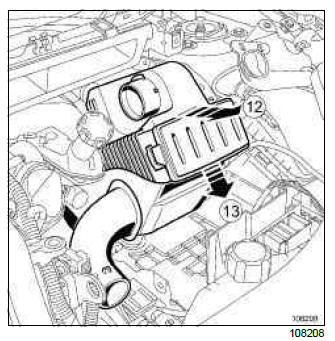
- Remove the air filter box in the direction of the arrows (12) and (13).
REFITTING
I - REFITTING OPERATION FOR PART CONCERNED
- Refit the air filter box.
- Fit the soundproofing unit in place.
- Refit the soundproofing unit mounting nuts.
- Connect the vacuum pipe to the throttle valve.
- Refit the air inlet pipe between the throttle valve and the air filter box.
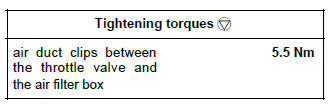
- Torque tighten the air duct clips between the throttle valve and the air filter box (5.5 Nm).
II - FINAL OPERATION.
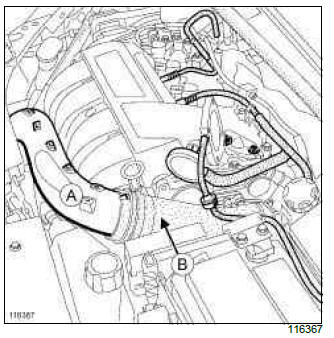
- Refit:
- the air inlet pipe (B),
- the air filter box,
- the air resonator.
- the air inlet pipe (A).
- Fit the thermal protection shield in place.
- Clip on the thermal protection shield.
- Fit the power feed fuse board support in place.
- Clip on:
- the power feed fuse board support to the thermal protection shield,
- the relay unit to the thermal protection shield.
- Refit the battery (see Battery: Removal - Refitting) (MR 392, 80A, Battery).

