Renault Clio: Differential output seal: Removal - Refitting
JH3 or JR5

REMOVAL
I - REMOVAL PREPARATION OPERATION
- Position the vehicle on a two-post lift (see Vehicle: Towing and lifting) (MR 392, 02A, Lifting equipment).
- Disconnect the battery (see Battery: Removal - Refitting) (MR 392, 80A, Battery).
- Remove:
- the front wheel from the side in question (see Wheel: Removal - Refitting) (MR 392, 35A, Wheels and tyres),
- the front brake pads from the side in question (see Front brake pads: Removal - Refitting) (MR 392, 31A, Front axle components),
- the engine undertray mounting bolts,
- the engine undertray.
- Drain the gearbox (see 21A, Manual gearbox, Manual gearbox oils: Draining - Filling, 21A-3).
- Remove the driveshaft from the side in question (see 29A, Driveshafts, Front left-hand driveshaft: Removal - Refitting, 29A-2) or (see 29A, Driveshafts, Front left-hand driveshaft: Removal - Refitting, 29A-2)
II - OPERATION FOR REMOVAL OF PART CONCERNED
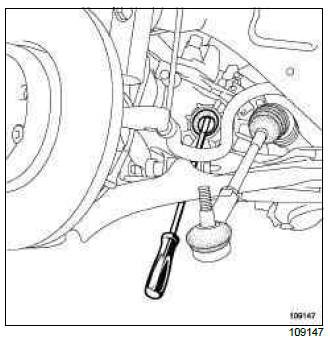
- Tap the base of the lip seal using a pin punch and a small hammer to release it and cause it to turn in its housing.
- Withdraw the lip seal using a large screwdriver, taking care not to damage the differential housing.
REFITTING
I - REFITTING OPERATION FOR PART CONCERNED
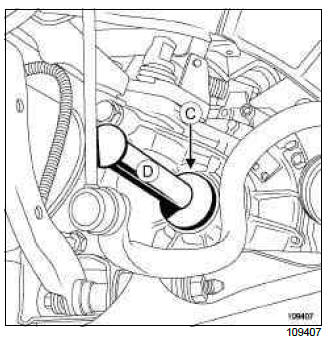
- Refit the seal using the (Bvi. 1666) (C), suffix A on the right-hand side, and suffix B on the left-hand side.
- Strike the (Bvi. 1666) (C) with a copper hammer (D) to fully seat the differential output seal
II - FINAL OPERATION.
- Position the driveshaft in relation to the sunwheel.
- Refit the driveshaft on the side in question (see 29A, Driveshafts, Front left-hand driveshaft: Removal - Refitting, 29A-2) or (see 29A, Driveshafts, Front left-hand driveshaft: Removal - Refitting, 29A-2)
- Fill the gearbox (see 21A, Manual gearbox, Manual gearbox oils: Draining - Filling, 21A-3).
- Refit:
- the engine undertray,
- the engine undertray mounting bolts,
- the front brake pads from the side in question (see Front brake pads: Removal - Refitting) (MR 392, 31A, Front axle components),
- the front wheel on the side in question (see Wheel: Removal - Refitting) (MR 392, 35A, Wheels and tyres),
- Connect the battery (see Battery: Removal - Refitting) (MR 392, 80A, Battery).
TL4
REMOVAL
I - REMOVAL PREPARATION OPERATION
- Position the vehicle on a two-post lift (see Vehicle: Towing and lifting) (02A, Lifting equipment).
- Remove:
- the engine undertray bolts,
- the engine undertray.
- Drain the gearbox (see 21A, Manual gearbox, Manual gearbox oils: Draining - Filling, 21A-3).
1 - When replacing the differential output seal on the left-hand side
- Remove:
- the front left-hand wheel (see Wheel: Removal - Refitting) (35A, Wheels and tyres),
- the front left-hand driveshaft (see 29A, Driveshafts, Front left-hand driveshaft: Removal - Refitting, 29A-2).
2 - When replacing the differential output seal on the right-hand side
- Remove:
- the front right-hand wheel (see Wheel: Removal - Refitting) (35A, Wheels and tyres),
- the front right-hand wheel driveshaft (see 29A, Driveshafts, Front right-hand driveshaft: Removal - Refitting, 29A-9).
II - REMOVAL OPERATION FOR THE DIFFERENTIAL OUTPUT SEAL
Left-hand differential output seal
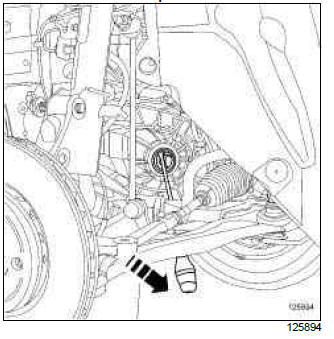
Right-hand differential output seal
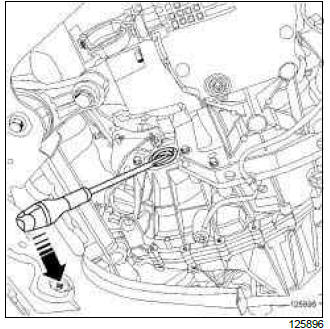
- Tap the base of the lip seal using a roll pin punch and a small hammer to release it and make it turn in its housing.
- Remove the lip seal using a large screwdriver, taking care not to damage the differential housing.
REFITTING
I - REFITTING PREPARATION OPERATION
- parts always to be replaced: Differential output seal.
II - REFITTING OPERATION FOR THE DIFFERENTIAL OUTPUT SEAL
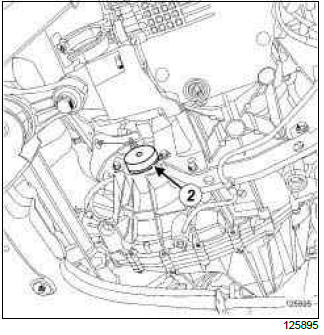
Refitting the right-hand side differential output seal
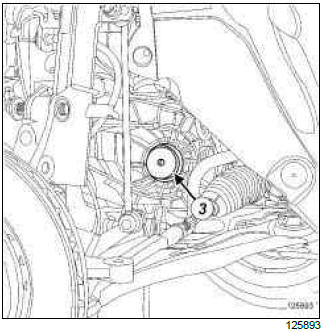
Refitting the left-hand side differential output seal.
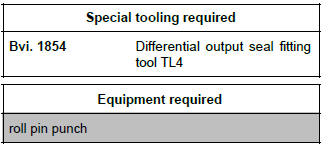
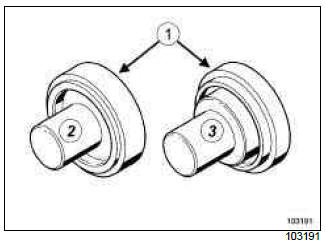
- The new differential output seal is refitted using the
tool (Bvi. 1854) (1) consisting of:
- a mandrel (2) for the right-hand side,
- a mandrel (3) for the left-hand side.
- Oil the internal surface of the new differential output seal.
- Fit:
- the new differential output seal on the gearbox,
- the mandrel (2) or (3) of the tool (Bvi. 1854) on the new differential output seal.
- Tap the tool (1) with a copper hammer to fit the new differential output seal fully.
III - FINAL OPERATION
1 - Refitting the left-hand driveshaft
- Refit:
- the front left-hand driveshaft (see 29A, Driveshafts, Front left-hand driveshaft: Removal - Refitting, 29A-2),
- the front left-hand wheel (see Wheel: Removal - Refitting) (35A, Wheels and tyres).
2 - Refitting the right-hand driveshaft
- Refit:
- the front right-hand driveshaft (see 29A, Driveshafts, Front right-hand driveshaft: Removal - Refitting, 29A-9),
- the front right-hand wheel (see Wheel: Removal - Refitting) (35A, Wheels and tyres).
3 - Final operation
- Fill the gearbox and check the level (see 21A, Manual gearbox, Manual gearbox oils: Draining - Filling, 21A-3).
- Refit the engine undertray.

