Renault Clio: Front left-hand driveshaft gaiter, gearbox side: Removal - Refitting
DP0 or JH3 or JR5 or TL4
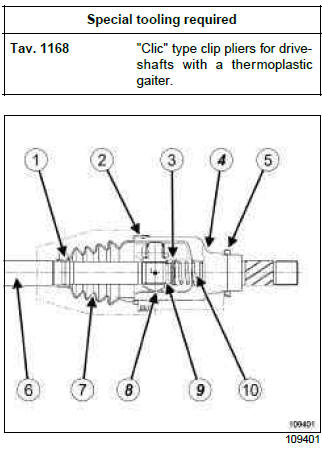
- Tightening clip
- Tightening ring
- Cup
- Driveshaft yoke sleeve
- Deflector
- Propeller shaft
- RC gaiter
- Spider
- Lock ring
- Spring
REMOVAL
I - REMOVAL PREPARATION OPERATION
- Position the vehicle on a two-post lift (see Vehicle: Towing and lifting) (MR 392, 02A, Lifting equipment).
- Disconnect the battery (see Battery: Removal - Refitting) (MR 392, 80A, Battery).
- Remove the front left-hand driveshaft (see 29A, Driveshafts, Front left-hand driveshaft: Removal - Refitting, 29A-2).
II - OPERATION FOR REMOVAL OF PART CONCERNED
- Cut the clip (1) and tightening ring (2) using cutting pliers or a metal saw, taking care not to damage the driveshaft yoke sleeve.
- Push back the gaiter (7) to release the driveshaft yoke sleeve.
- Remove as much grease as possible.
WARNING
Never use thinners to clean the components.
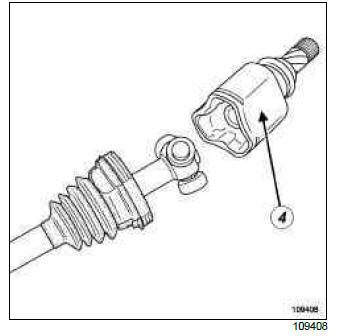
- Remove the driveshaft yoke sleeve (4).
Note:
- since the driveshaft yoke sleeve does not have a stop tab, it can be removed without being forced.
- Do not remove the rollers from their respective bushings as the rollers and needles are matched and should never be interchanged.
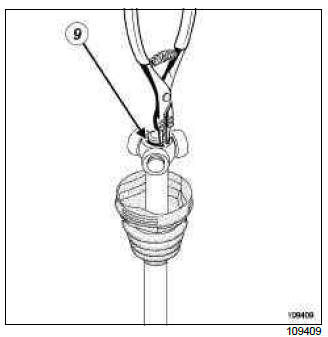
- Remove the lock ring (9).

Note: Mark the position of the spider before extracting it.
- Extract the spider (8), using a press and a releasing type extractor.
- Remove the propeller shaft gaiter.
REFITTING
I - REFITTING OPERATION FOR PART CONCERNED
- Fit the small tightening clip (1) to the propeller shaft.
- Slightly lubricate the driveshaft to facilitate fitting gaiter (7).
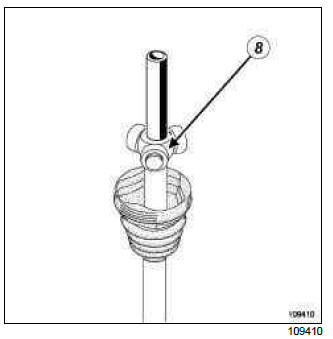
- Refit the spider (8) in the position marked during removal.
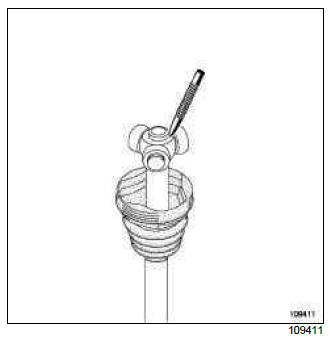
- Refit the lock ring (9).
- Lubricate the driveshaft yoke sleeve (4).
- Fit the driveshaft yoke sleeve (4) onto the spider.
- Divide the quantity of grease between the gaiter (7) and the driveshaft yoke sleeve (4).
Note: Be sure to observe the prescribed quantity of lubricant.
- Position the lips of the gaiter (7) in the grooves of the driveshaft yoke sleeve and the propeller shaft.
- Insert a smooth rod with a rounded end between the gaiter and propeller shaft to control the amount of air inside the joint.
- Fit the clips, tightening with the (Tav. 1168).
II - FINAL OPERATION.
- Refit the front left-hand driveshaft (see 29A, Driveshafts, Front left-hand driveshaft: Removal - Refitting, 29A-2).
- Connect the battery (see Battery: Removal - Refitting) (MR 392, 80A, Battery).
READ NEXT:
 Chassis
The Renault Clio IV (2014-2019) features a well-engineered chassis that contributes to its handling, stability, and overall driving dynamics. The chassis is designed to provide a balanced and controll
 Brake circuit: Operating diagram
" X " braking system with load-sensitive
compensator
IMPORTANT
This is a diagram of the general principle, do not
use it as a reference for take-off points or circuit
allocation. When replacing compo
SEE MORE:
 Rear brake calliper: Removal - Refitting
Note:
The callipers supplied as replacement parts are
pre-filled.
REMOVAL
I - REMOVAL PREPARATION OPERATION
Position the vehicle on a two-post lift (see Vehicle: Towing and
lifting).
WARNING
Prepare for brake fluid outflow, to prevent damage
to the mechanical parts and bodywork
around the brak
 Hydraulic unit - front right-hand calliper brake pipe: Removal - Refitting
LEFT-HAND DRIVE
REMOVAL
I - REMOVAL PREPARATION OPERATION
Put the vehicle on a two-post lift (see Vehicle: Towing and lifting).
Drain the coolant circuit using refrigerant charging
station.
Fit a pedal press on the brake pedal.
Disconnect the battery (see Battery: Removal - Refitting).
Remov
© 2016-2026 Copyright Renault Clio Owners Club

