Renault Clio: Engagement sensor: Removal - Refitting
Renault Clio III (2005-2013) Service Manual / Transmission / Sequential Gearbox / Engagement sensor: Removal - Refitting
K9K, and JA5
REMOVAL
I - REMOVAL PREPARATION OPERATION
- Position the vehicle on a two-post lift (see Vehicle: Towing and lifting) (MR 392, 02A, Lifting equipment).
- Disconnect the battery (see Battery: Removal - Refitting) (MR 392, 80A, Battery).
- Remove the front left-hand wheel (see Wheel: Removal - Refitting) (MR 392, 35A, Wheels and tyres).
II - OPERATION FOR REMOVAL OF PART CONCERNED

- Disconnect the engagement sensor connector.
- Remove:
- the engagement sensor bolts,
- the engagement sensor (1).
REFITTING
I - REFITTING OPERATION FOR PART CONCERNED
- Refit:
- the engagement sensor,
- the engagement sensor bolts.
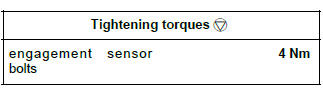
- Tighten to torque the engagement sensor bolts (4 Nm).
- Connect the engagement sensor connector.
II - FINAL OPERATION.
- Connect the battery (see Battery: Removal - Refitting) (MR 392, 80A, Battery).
- Refit the front left-hand wheel (see Wheel: Removal - Refitting) (MR 392, 35A, Wheels and tyres).
- Carry out the necessary programming (see Fault finding - Replacement of components) (MR 394, 21B, Sequential gearbox).
WARNING
After the accumulator has been fully filled (15 seconds after the ignition has been switched on): the oil is at the MIN mark.
D4F, and JA3
REMOVAL
I - REMOVAL PREPARATION OPERATION
- Position the vehicle on a two-post lift (see Vehicle: Towing and lifting) (MR 392, 02A, Lifting equipment).
- Disconnect the battery (see Battery: Removal - Refitting) (MR 392, 80A, Battery).
- Remove the front left-hand wheel (see Wheel: Removal - Refitting) (MR 392, 35A, Wheels and tyres).
II - OPERATION FOR REMOVAL OF PART CONCERNED

- Disconnect the engagement sensor connector.
- Remove:
- the engagement sensor bolts,
- the engagement sensor (1).
REFITTING
I - REFITTING OPERATION FOR PART CONCERNED
- Refit:
- the engagement sensor,
- the engagement sensor bolts.
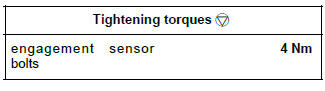
- Tighten to torque the engagement sensor bolts (4 Nm).
- Connect the engagement sensor connector.
II - FINAL OPERATION.
- Connect the battery (see Battery: Removal - Refitting) (MR 392, 80A, Battery).
- Refit the front left-hand wheel (see Wheel: Removal - Refitting) (MR 392, 35A, Wheels and tyres).
- Carry out the necessary programming (see Fault finding - Replacement of components) (MR 394, 21B, Sequential gearbox).
WARNING
After the accumulator has been fully filled (15 seconds after the ignition has been switched on): the oil is at the MIN mark.
READ NEXT:
 Actuator module: Removal - Refitting
K9K, and JA5
(1) Clutch solenoid valve
(2) Gear engagement solenoid
valve
(18) Gear engagement solenoid
valve
(4) Selection solenoid valve
(5) Engagement sensor
(20) Gear selection sensor
(7) Solen
Gear selection sensor: Removal - Refitting
K9K, and JA5
REMOVAL
I - REMOVAL PREPARATION OPERATION
WARNING
To remove the gear selection sensor it is essential
that you shift to first gear before removal.
Remove:
the battery (see Battery: R
Clutch position sensor: Removal - Refitting
K9K, and JA5
REMOVAL
I - REMOVAL PREPARATION OPERATION
Position the vehicle on a two-post lift (see Vehicle:
Towing and lifting) (MR 392, 02A, Lifting equipment).
Disconnect the battery (see Batte
SEE MORE:
Driving
The Renault Clio IV (2014-2019) offers a satisfying driving experience with its nimble handling and responsive performance. Its compact size and maneuverability make it well-suited for urban driving and tight parking spaces. The precise steering and suspension tuning provide a balanced and confident
Your comfort
The Renault Clio IV (2014-2019) is designed with your comfort in mind. It features a well-crafted interior with quality materials and thoughtful ergonomics. The seats offer excellent support and adjustability, providing a comfortable driving experience. The cabin is designed to minimize noise and vi
© 2016-2026 Copyright Renault Clio Owners Club - 0.0044
